
What we will do in this tutorial:
a) Download the EmailAcheck application & Register an account.
b) Add a bank account (bank logs with $$$ from where the check will be issued).
c) For a check, add the name and address of the recipient/customer.
d) We will send the check by email.
a) Download the EmailAcheck application & Register an account.
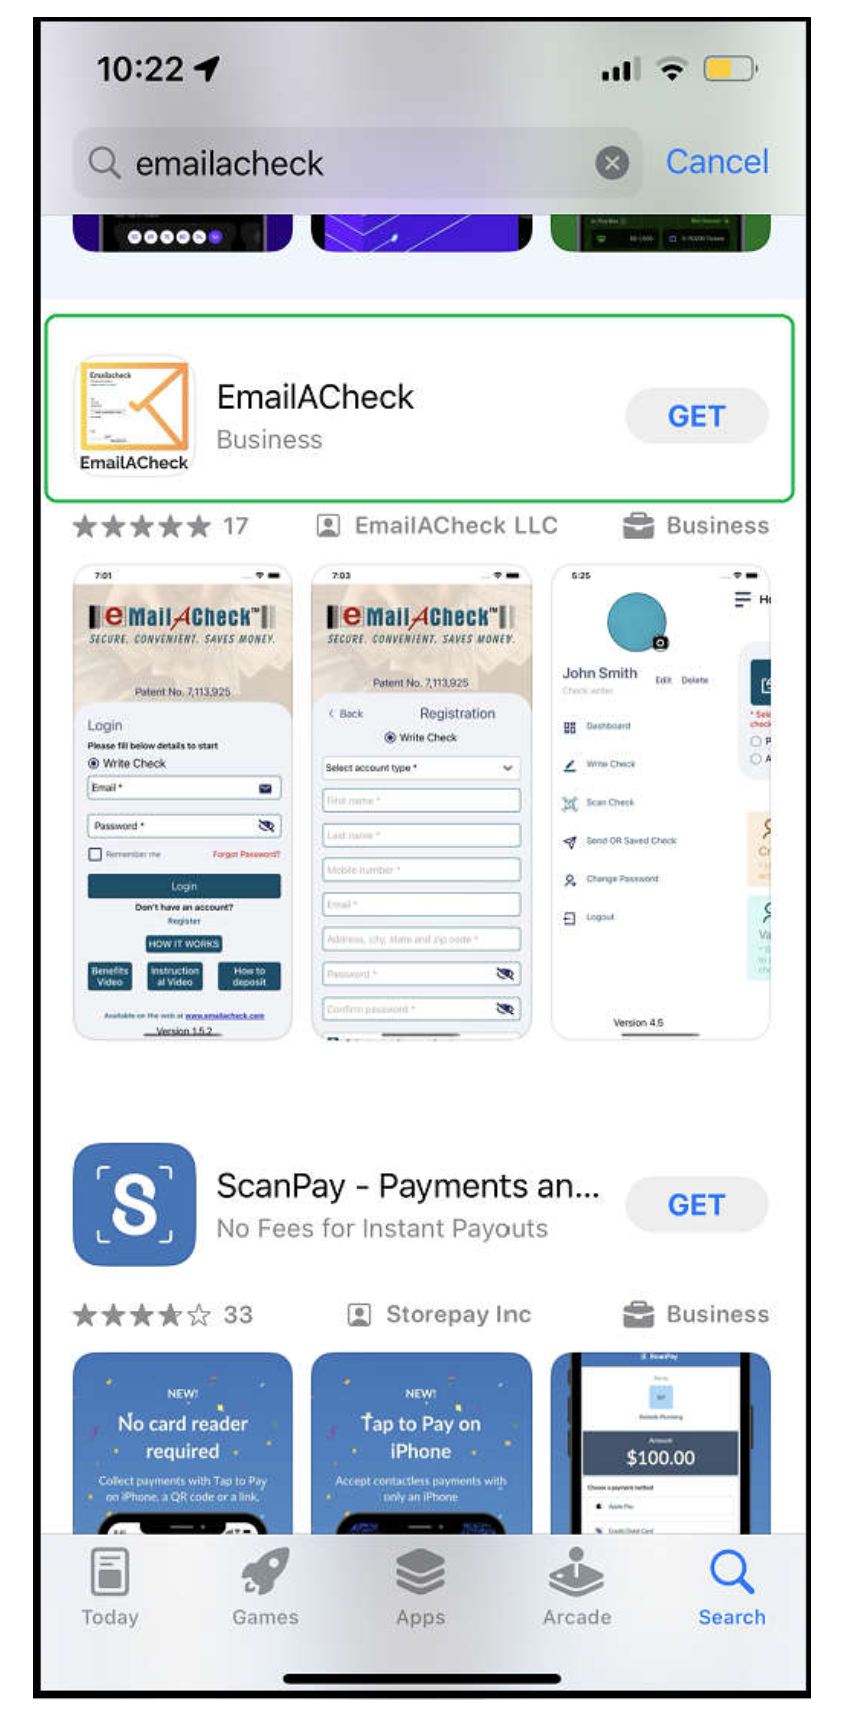
Go to the AppStore and download this application
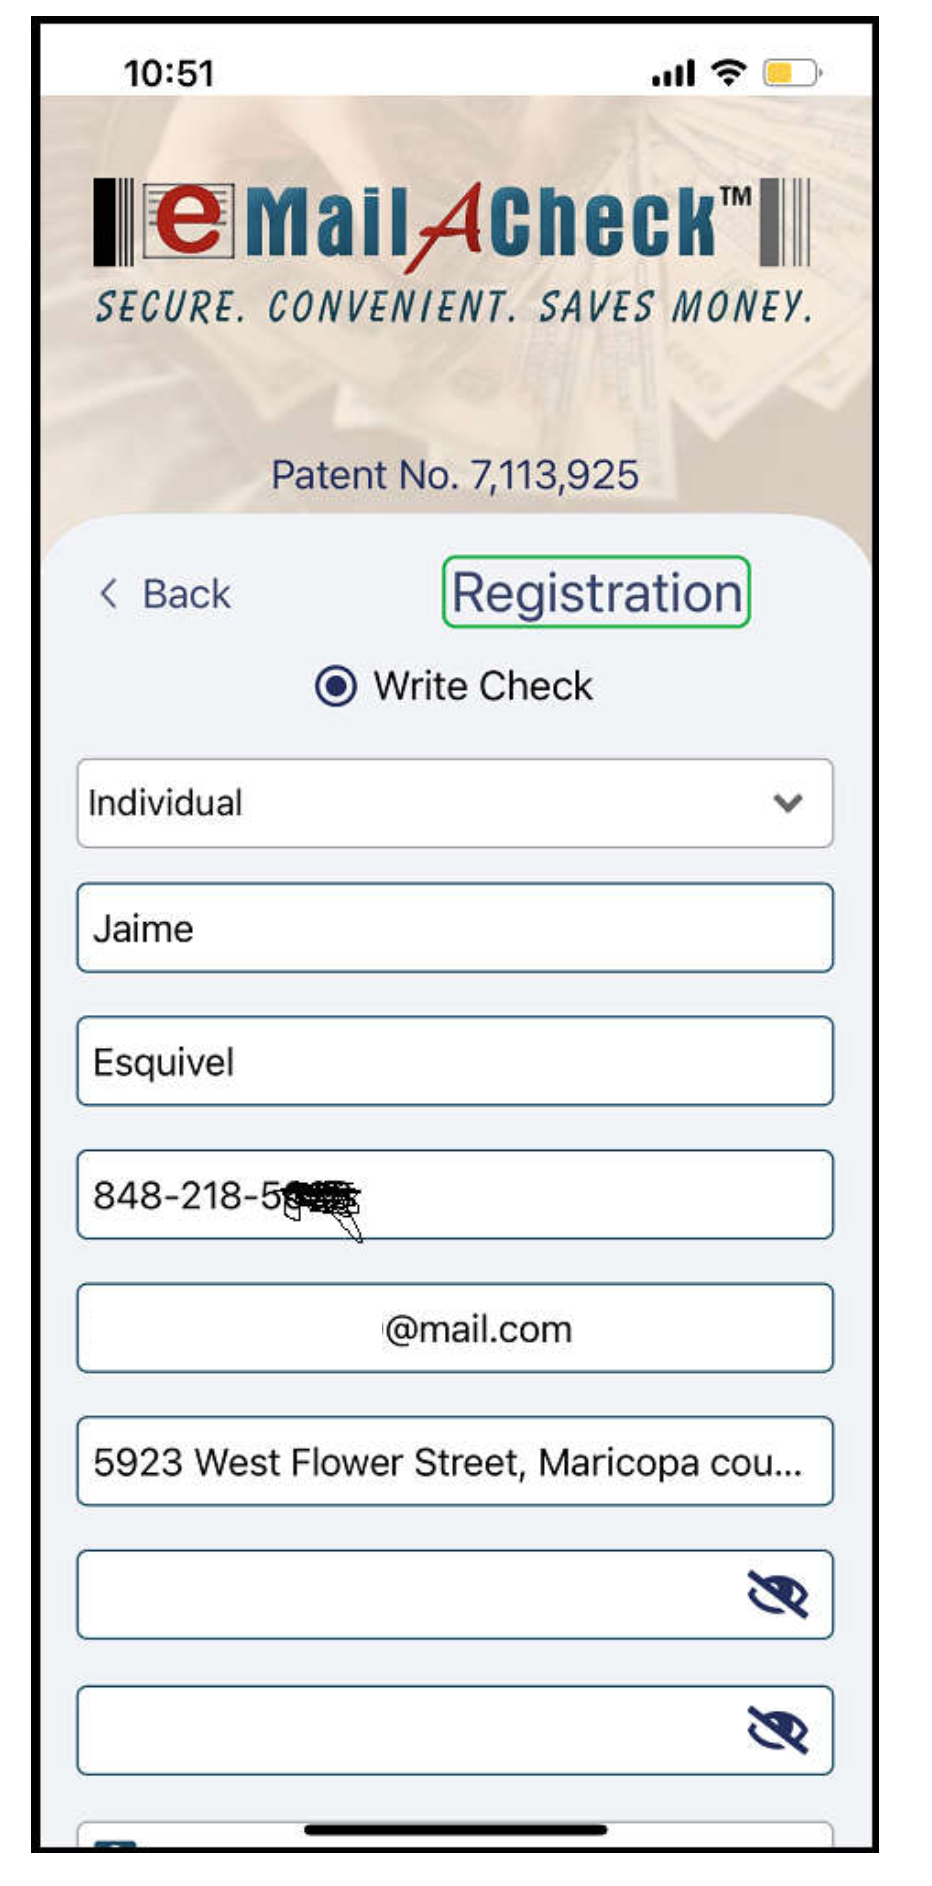
2. We start with the registration process, you can enter any random information, but the email must be valid because a code will be sent there.
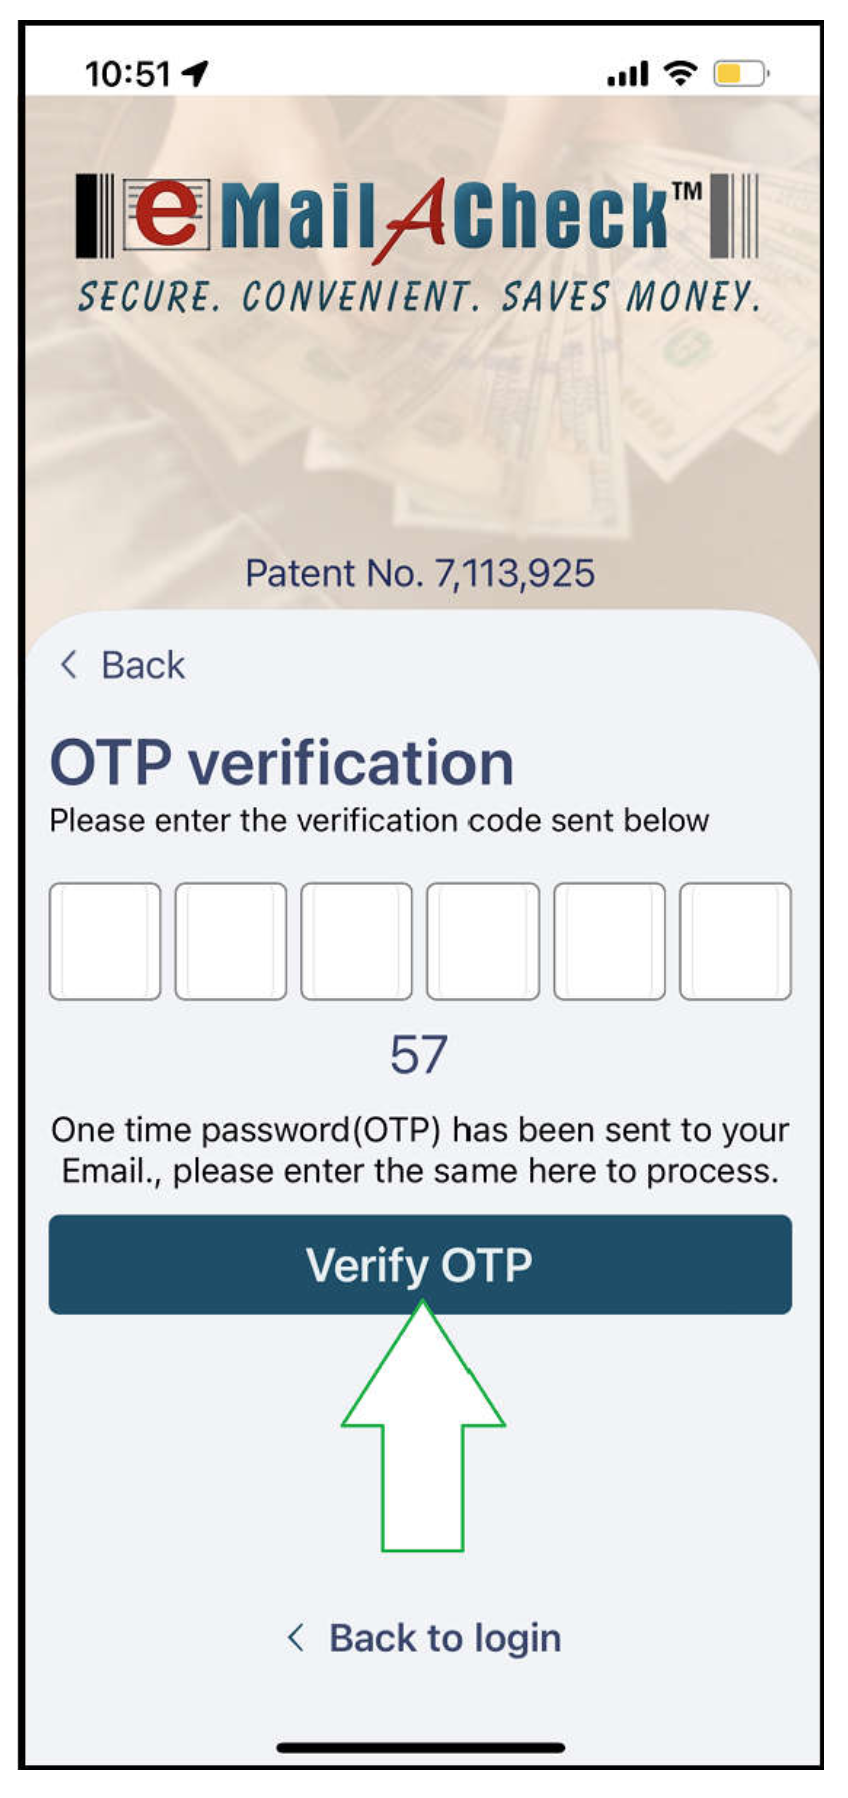
3. Enter the OTP code received by email you specified earlier.
b) Add a bank account (bank logs with $$$ from where the check will be issued).
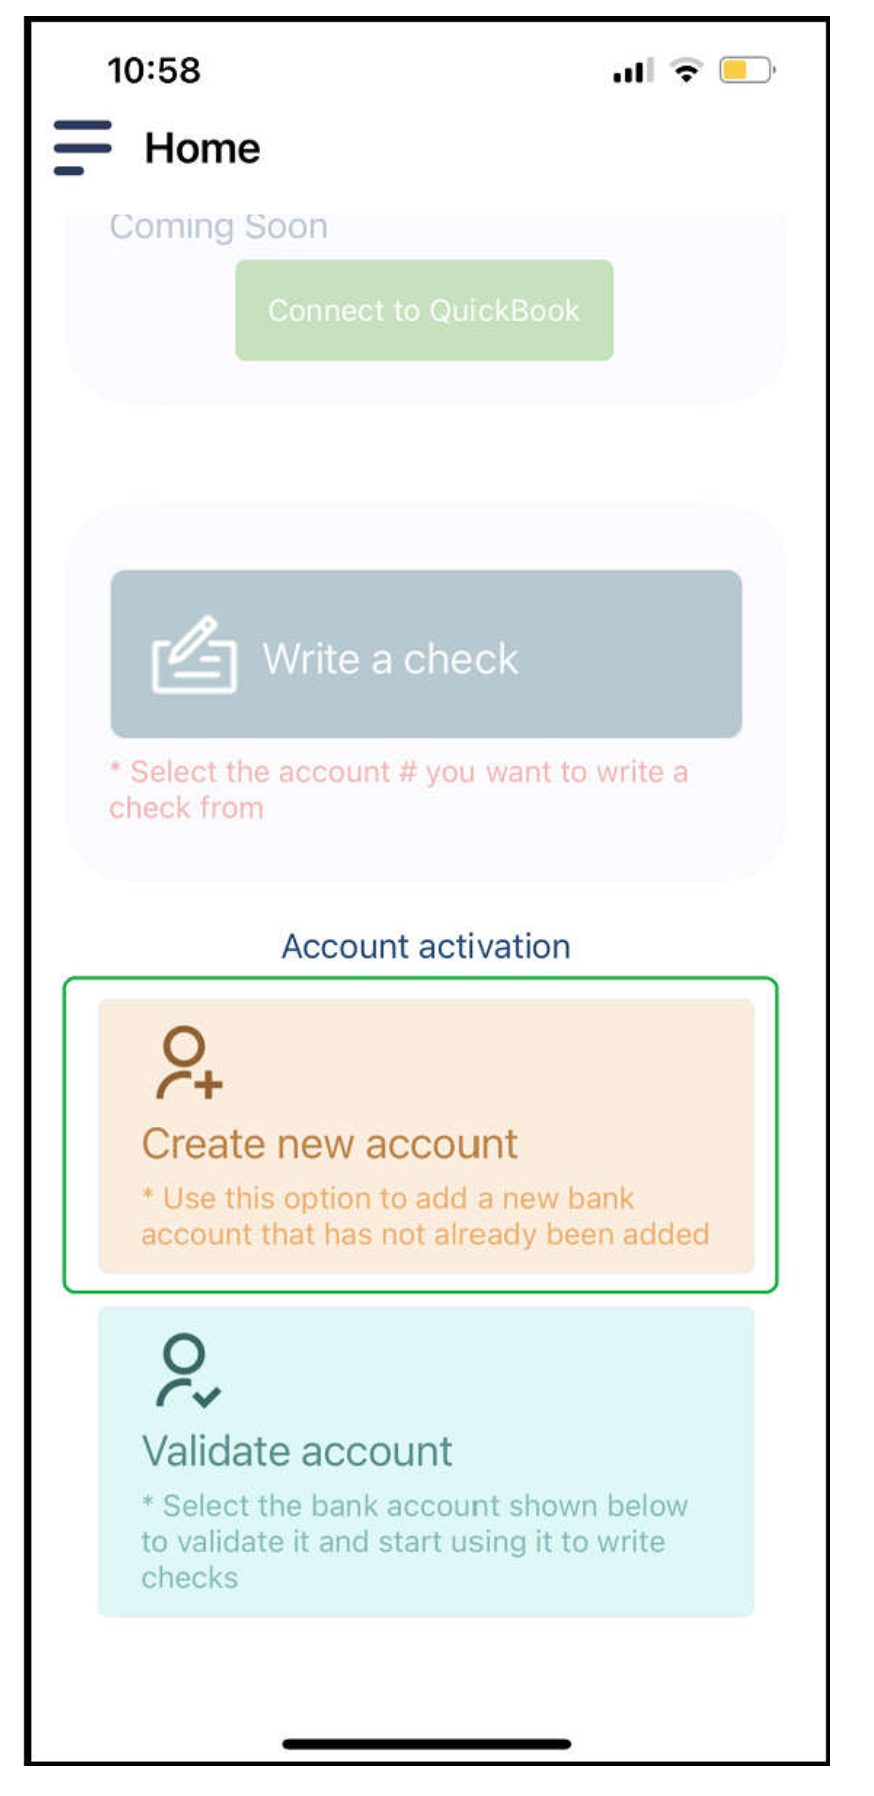
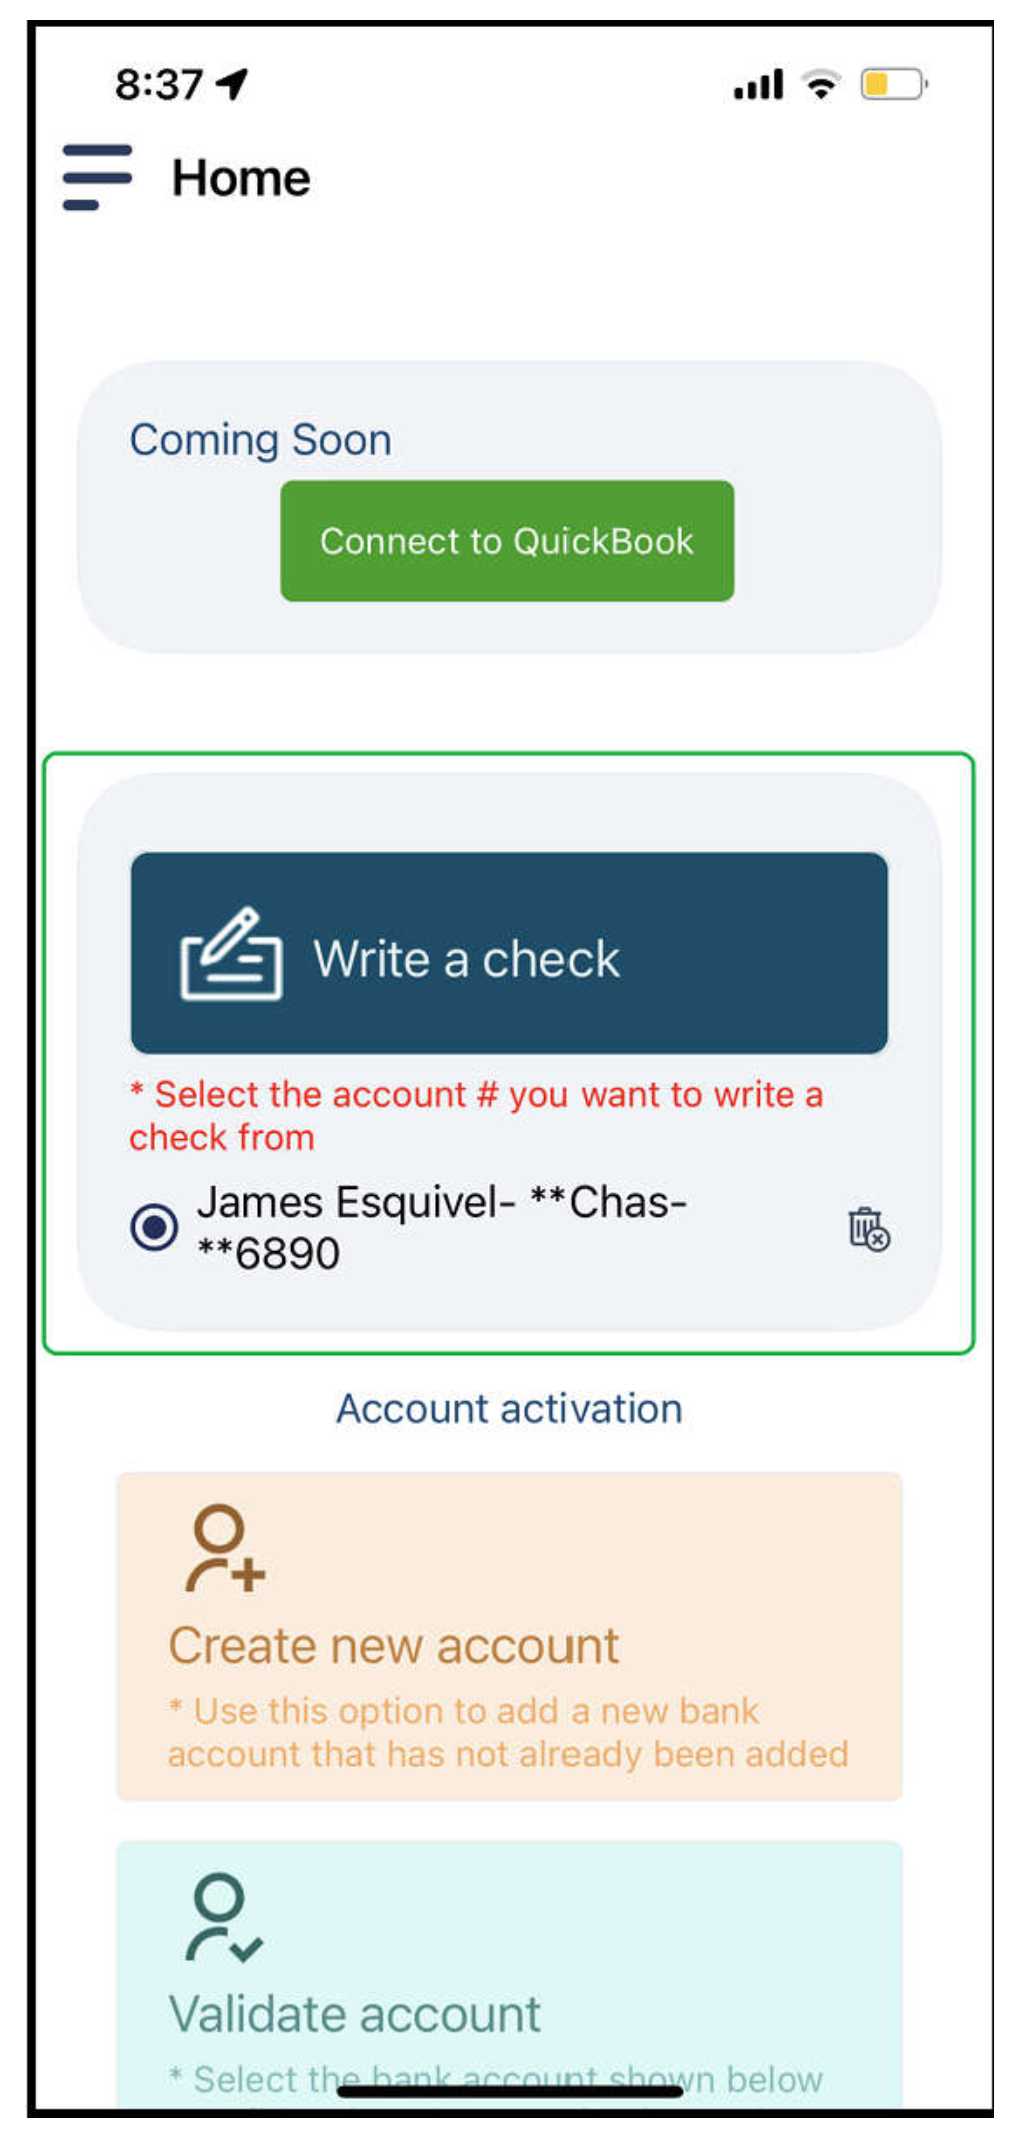
4. Click on Create new account
5. Insert information from your bank log; if you don't know the Routing number, google it.
6. The bank account has been added successfully.
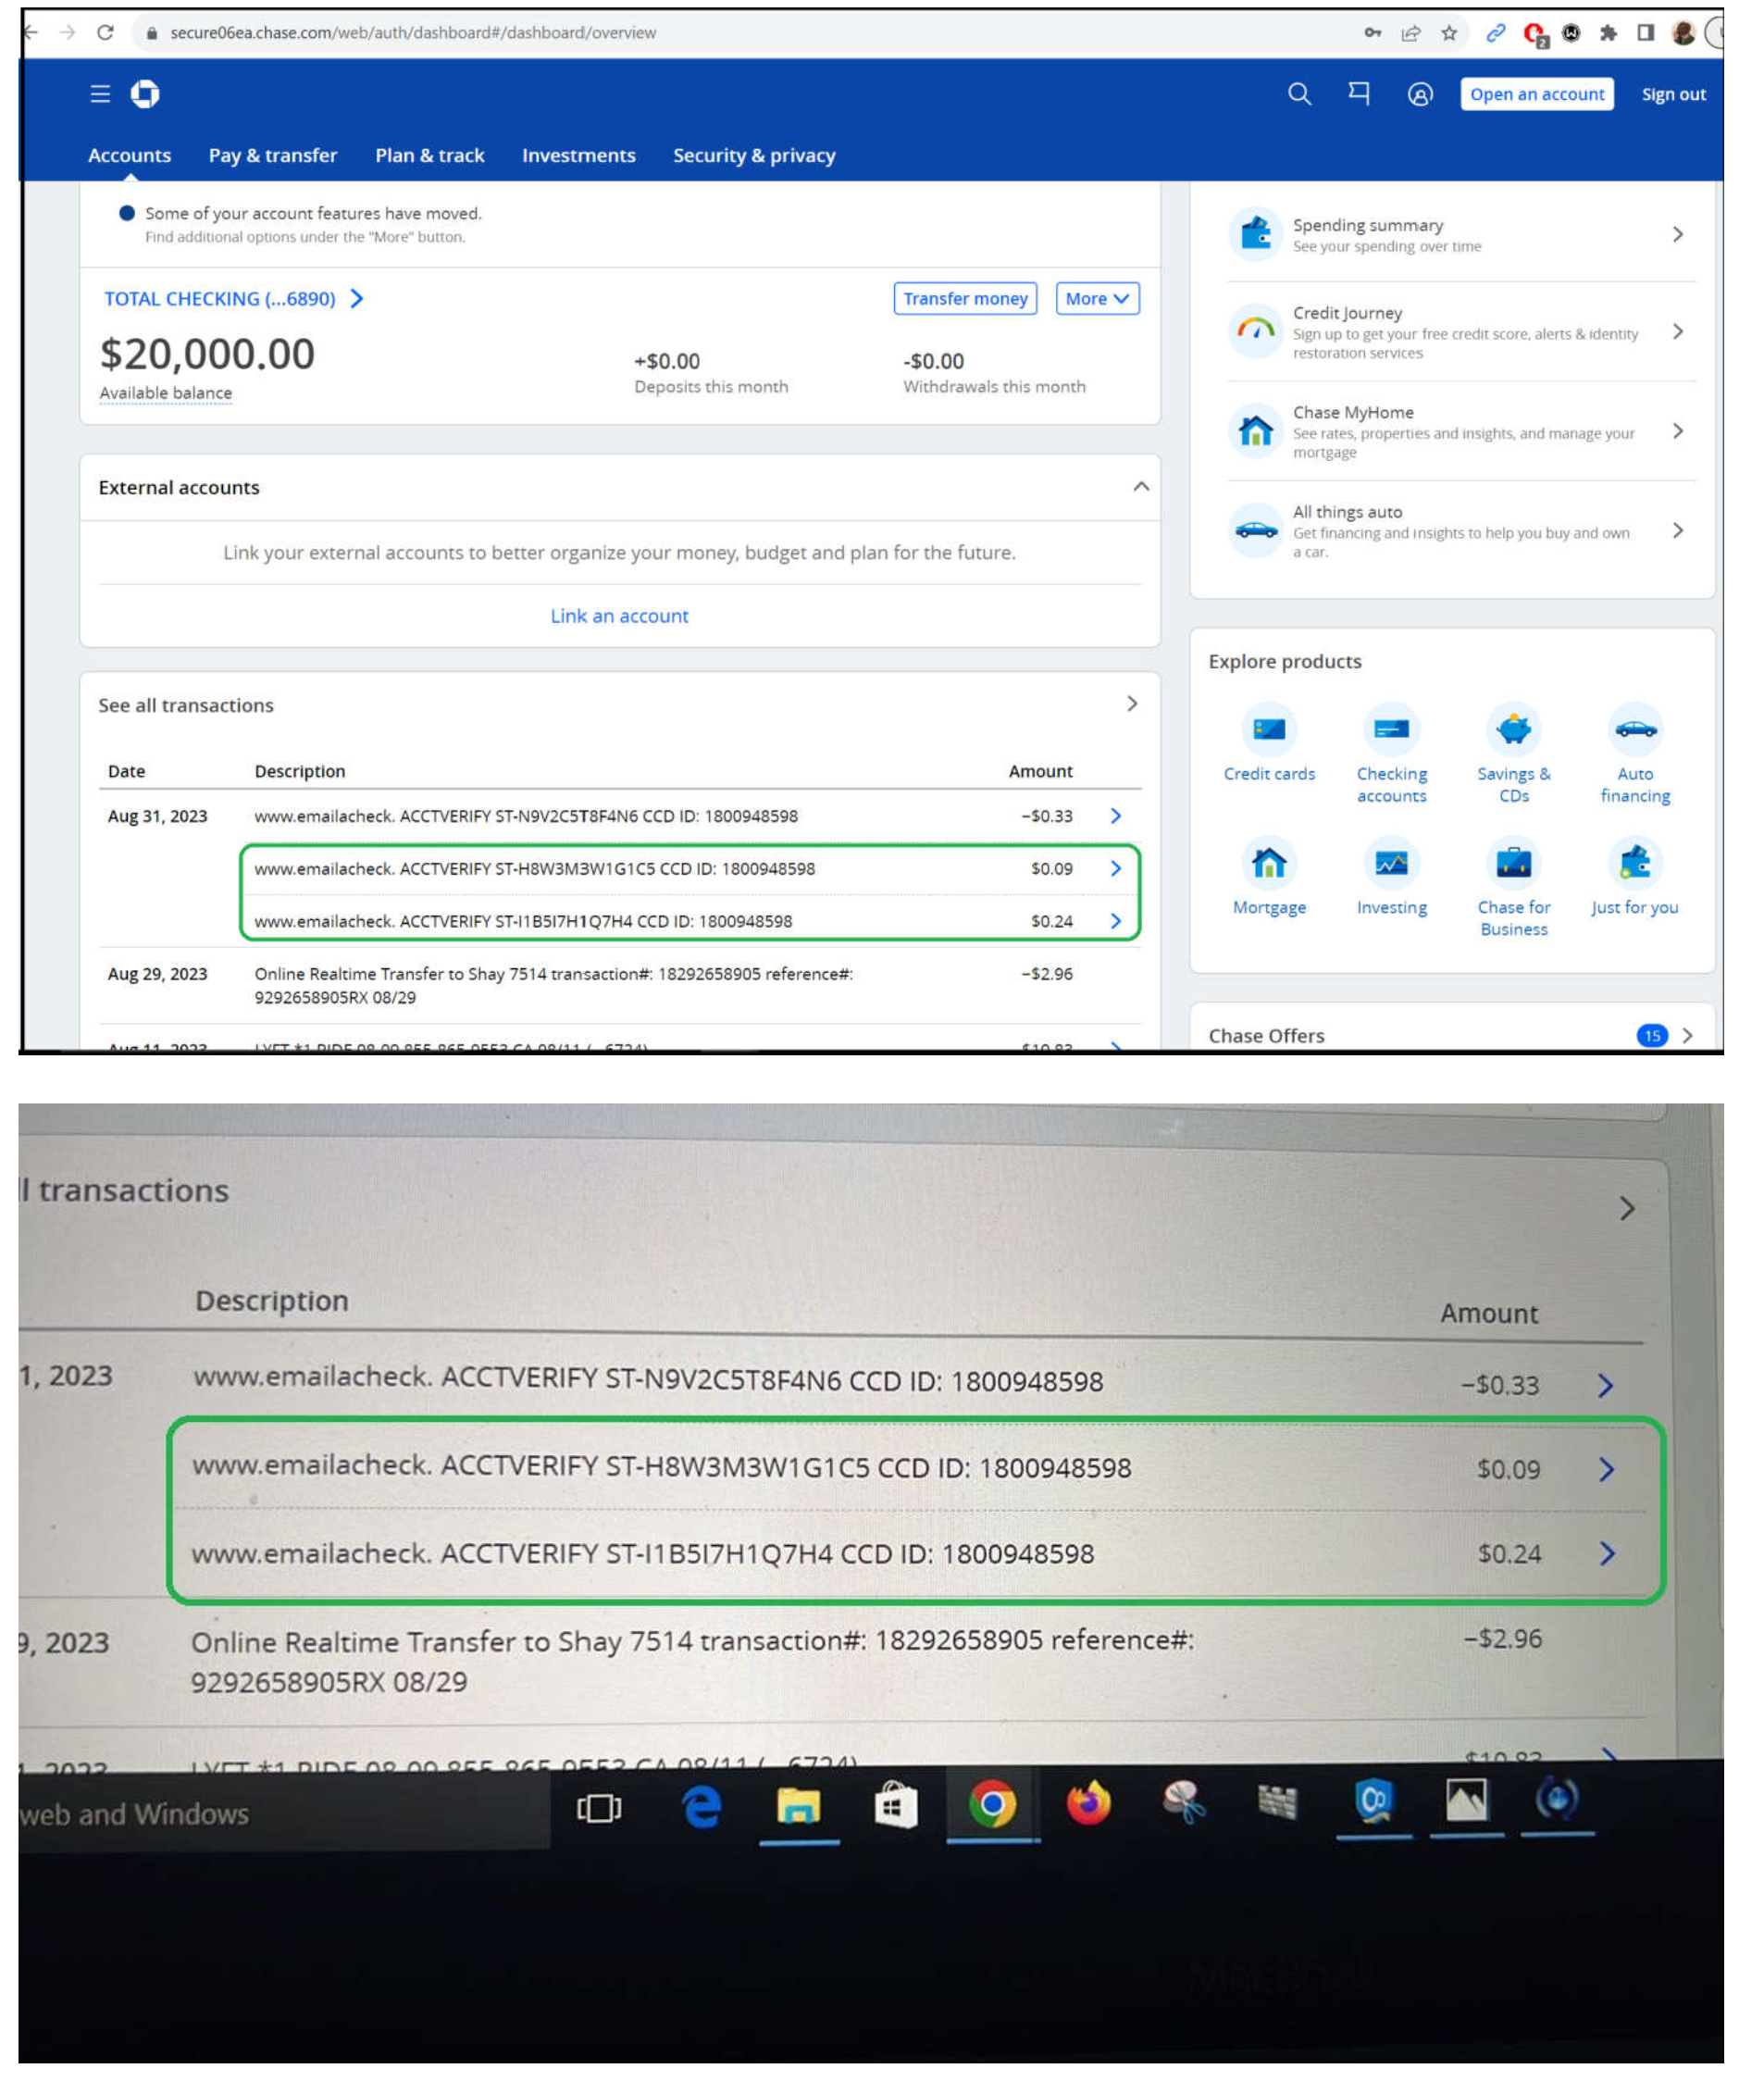
7. Two micro deposits were sent to fully verify the account.
8. After 2 days, go to the mobile application and click Validate account
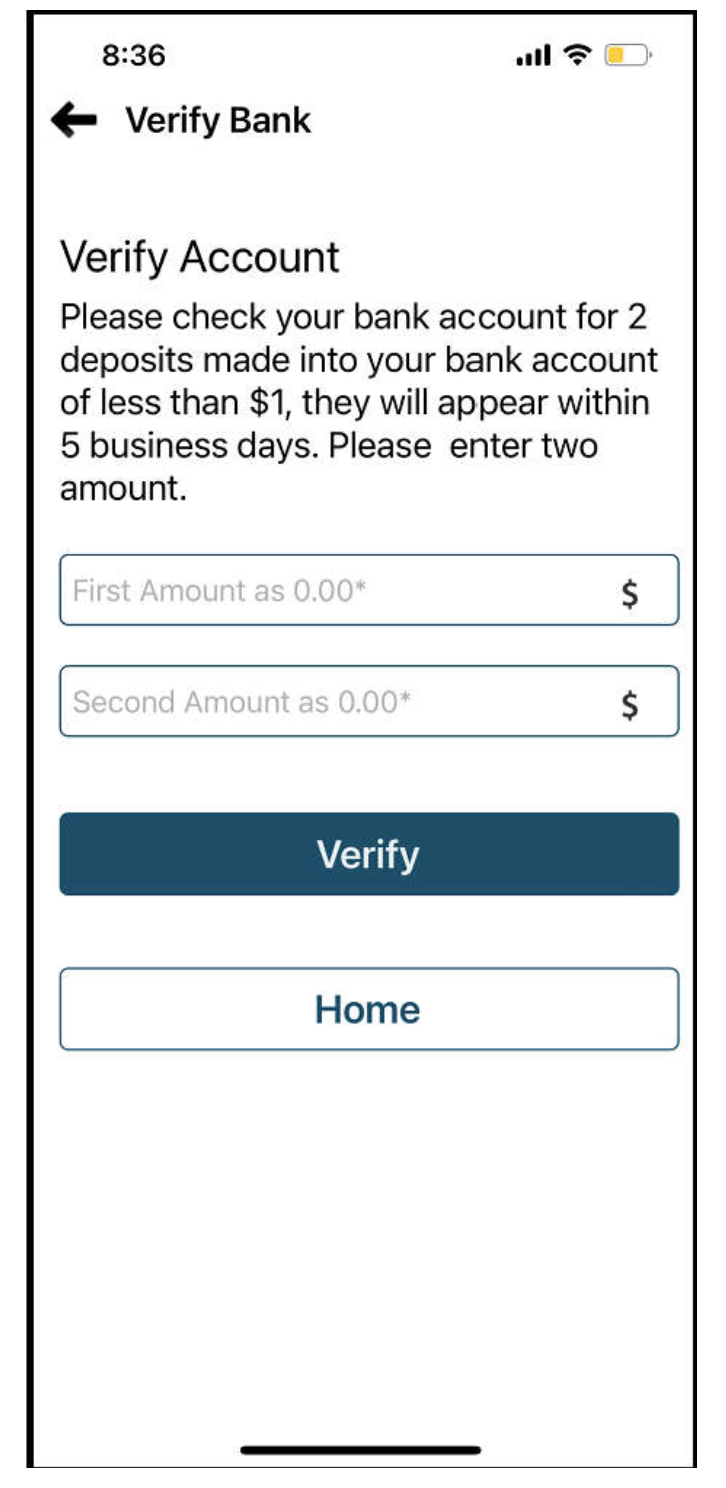
9. You will see two fields for entering mini-deposits
10. Two mini depots will be reflected as below
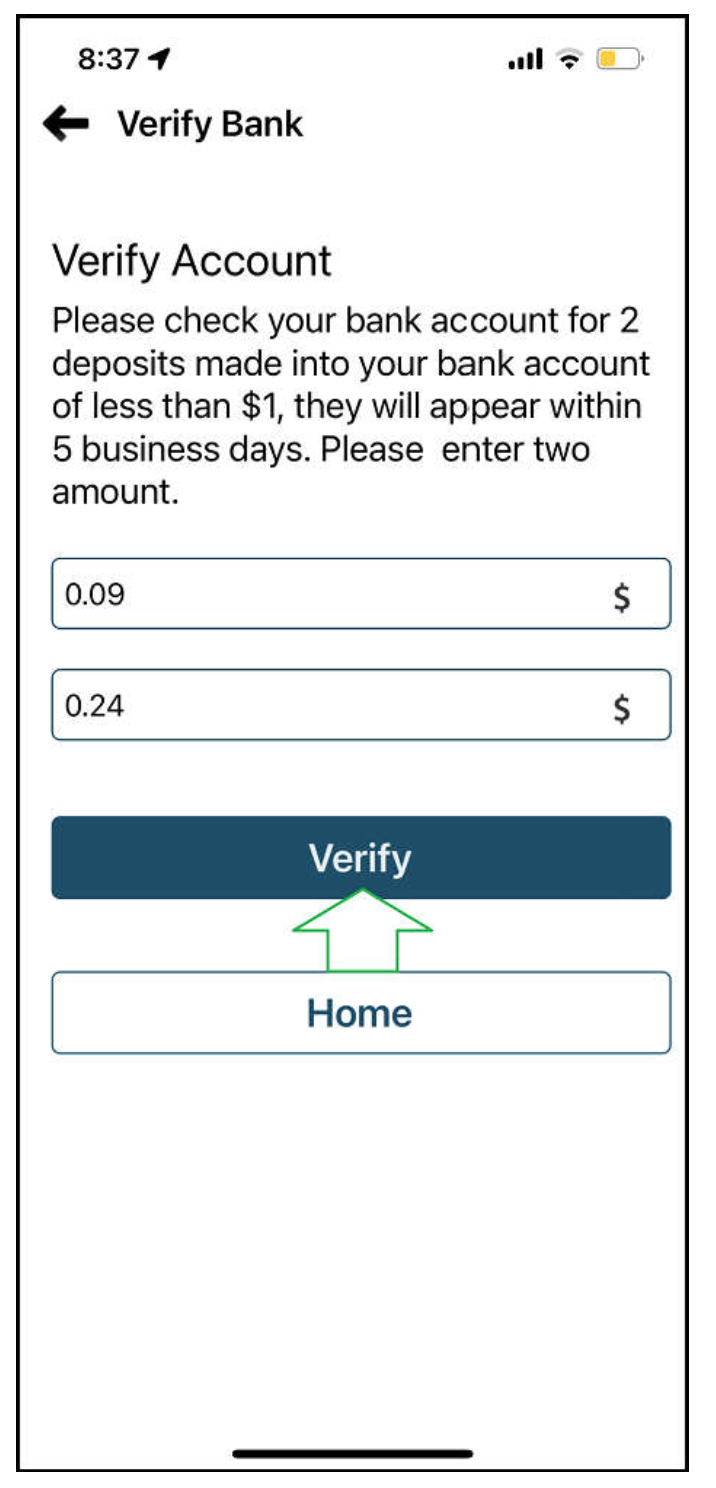
11. Enter them and click Verify
c) For a check, add the name and address of the recipient/customer.
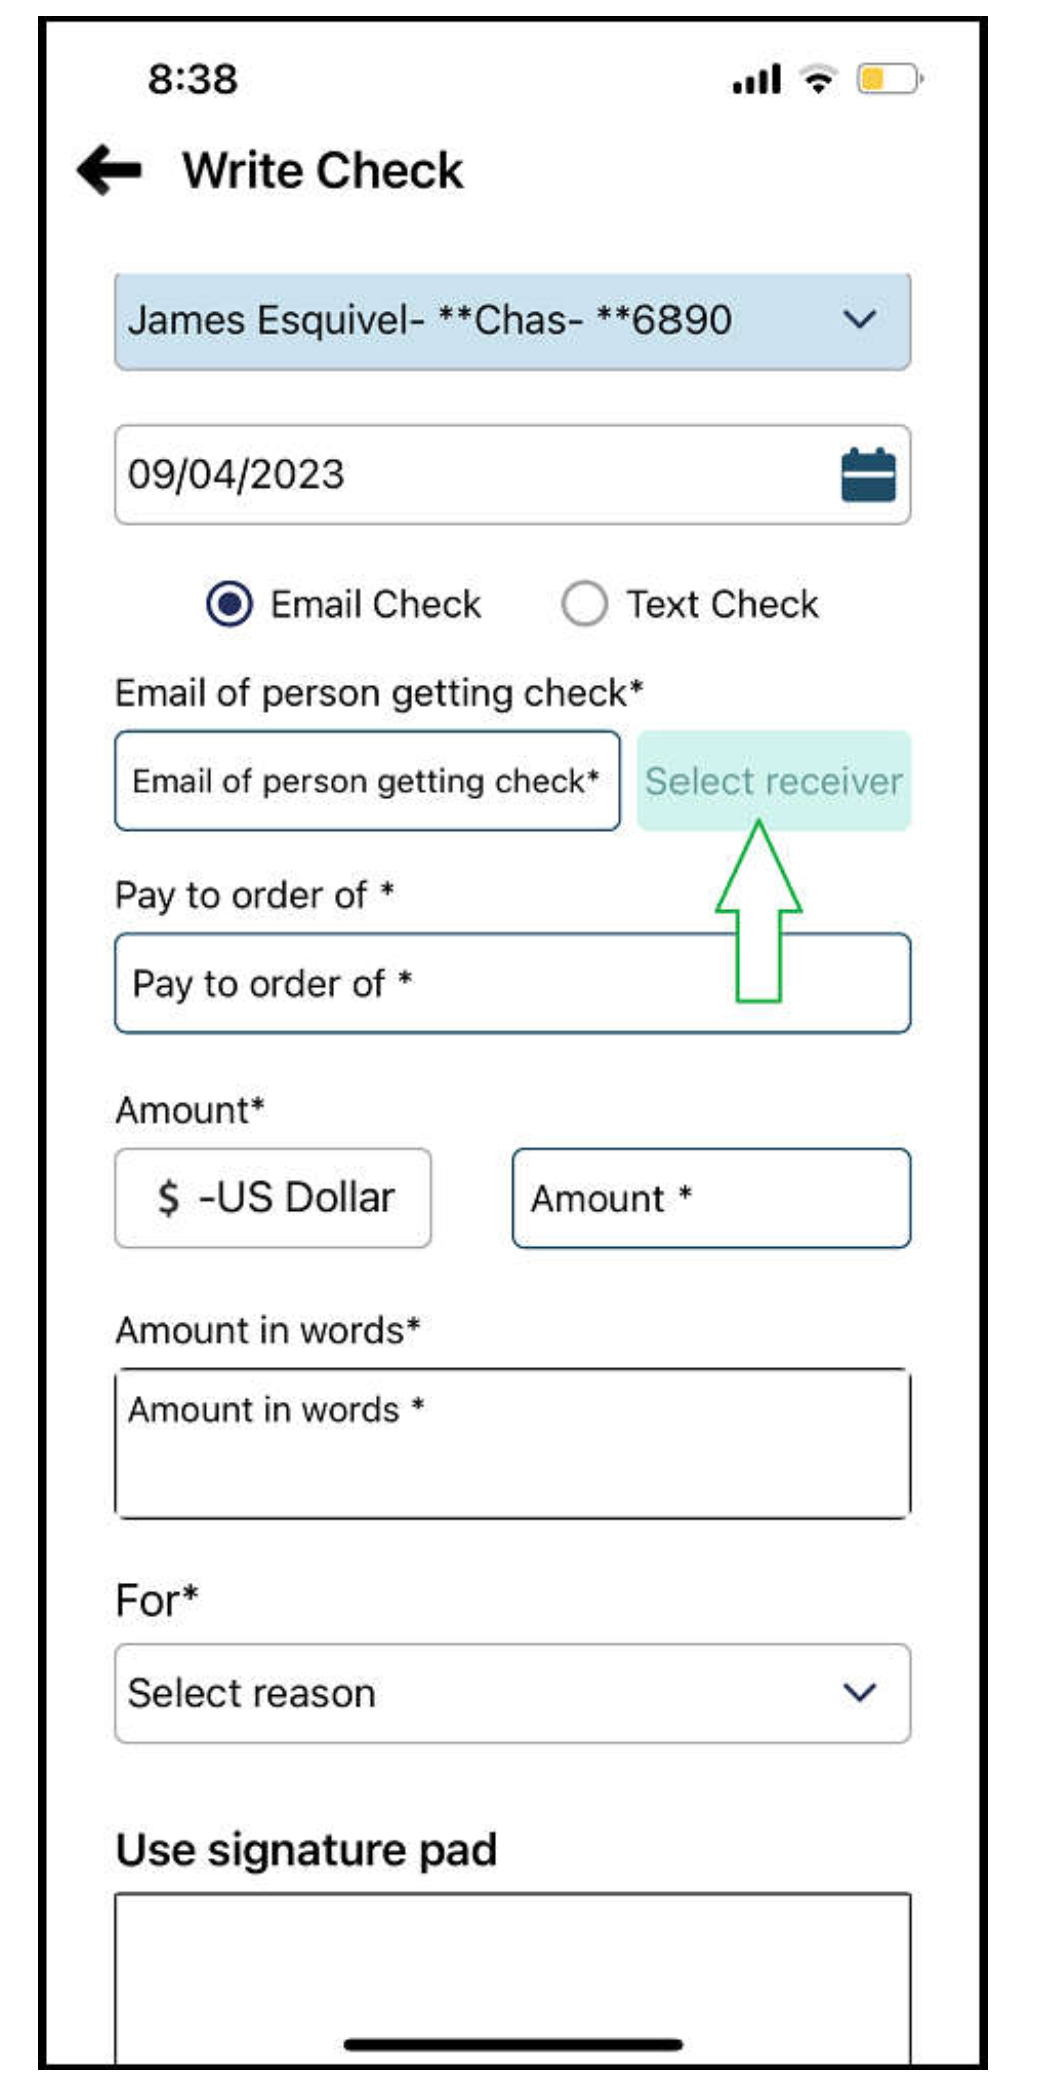
12. Click on Write a check
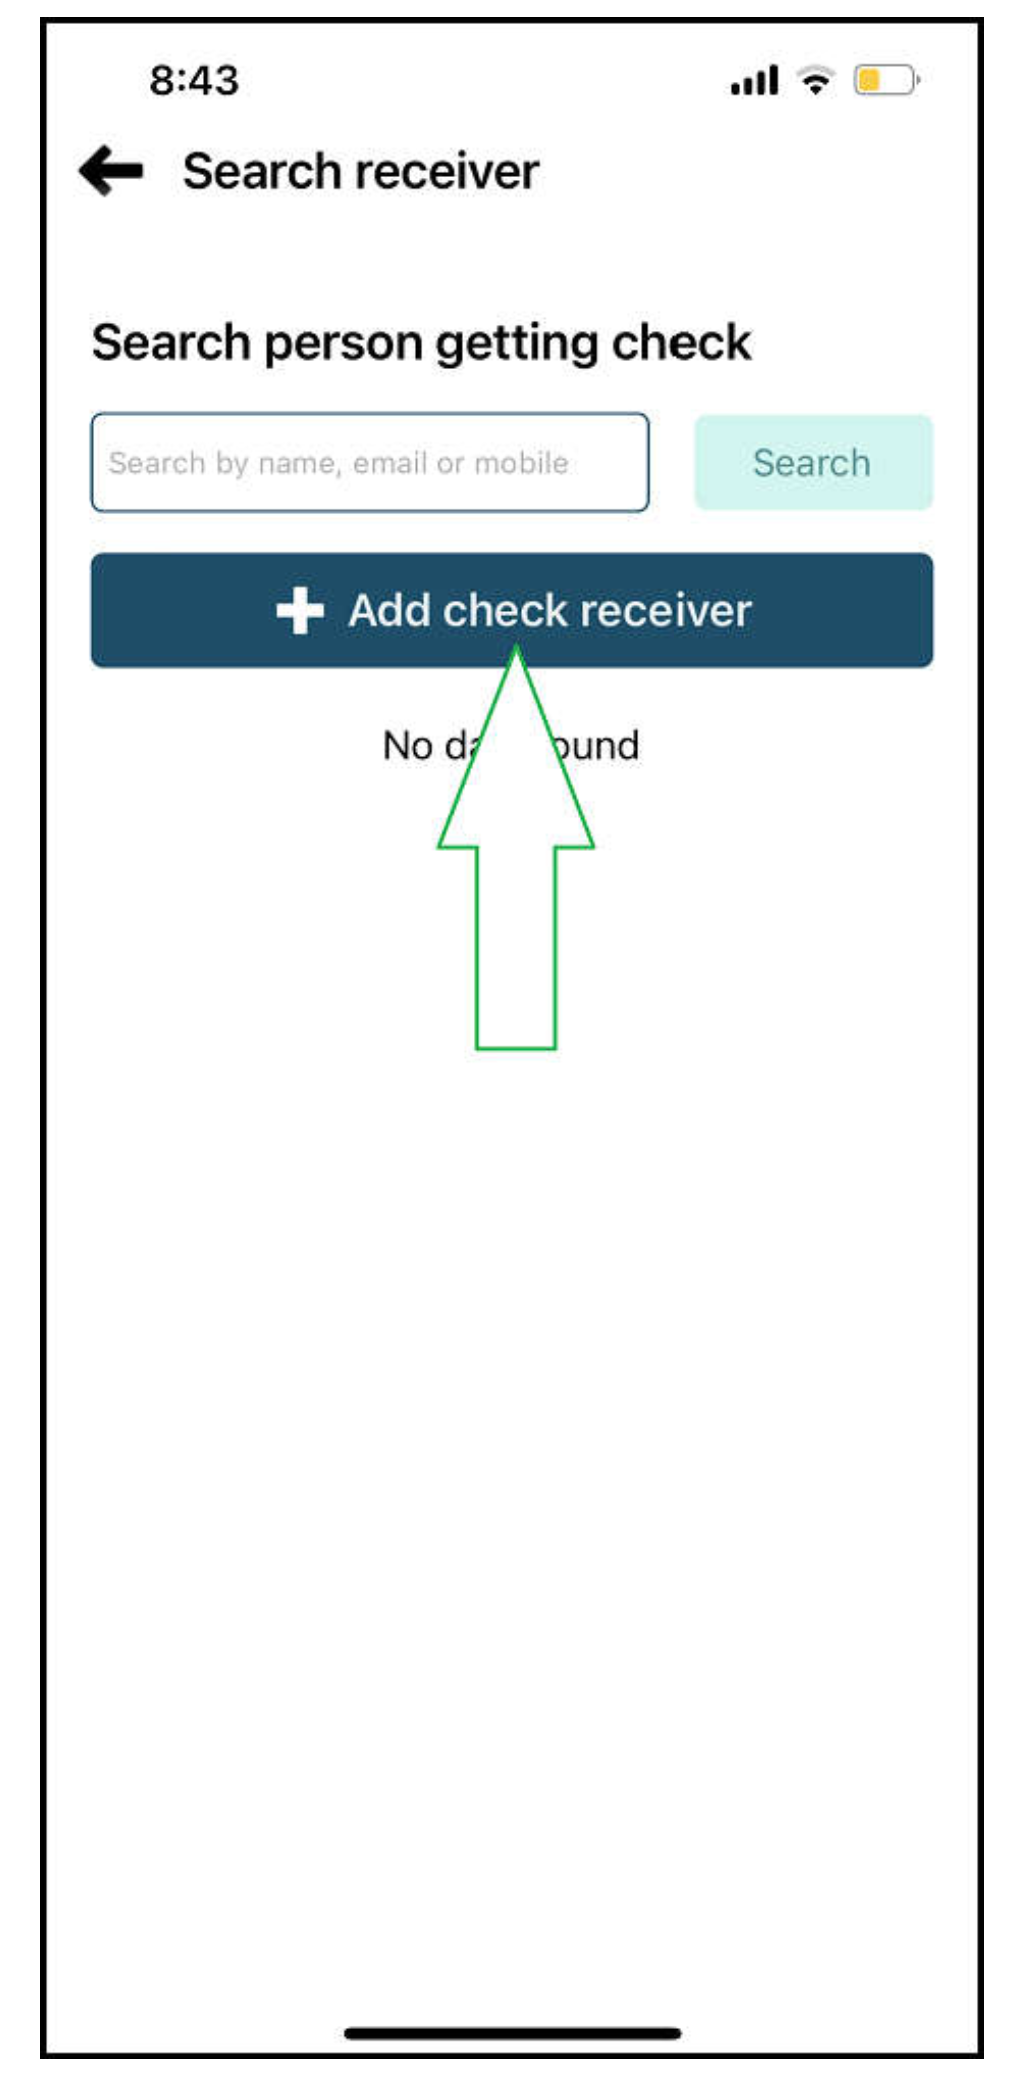
13. Click on Select receiver
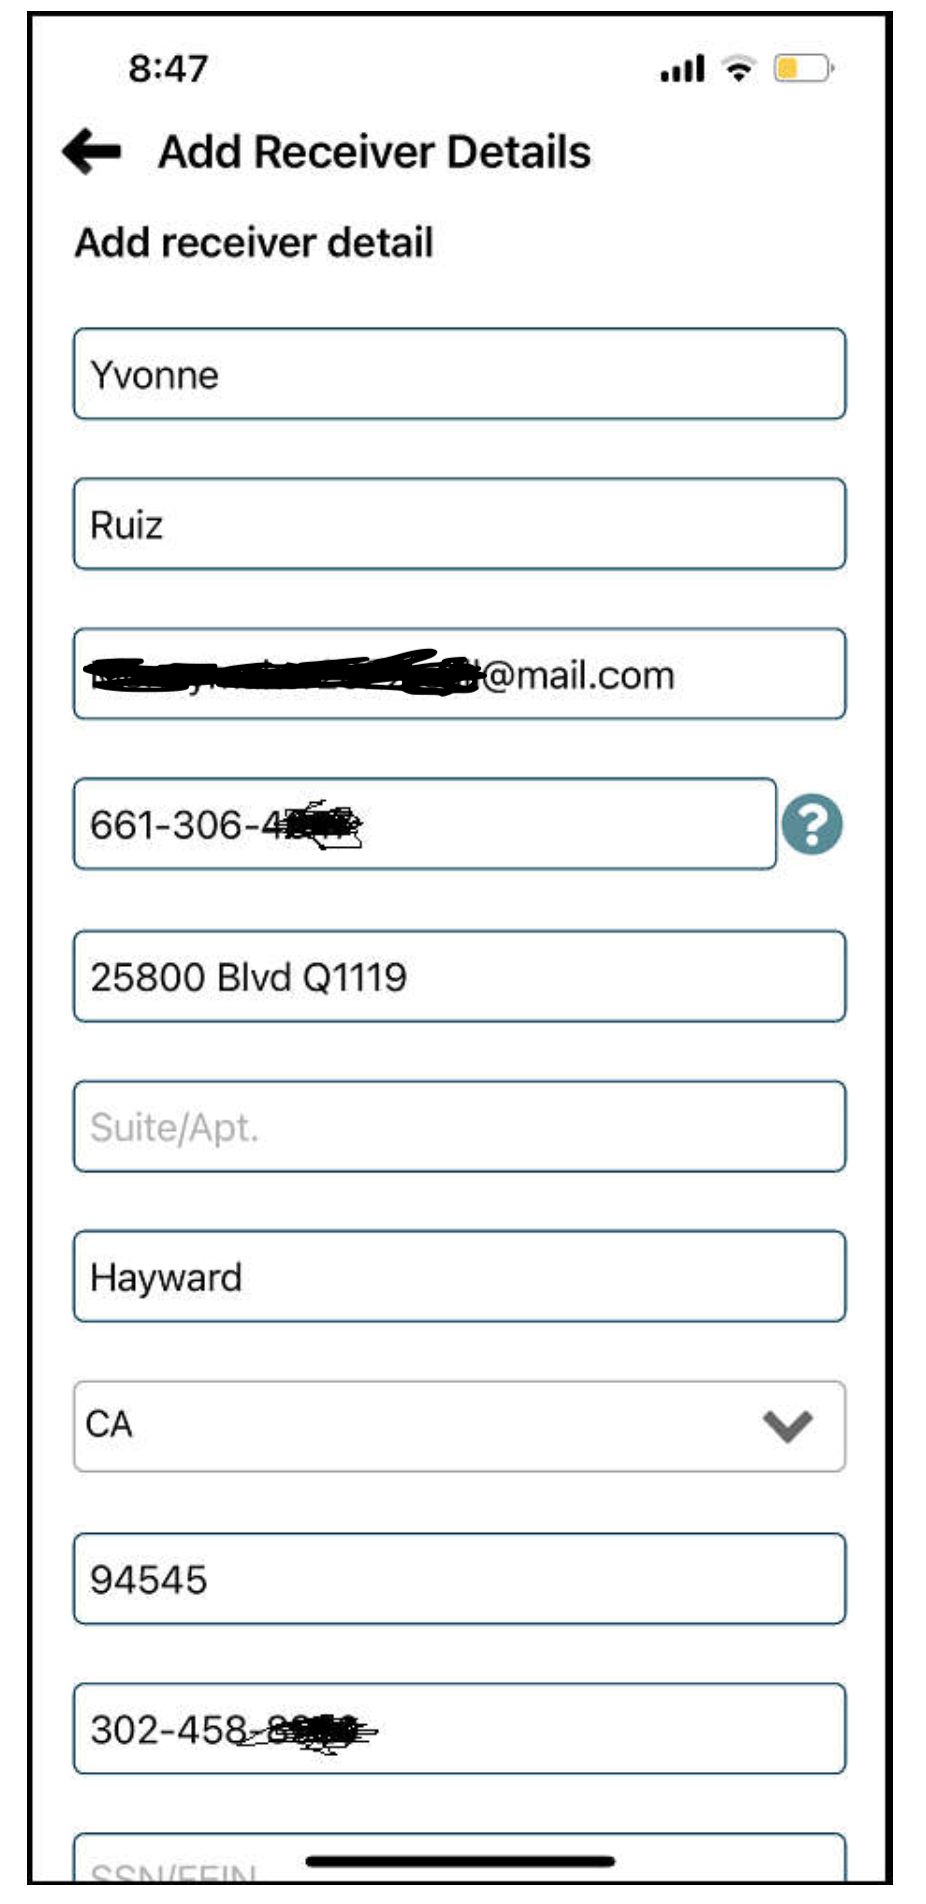
14. Click on Add check receiver
15. You will need name, address, phone number and email
16. The phone number will be the password required to open the verification email.
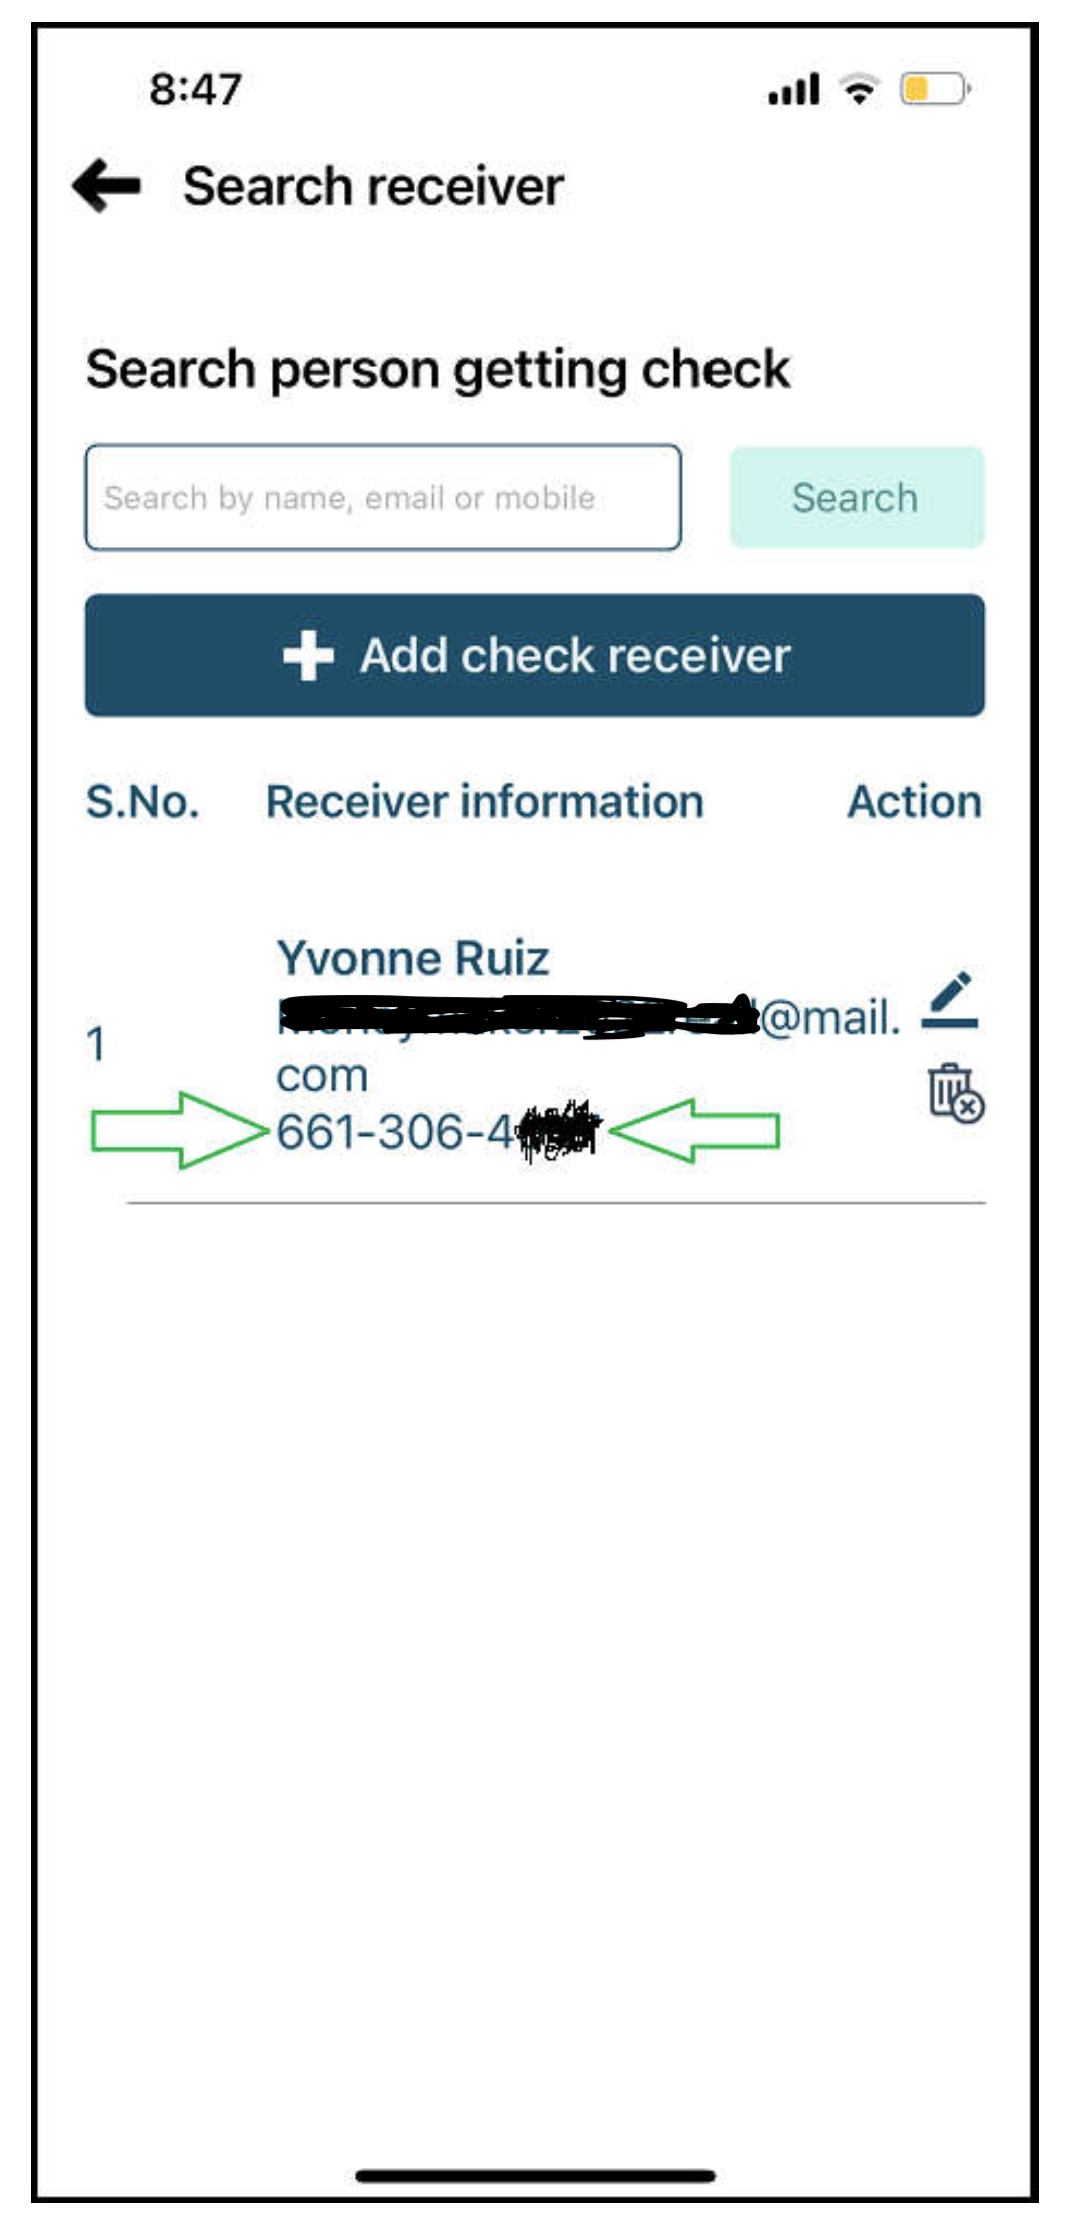
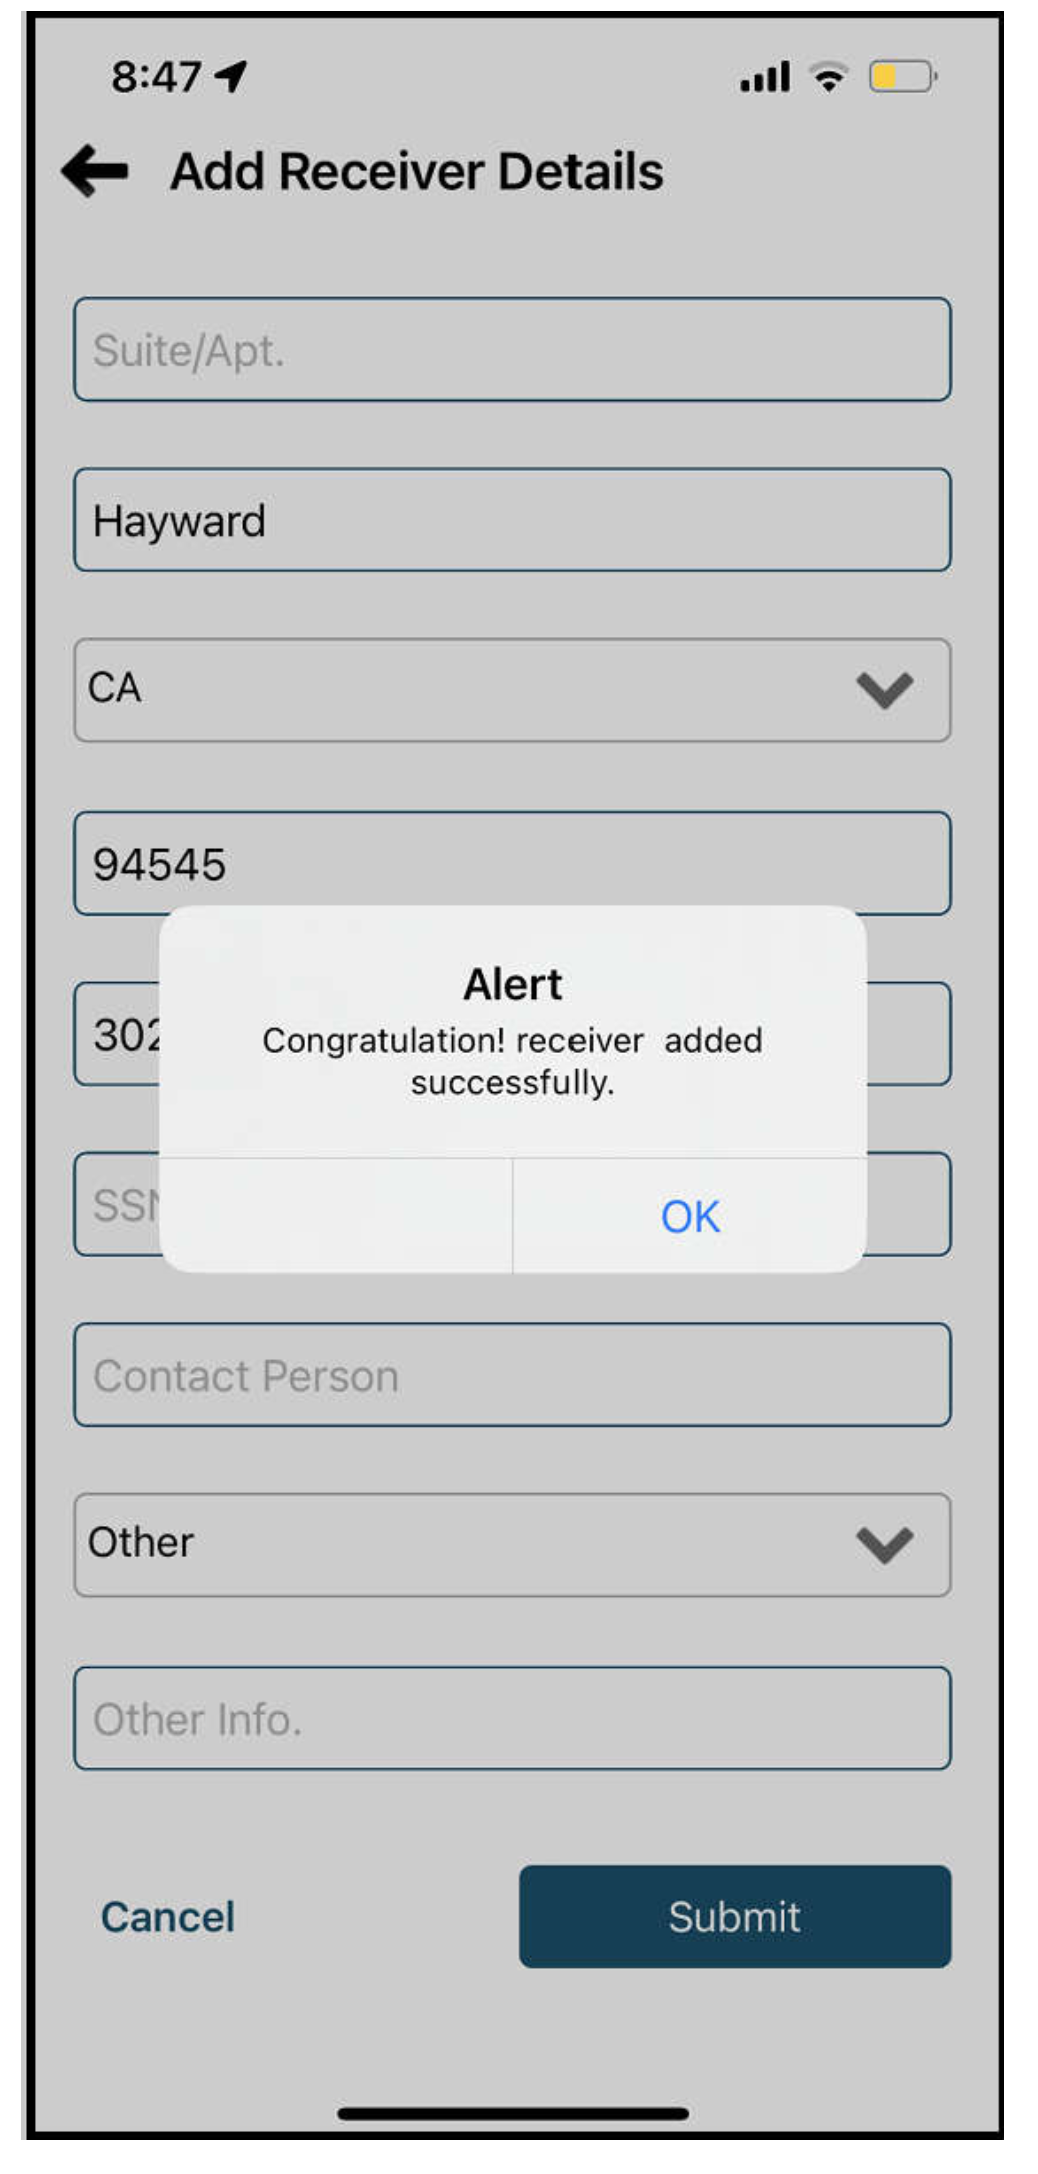
17. Recipient added successfully
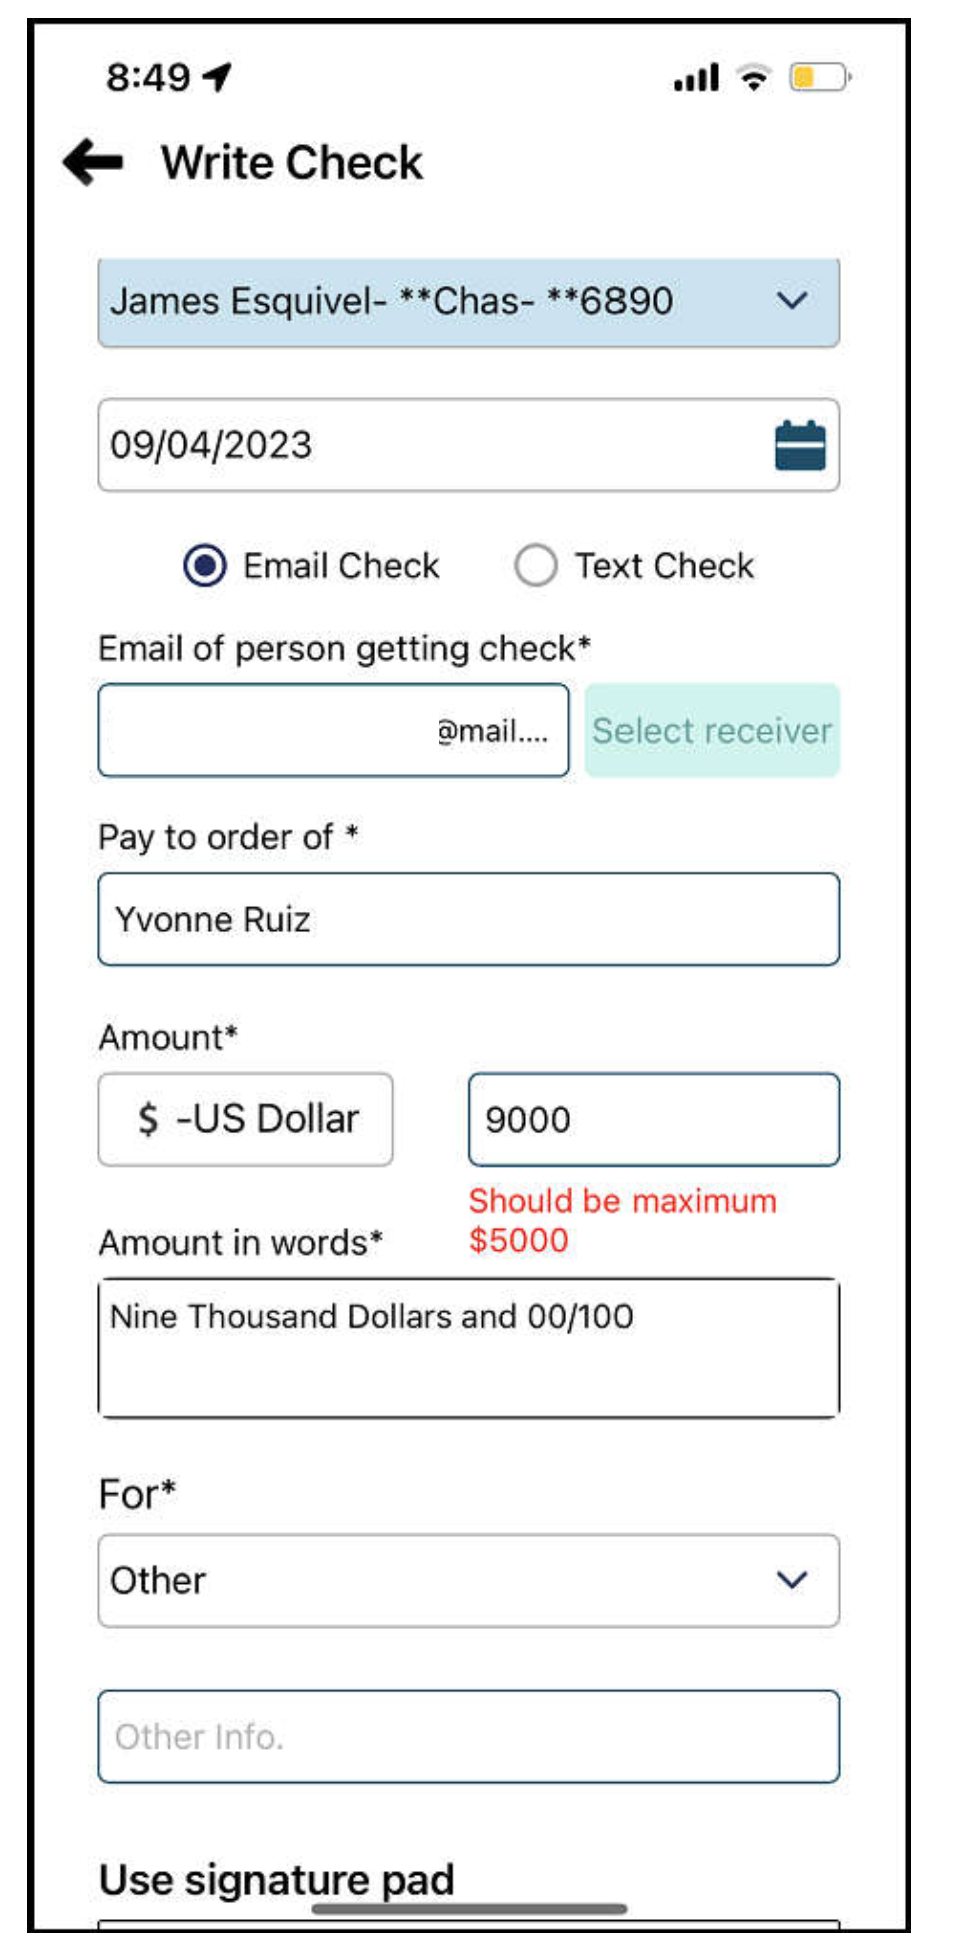
18. There is a $5k limit on each check.
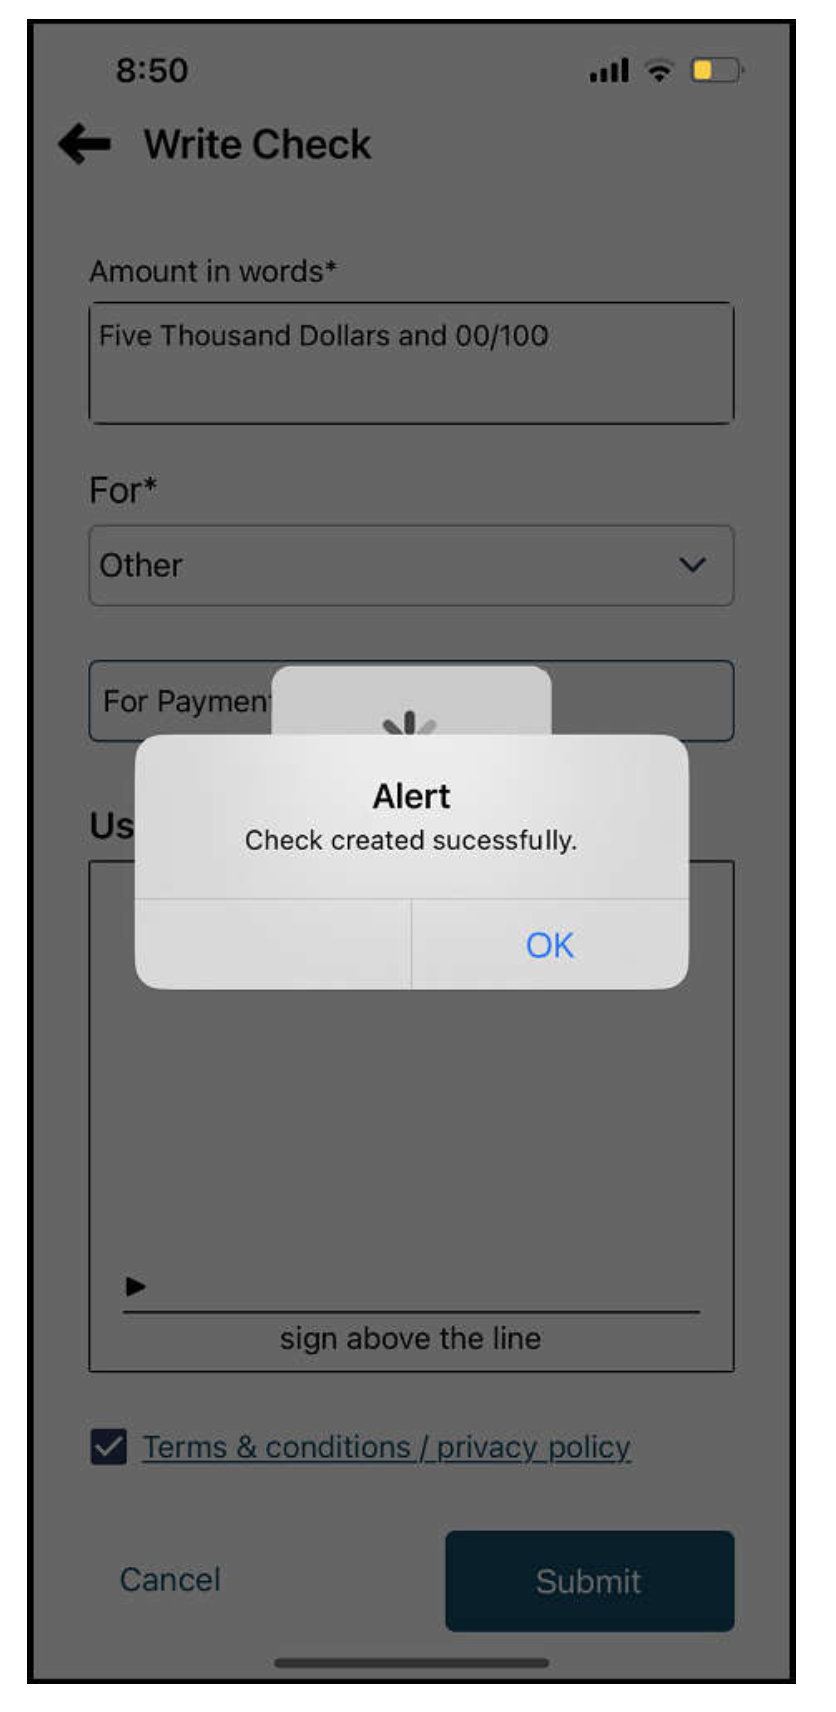
19. Receipt successfully created
d) We will send the check by email.
20. Click Send to send your check
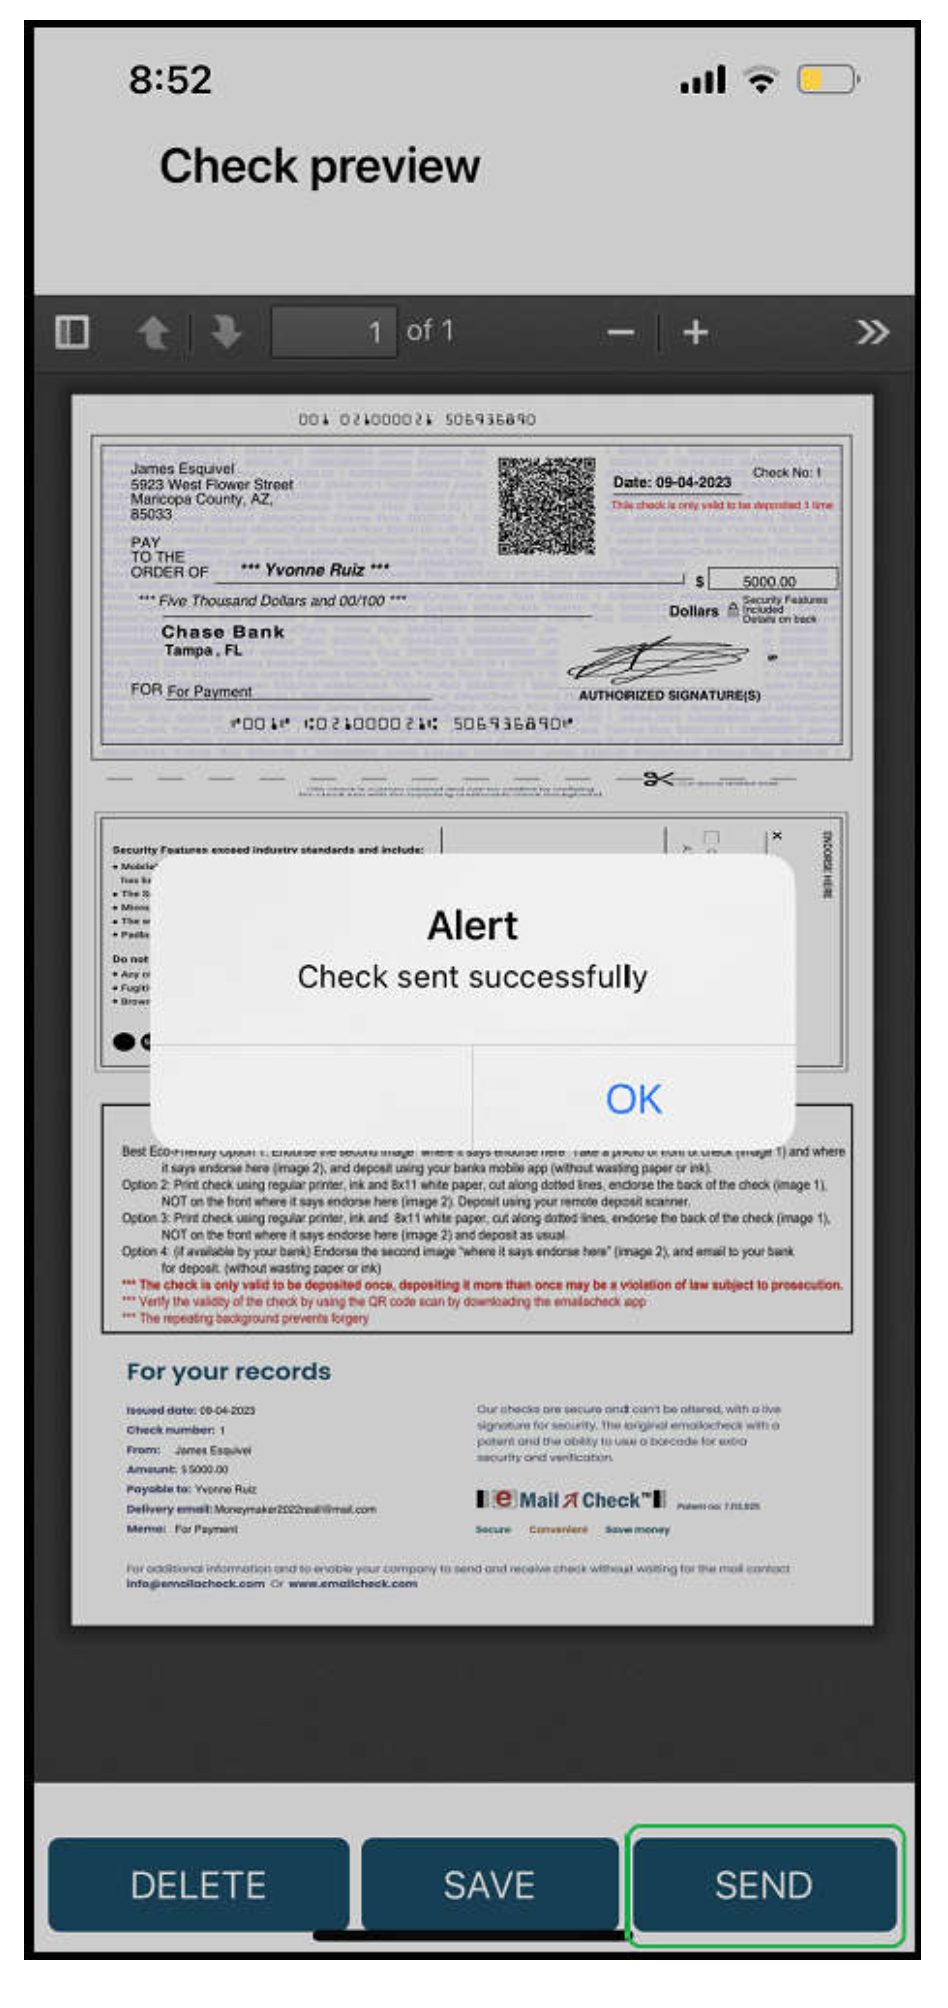
21. What does a check received by email look like?
22. This is an example of what a check might look like. The check will have all levels of security so that no bank will reject it.
In Endorse Here: write the recipient's full name
a) Download the EmailAcheck application & Register an account.
b) Add a bank account (bank logs with $$$ from where the check will be issued).
c) For a check, add the name and address of the recipient/customer.
d) We will send the check by email.
a) Download the EmailAcheck application & Register an account.
Go to the AppStore and download this application
2. We start with the registration process, you can enter any random information, but the email must be valid because a code will be sent there.
3. Enter the OTP code received by email you specified earlier.
b) Add a bank account (bank logs with $$$ from where the check will be issued).
4. Click on Create new account
5. Insert information from your bank log; if you don't know the Routing number, google it.
6. The bank account has been added successfully.
7. Two micro deposits were sent to fully verify the account.
8. After 2 days, go to the mobile application and click Validate account
9. You will see two fields for entering mini-deposits
10. Two mini depots will be reflected as below
11. Enter them and click Verify
c) For a check, add the name and address of the recipient/customer.
12. Click on Write a check
13. Click on Select receiver
14. Click on Add check receiver
15. You will need name, address, phone number and email
16. The phone number will be the password required to open the verification email.
17. Recipient added successfully
18. There is a $5k limit on each check.
19. Receipt successfully created
d) We will send the check by email.
20. Click Send to send your check
21. What does a check received by email look like?
22. This is an example of what a check might look like. The check will have all levels of security so that no bank will reject it.
In Endorse Here: write the recipient's full name