Lord777
Professional
- Messages
- 2,579
- Reaction score
- 1,480
- Points
- 113
Selfie identity verification has become one of the most common identity verification methods in apps. However, despite its popularity, selfie verification is not a perfect solution as it can be bypassed. In this article, we will look at one of the ways to bypass selfie verification in applications.
What we need:
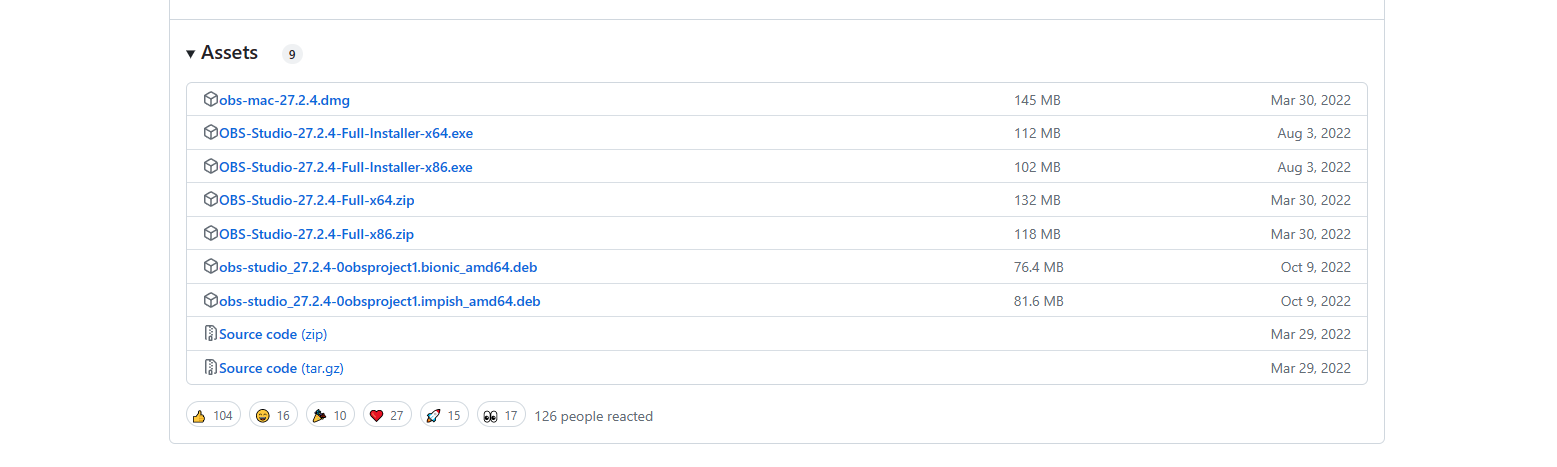
We need Install the OBS Studio
We follow the link, scroll to the very bottom of the page and select the desired version based on your device
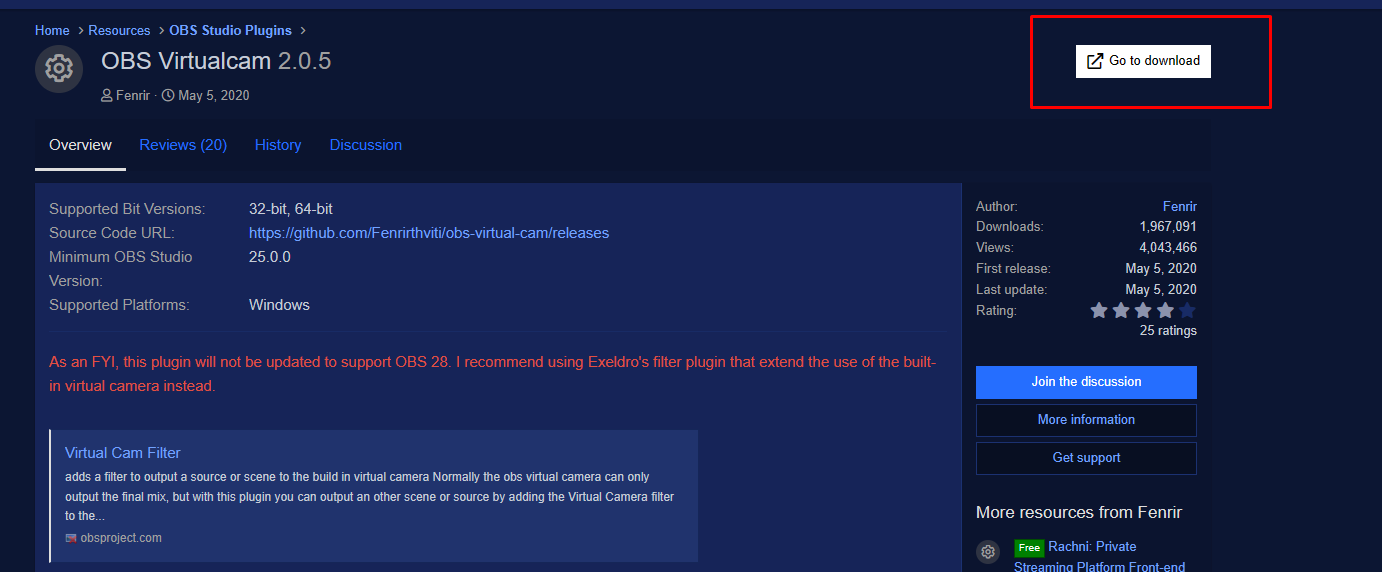
Install Virtualcam Plugin
When visiting a site, we see this picture and we only need one button on that page (denoted by the red rectangle).
Installed, without problems passed the first two stages. In the third step, we will need to specify the location of our version of OBS, namely 27.2.4, which we downloaded earlier. Make sure you select this version.

Installing Bluestacks
OBS setup
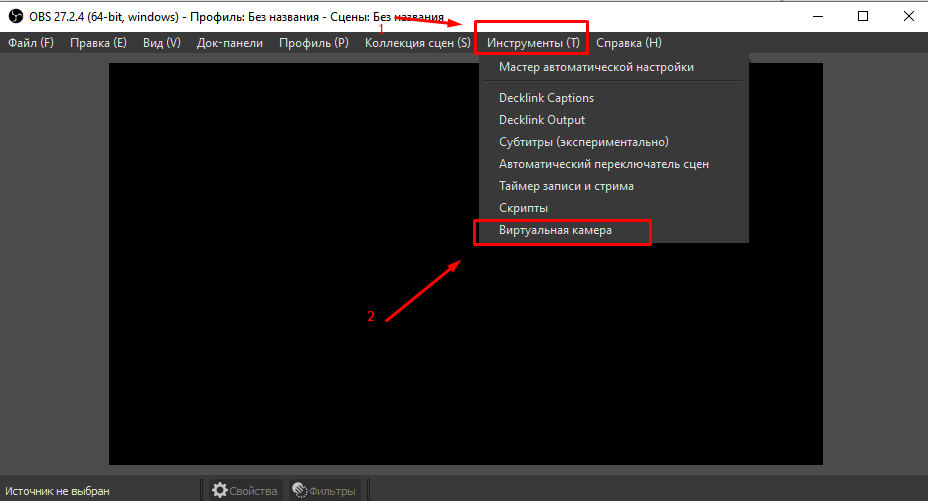
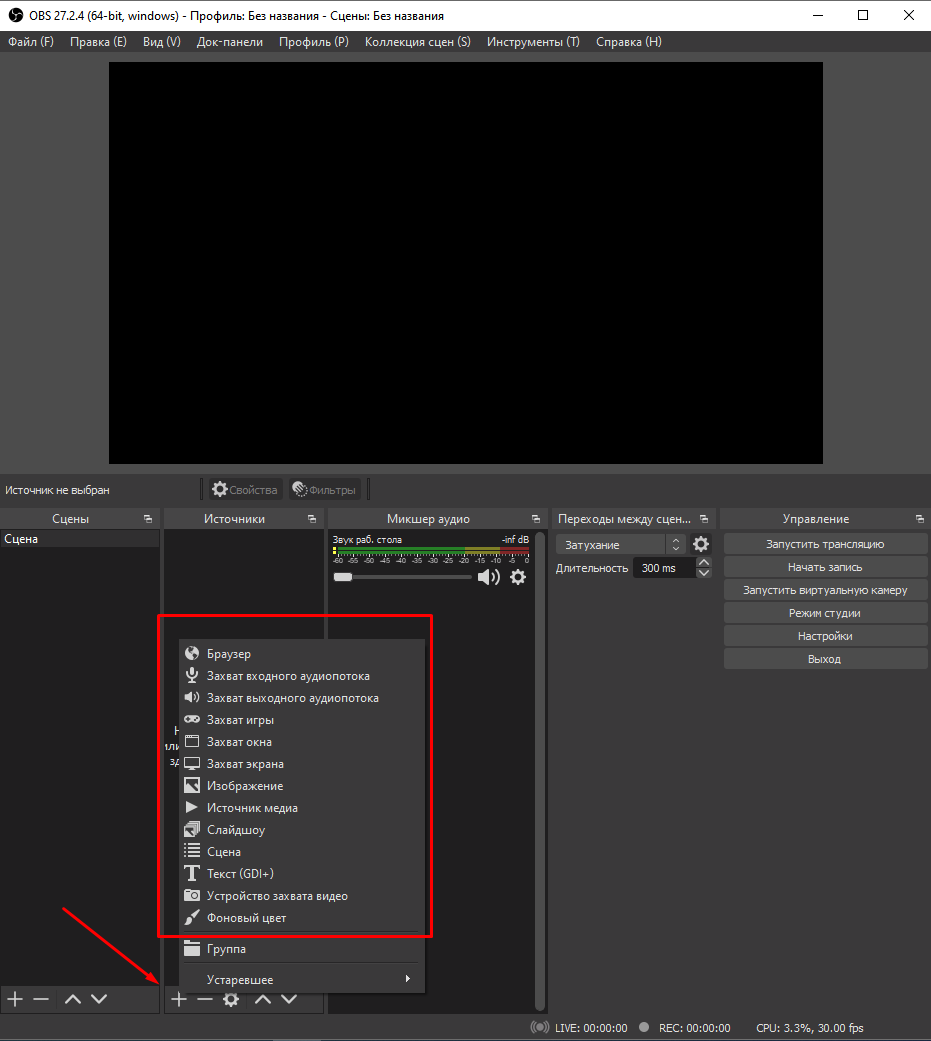
Open OBS and do the following
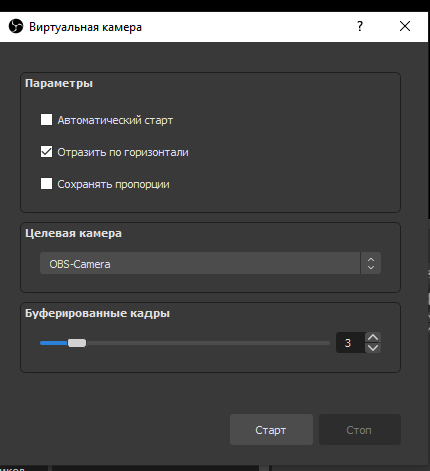
A window opens with the settings of the virtual camera and set the same as mine, after setting the settings, press START .
Now add your video/photo. If you are uploading a video, launch the video as in a media player and then select 'Window Capture'. In the case of a photo, simply select 'Image'. The OBS setup ends here.
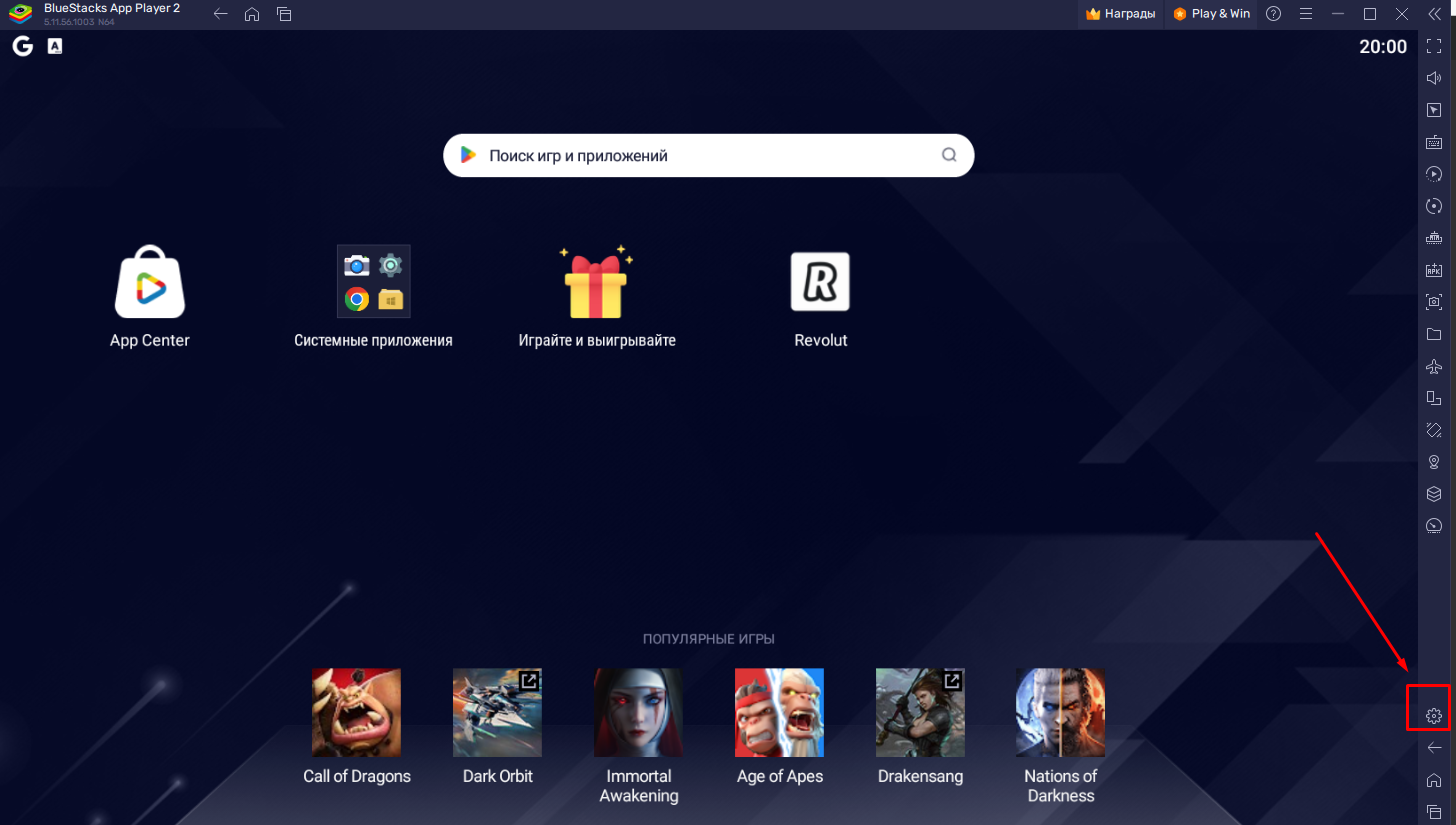
Setting up Bluestacks
We launch our emulator and immediately go to the settings (gear in the right tray)
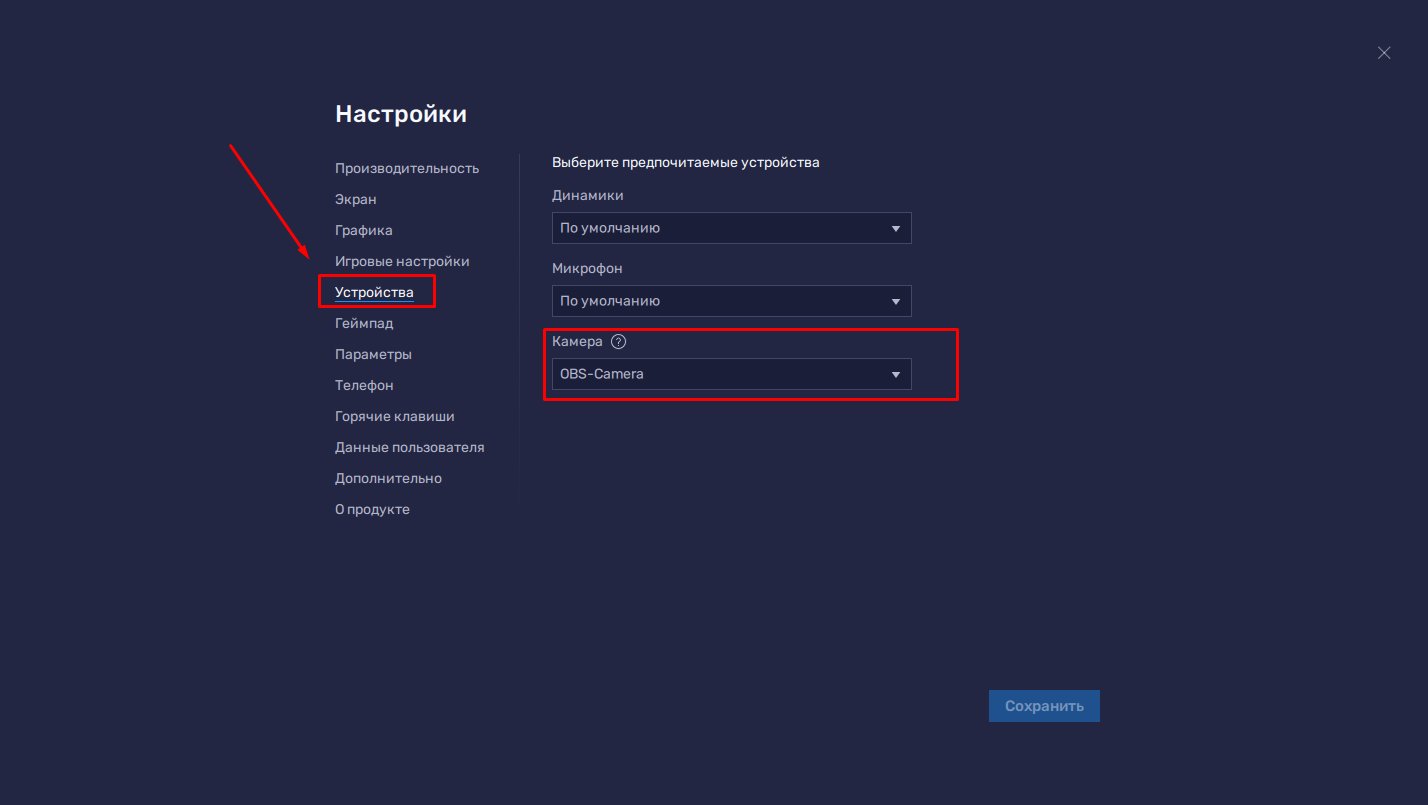
Select the device section. We click on the camera, and several options may appear here. We need to select a camera called OBS-Camera or the one you specified in the OBS settings in the second paragraph.
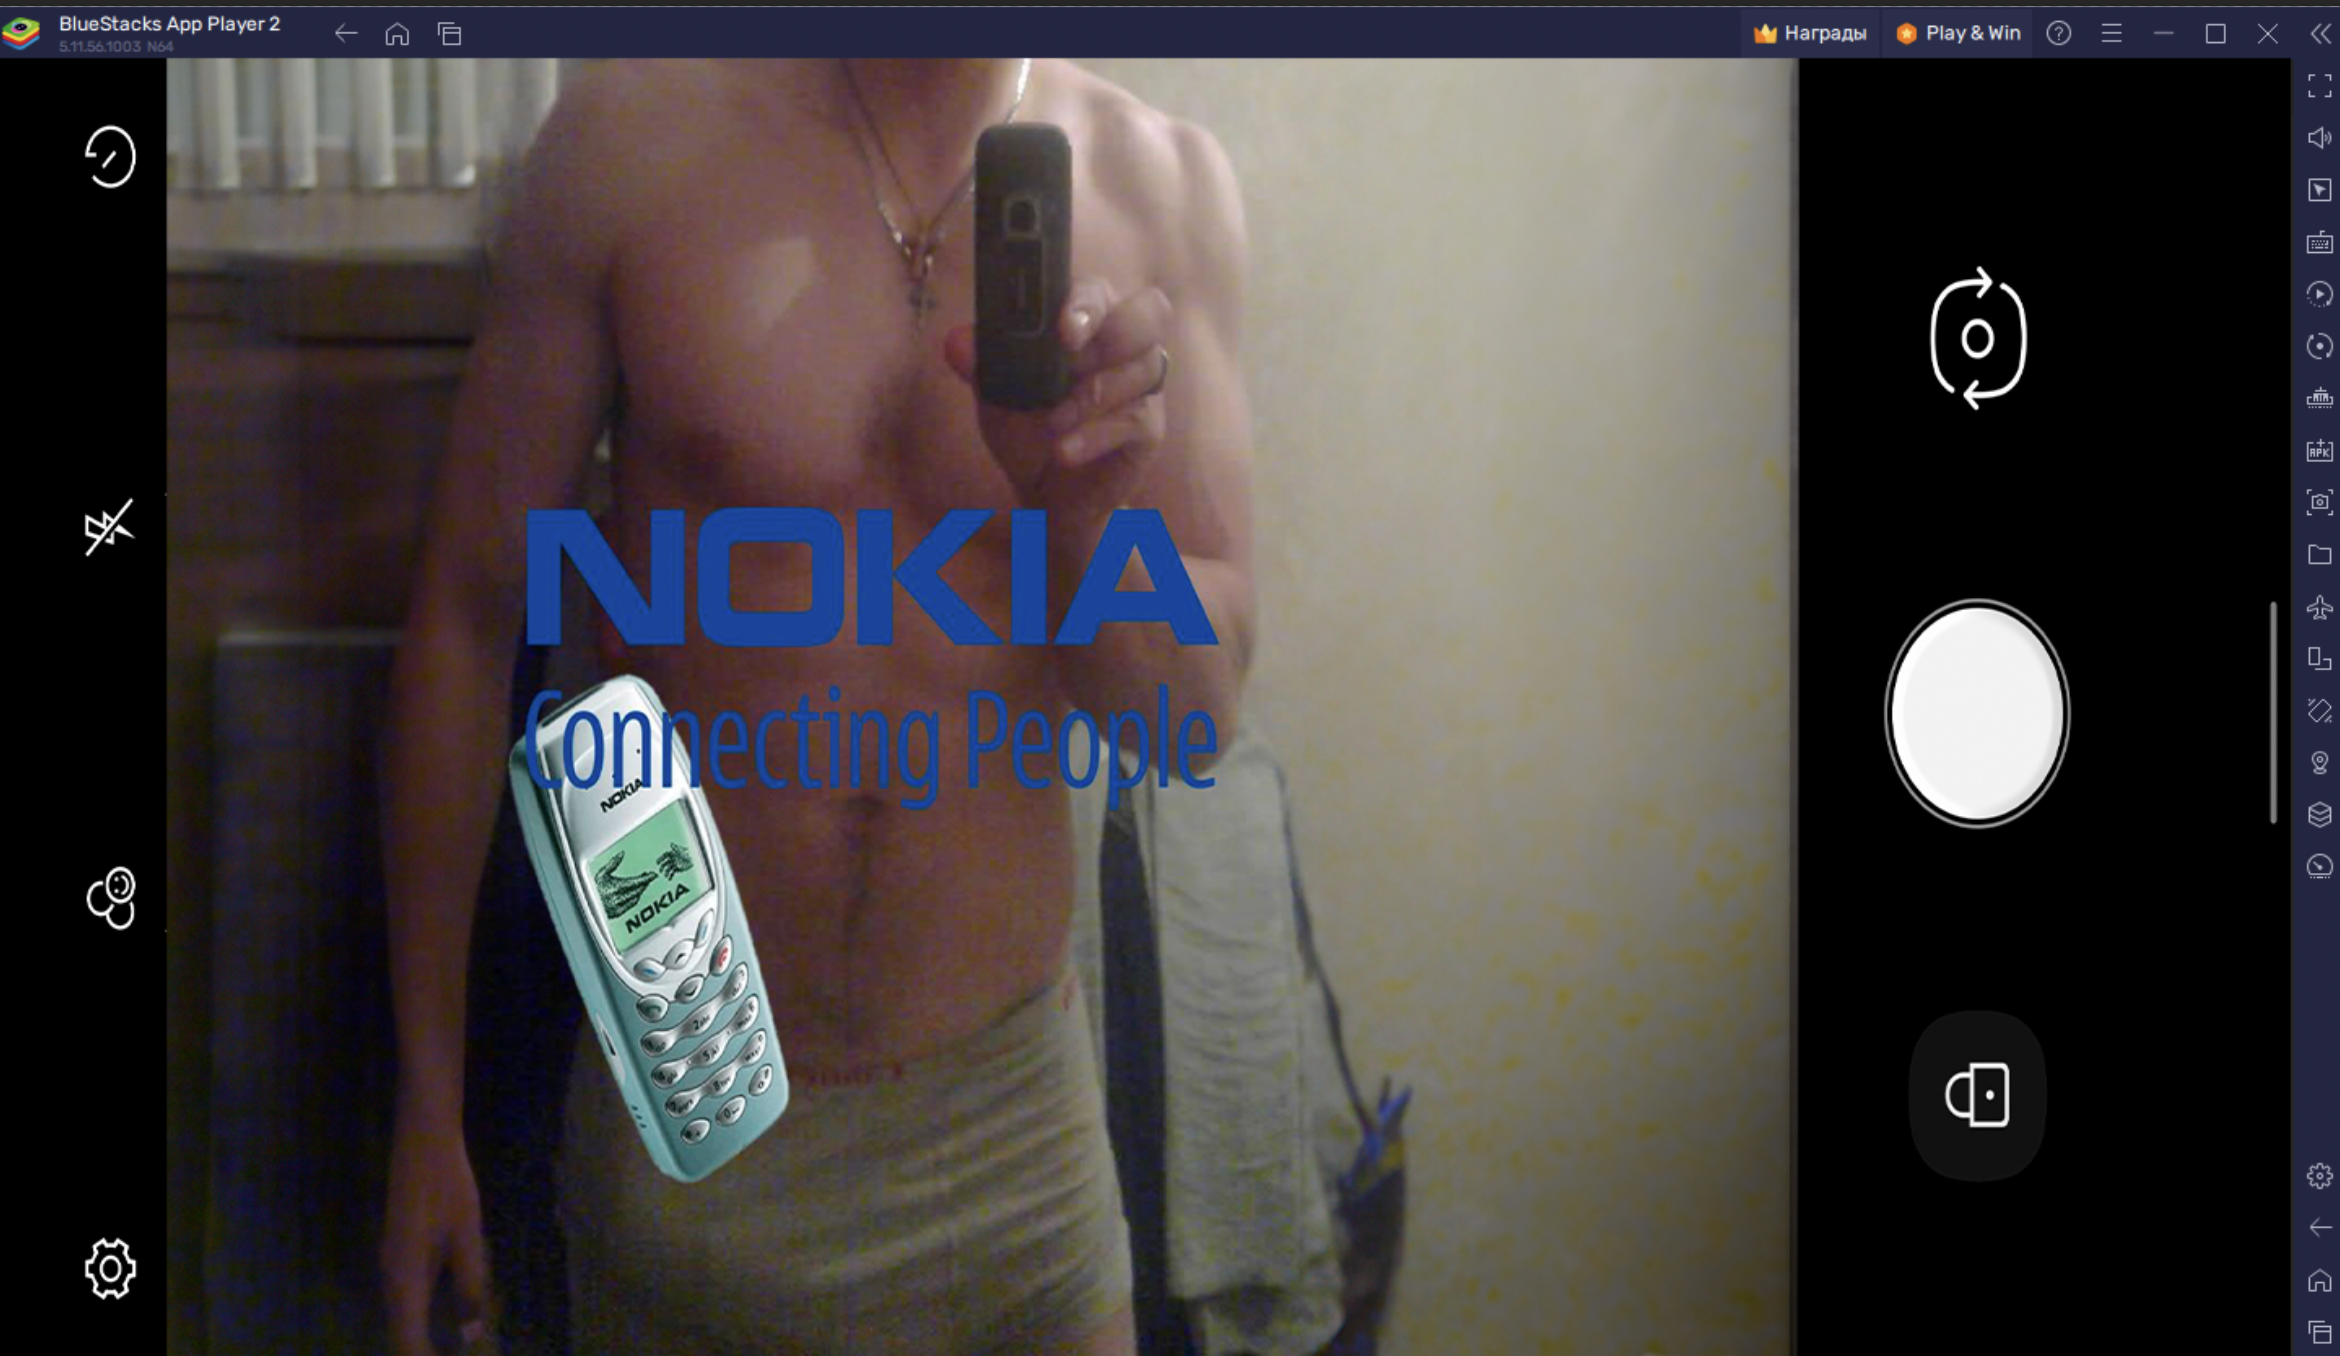
We go in the 'Camera' application, check that everything works.
What we need:
- Video / photo (preferably the first).
- NOTE Studio 27.2.4
- OBS Virtualcam Plugin
- Bluestacks from version 5.10
We need Install the OBS Studio
We follow the link, scroll to the very bottom of the page and select the desired version based on your device
Install Virtualcam Plugin
When visiting a site, we see this picture and we only need one button on that page (denoted by the red rectangle).
Installed, without problems passed the first two stages. In the third step, we will need to specify the location of our version of OBS, namely 27.2.4, which we downloaded earlier. Make sure you select this version.
Installing Bluestacks
OBS setup
Open OBS and do the following
A window opens with the settings of the virtual camera and set the same as mine, after setting the settings, press START .
Now add your video/photo. If you are uploading a video, launch the video as in a media player and then select 'Window Capture'. In the case of a photo, simply select 'Image'. The OBS setup ends here.
Setting up Bluestacks
We launch our emulator and immediately go to the settings (gear in the right tray)
Select the device section. We click on the camera, and several options may appear here. We need to select a camera called OBS-Camera or the one you specified in the OBS settings in the second paragraph.
We go in the 'Camera' application, check that everything works.