
Tomcat
Professional
- Messages
- 2,687
- Reaction score
- 1,038
- Points
- 113
Hello everybody! Thank you for reading my channel! Today we will focus on setting up the system for work. Nothing complicated, but in which case it gives you a security guarantee.
In today's article:
1) Creation of a cryptocontainer
2) Installing vitrualbox + windows 7 eng on an encrypted container
3) Protection against data leaks and traffic
4) Software required for work.
Let's get started!
1) Setting up and creating a cryptocontainer
Download veracrypt from the official site.
https://veracrypt.codeplex.com/releases/view/631440

Step 1 - creating the volume
Launch VeraCrypt and click Create Volume.
Step 2.- Choose the volume type
In the window of the volume creation wizard, you should select what type of volume you want to create. VeraCrypt can place an encrypted volume in a file, in a disk partition, or on an entire disk. In this case, we choose the second item, since we need to encrypt a non-system partition / disk.
Select the second item and click Next
Step 3 - regular or hidden volume
At this step, you need to choose what type of volume to create, standard or hidden. Hidden volumes are discussed in the "VeraCrypt Advanced Features" article - not yet published.
Select VeraCrypt Regular Volume and click Next
Step 4 - Placing the Volume
You must select a disk or partition that will be used as an encrypted container for storing data.
To continue, click Select Device, a dialog for selecting a partition or disk will open in which you need to select a disk or partition for encryption.
In this case, we have selected the only partition (\ Device \ Harddisk2 \ Partition1), which takes up all the free space on Removable Disk 2
Please note that if you select an existing partition on the disk and it contains files, at the sixth step you will have the opportunity to choose to delete this data or encrypt along with the partition.
If you want to encrypt the entire device, and not a separate disk partition, you need to delete the existing partitions on the disk, for example, using the Windows Disk Management tool, and all data on the device will be lost.
After you have selected a disk or partition, click OK
Step 5 - Placing the Volume
On the Volume Creation Wizard, click Next
Step 6 - volume creation mode
If you want to encrypt the selected partition along with all the data it contains, select the Encrypt partition in place item (works only for partitions with the NTFS file system).
We encrypt a partition on a USB flash drive with the FAT file system, the encryption option with all available data will not work in our case. Therefore, we choose to create and format the encrypted volume (ATTENTION! This option will destroy all data on the selected partition)
Remember to click the Next button
Step 6 - Encryption Settings
Choosing encryption and hashing algorithms, if you are not sure which to choose, leave the default AES and SHA-512 as the strongest option
Step 7 - Volume Size
The volume size corresponds to the size of the selected partition, in our case it is 3.77 GB. Remember to click the Next button
Step 8 - Volume Password
This is the most important step, here you need to create a strong password that will be used to access the encrypted data. We recommend that you carefully read the recommendations of the developers in the Create Volume Wizard window on how to choose a good password.
In addition to the password or separately, you can use a key file - create or select an existing one. It is not necessary to use a key file, but using it will further increase the security of your data. At the same time, it is important to take care of a backup copy of the file, since if it is lost or damaged, you will not be able to access the data in the container.
After you select a strong password and / or key file, click the Next button
Step 9 - Formatting the Volume
To store files larger than 4 Gigabytes in an encrypted partition, select the NTFS file system , for small partitions (as in our case) it is better to use FAT or exFAT.
Move the mouse pointer randomly within the volume creation wizard window, at least until the indicator turns green, the longer you move the mouse, the better. This allows you to significantly strengthen the cryptographic strength of the encryption key. Then click Format .
Answer affirmatively in the dialogue, all data will be destroyed if such appears, and you agree with this.
Formatting will start, depending on the size of the partition and the speed of your computer, it may take some time.
After the partition is formatted, carefully read the warning about using the old drive letter, always follow these recommendations.
Click OK You will see the following message.
Step 9 - The volume is created
We have just successfully encrypted the Device \ Harddisk2 \ Partition1 partition on the USB stick.
Click Exit, the wizard should close
Next, the newly created volume must be mounted, after which it can be used for its intended purpose - for safe storage of data.
Step 10 - Selecting a Drive Letter and Device
In the main window of the program, select the desired drive letter (in our case, it is K ) and click the Select Device button .
Step 11 - Selecting an Encrypted Partition
In the dialog that opens, select the encrypted partition that you used in the previous steps (in our case, it is Device \ Harddisk2 \ Partition1 ), after which you will return to the main program window.
Step 12 - Mount the encrypted partition
Click the Mount button, after which a dialog for entering a password and / or selecting a key file will appear.
Step 13 - entering password and / or key file
Enter the password and / or key file that you specified in step 8 and click OK
Step 14 - the last step
Successfully installed for Have for We the encrypted partition as with the with the a local drive the the the K.
Drive K is fully encrypted (including filenames, partition table, free space). You can work with this disk in the same way as with any other disk in the system, copy, save, move files. As soon as you place a file on this disk, it is immediately encrypted on the fly
After you place the files on the encrypted disk, it is important to permanently delete the originals using any program to permanently erase the files.
Please note that VeraCrypt never saves decrypted data to disk - when you work with an encrypted container, it is always encrypted, and files are decrypted on the fly and stored in RAM. This ensures that in the event of a sudden power outage or reboot, all files in the container remain encrypted. If you need to access them again, you will need to repeat steps 10 through 13.
If you need to restart the operating system, remove the USB flash drive or remove the K drive to stop accessing the container, do the following.
In the main window of the program, select the appropriate drive letter and click Dismount
P.S. I hope the information was useful and you have securely encrypted your data, but do not forget to take care of the security of your connection and use a VPN. More on that later.
2) Installing virtualbox + windows 7 eng on a cryptocontainer.
Step one
Downloading VirtualBox from the official site
https://www.virtualbox.org/wiki/Downloads
We install it on the connected cryptocontainer. For convenience, you can create a Program files folder there.
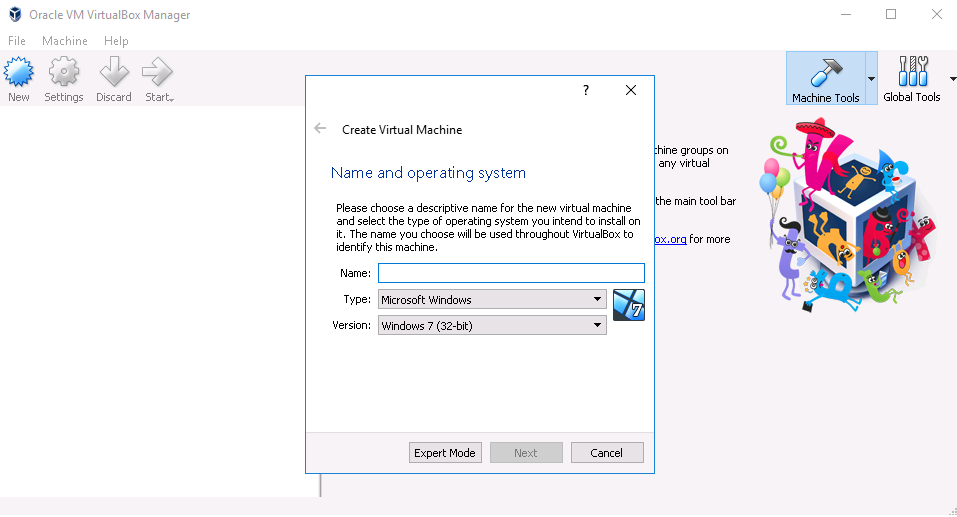
We launch. Click new. Enter the name and click next
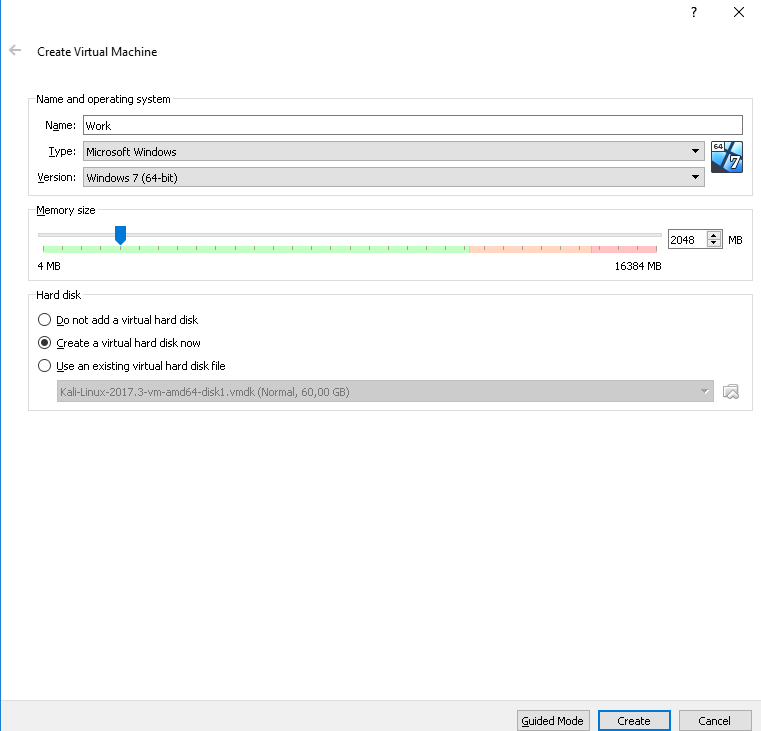
We choose windows 7 64 bit and the optimal video memory size. I recommend setting 2-4GB. Then click create
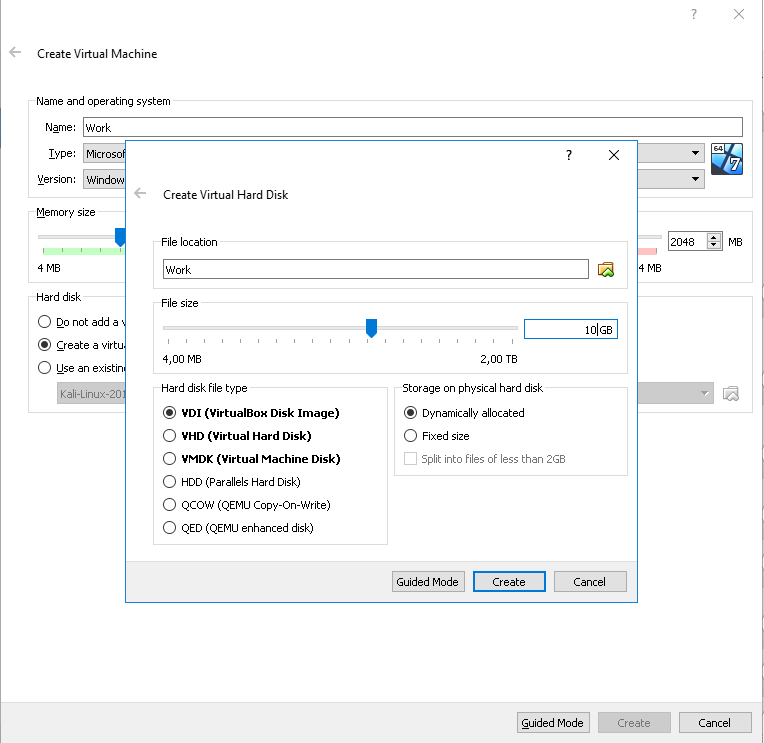
We set the size of the virtual hard disk based on the size of the created cryptocontainer. Click create
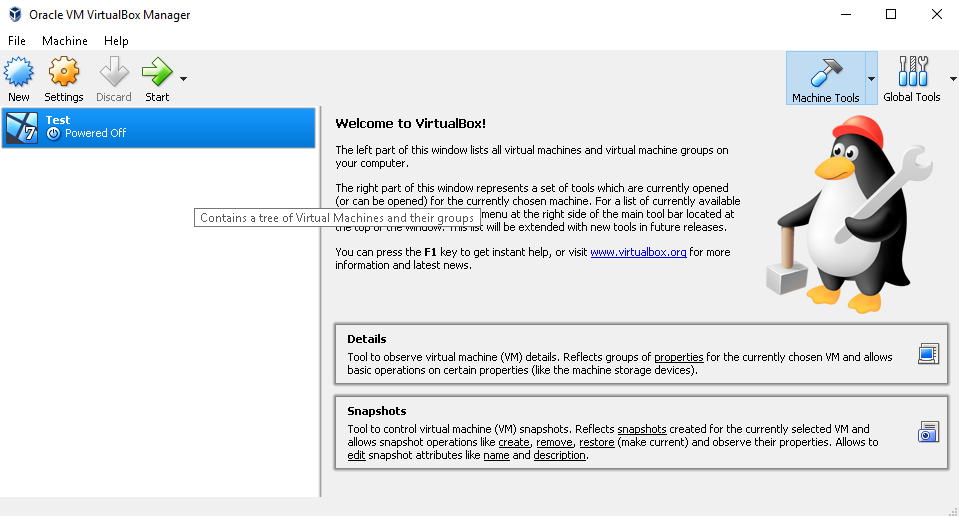
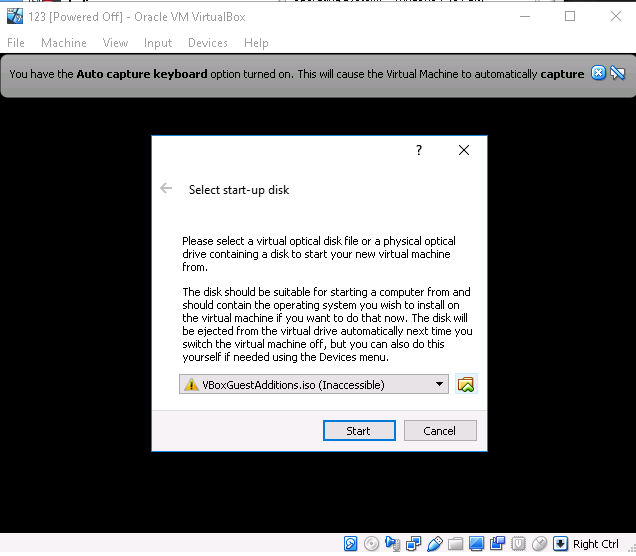
We see this picture. Click start
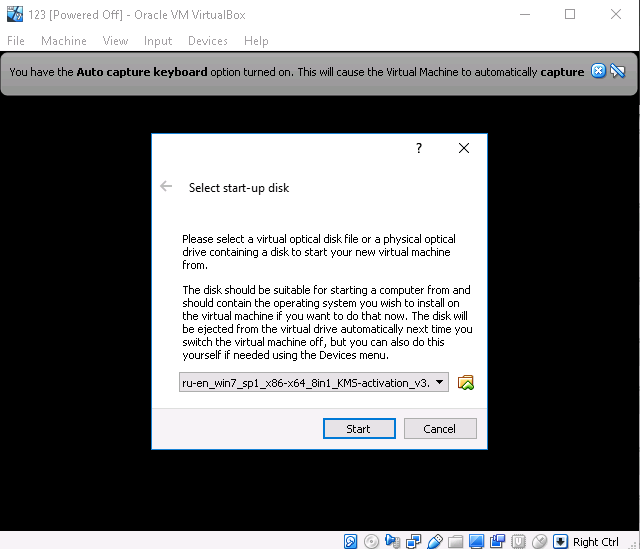
Click on the icon and select the iso image of our Windows
Click start and install it as a normal Windows.
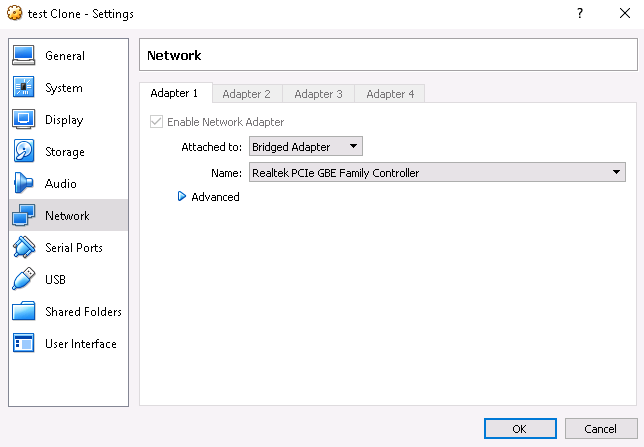
This completes the virtualbox setup. I do not recommend installing guest extensions. If the Internet does not work on the virtual machine, then in the settings in the network tab, change the NAT to Bridged adapter
3) Configuring vpn from traffic leaks.
Personally, I use one vpn provider known in narrow circles, I will not advertise, who needs to figure out how to find them.
We will configure it through openvpn and through the service client. I like the client more, because there is a function to block all connections that do not go through vpn.
OpenVPN setup
Download the client from the official website.
https://openvpn.net/index.php/download/community-downloads.html
We set. Don't launch it yet.

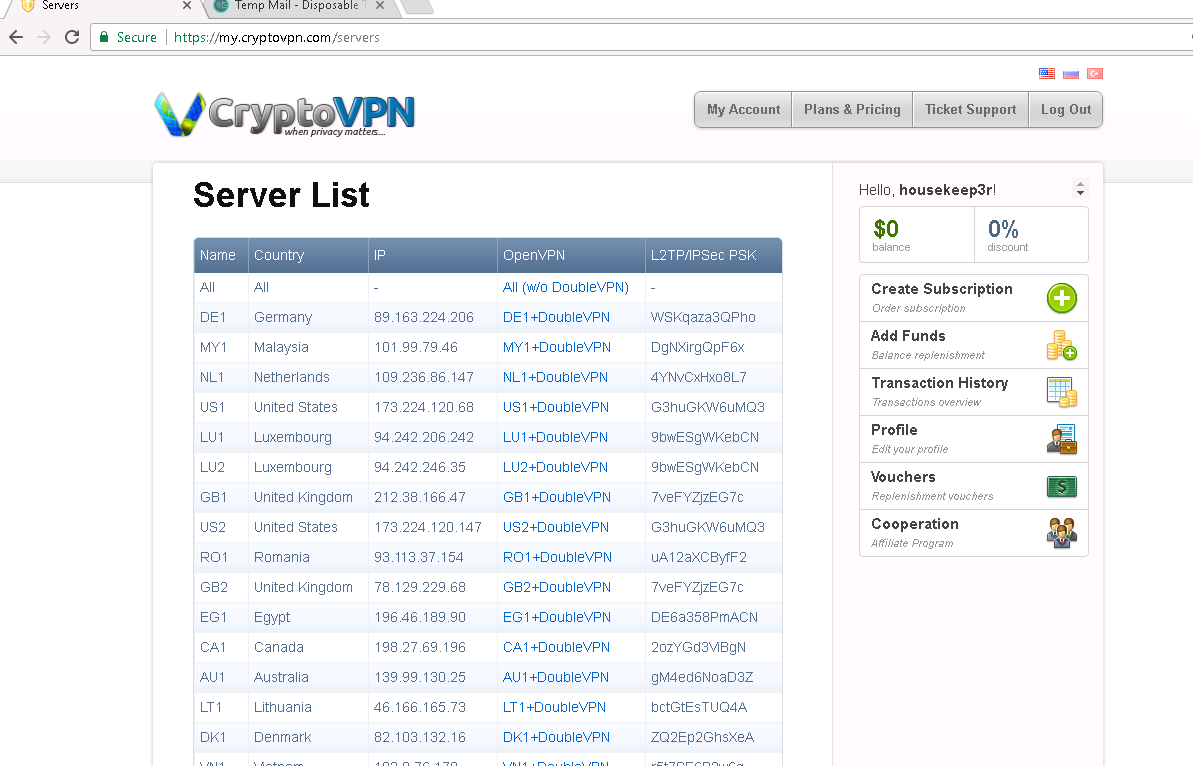
Downloading configs from the vpn provider. In my case it looks like this
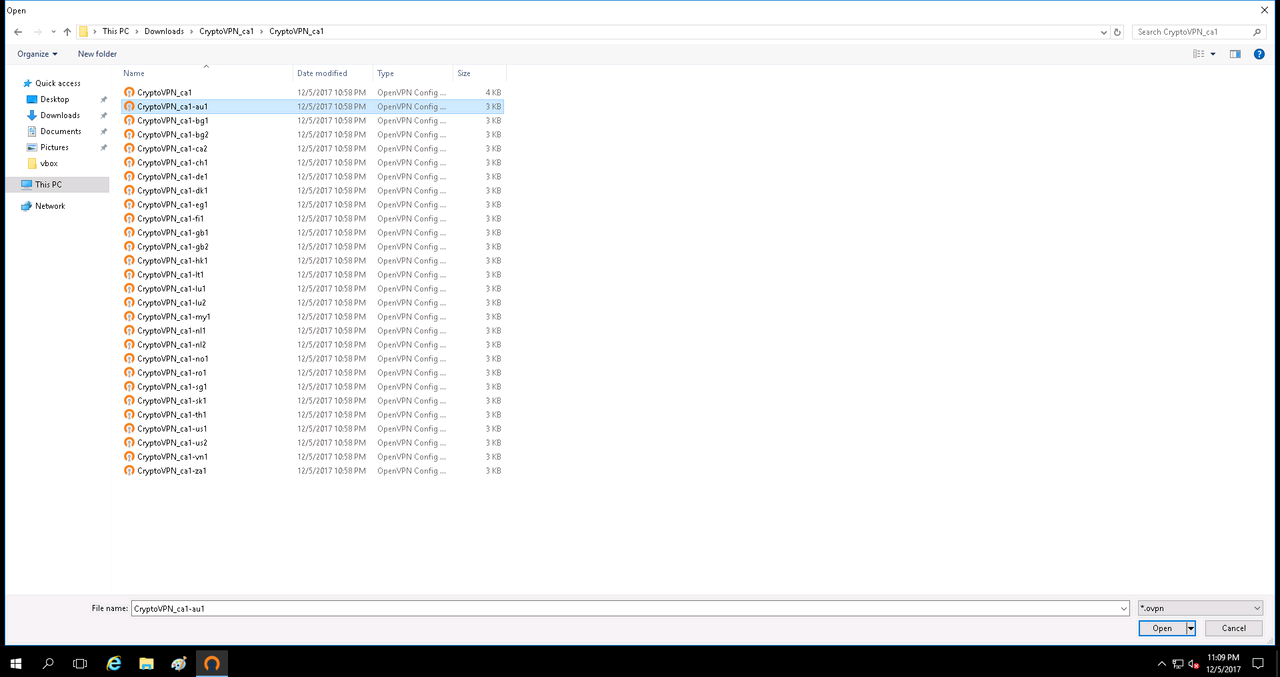
Launch Openvpn. In the tray, click Import file

We select the config. I have it for example double vpn Canada-Australia
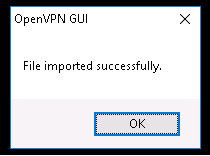
If everything is ok, then we see such a message.
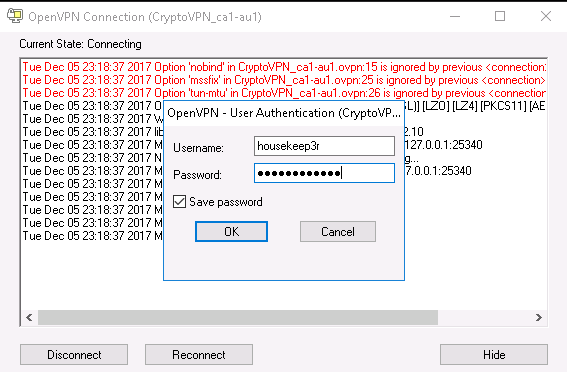
Go to the tray, right-click on openvpn and click connect

We fill in the authorization data. And click OK
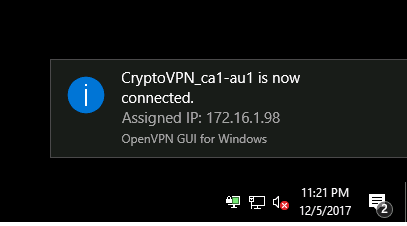
If the connection was successful, we see something like this
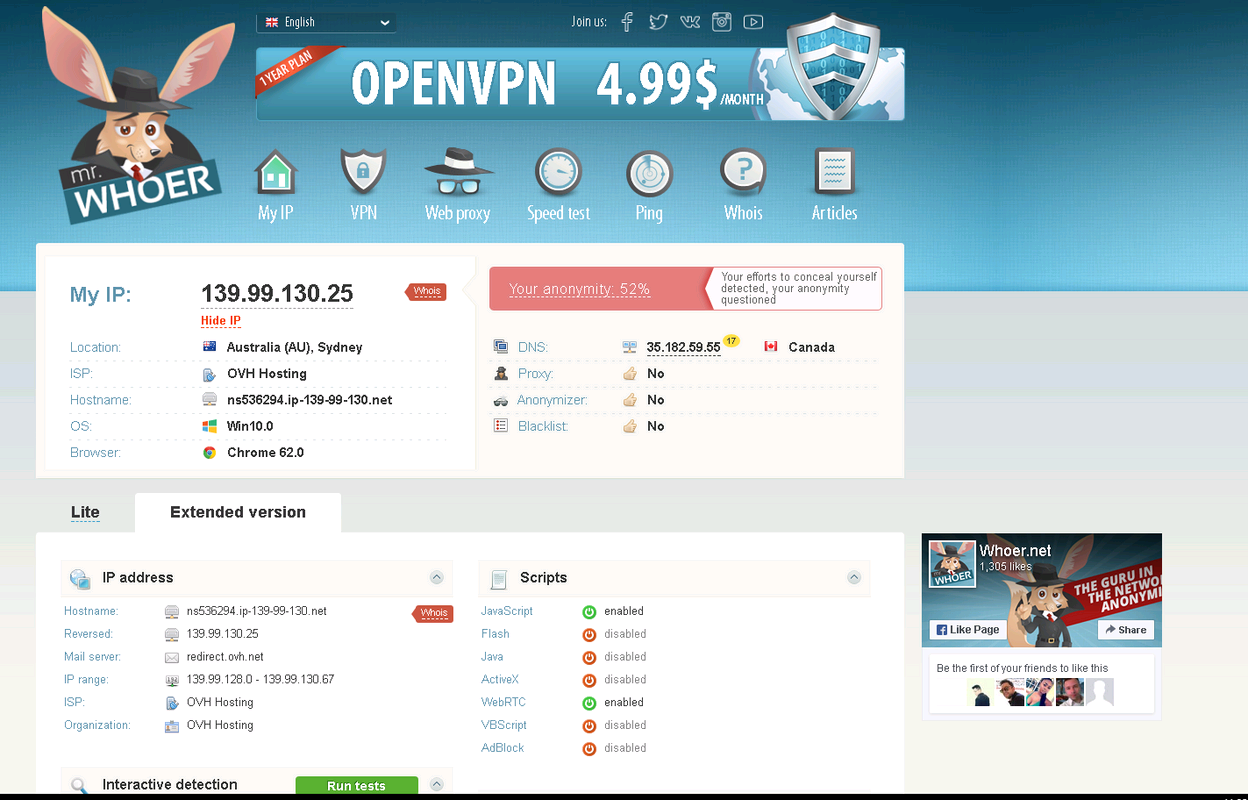
We go to whoer and see that it does not define us as a proxy or anonymizer.
It's time to disable webtrc, configure the mozilla and configure the firewall.
Go to the address bar, enter about: config
We are looking for and setting the following parameters:
browser.display.use_document_fonts; 0 - to hide additional fonts used in the system;
browser.privatebrowsing.autostart; true - private browsing is enabled by default;
browser.formfill.enable; false - disable autocomplete
browser.cache.offline.enable; false - block offline caching
browser.cache.disk.enable; false - disable caching to disk
browser.cache.disk_cache_ssl; false - do not cache certificates
privacy.resistFingerprinting; true - enable built-in anti-fingerprinting mechanisms of the browser
canvas.focusring.enabled; false
canvas.path.enabled; false
canvas.filters.enabled; false
canvas.customfocusring.enabled; false
canvas.capturestream.enabled; false - to disable Canvas HTML;
font.name.monospace.x-western; Times New Roman - font options have been corrected so that the browser cannot be identified by the specific fonts used.
dom.event.clipboardevents.enabled; false - disable transmission of keyboard events.
security.ssl3.rsa_des_ede3_sha; false - prohibit weak encryption algorithms
security.ssl.require_safe_negotiation; true - requires secure data transfer
security.tls.version.min; 3 - prohibit the use of old versions of TLS
geo.enabled; false
network.cookie.lifetimePolicy; 2 - clear cookies every time the browser is turned off.
media.peerconnection.enabled; false - disable the hated WebRTC support. A technology created for Peer-2-Peer to transfer data in a browser (streaming video, voice, etc.), which entails disclosing the parameters of a local network (internal IP, DNS).
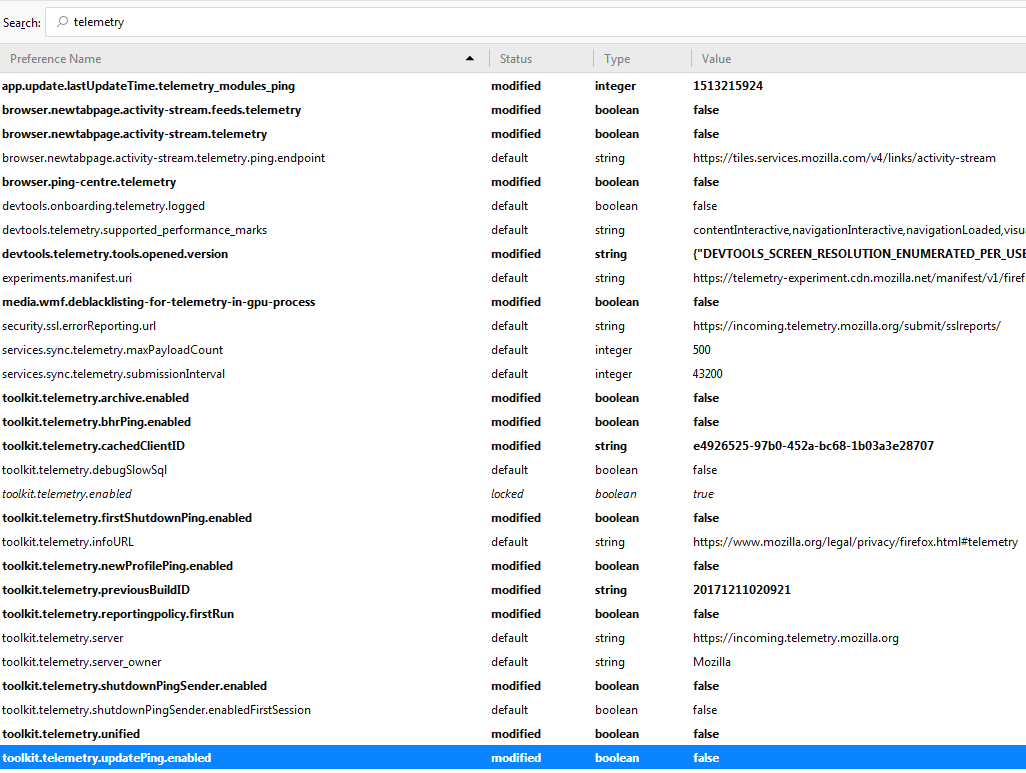
Completely disable telemetry by entering telemetry in the search and set all parameters that take the value true / false to false.
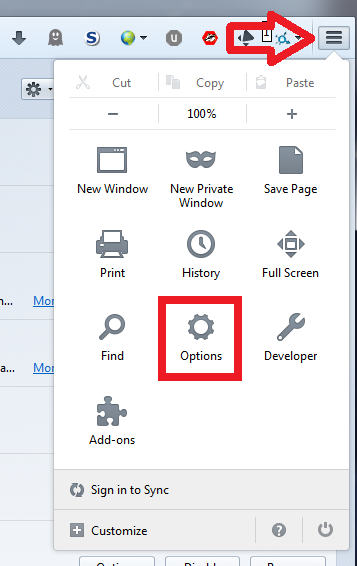
Further in the settings
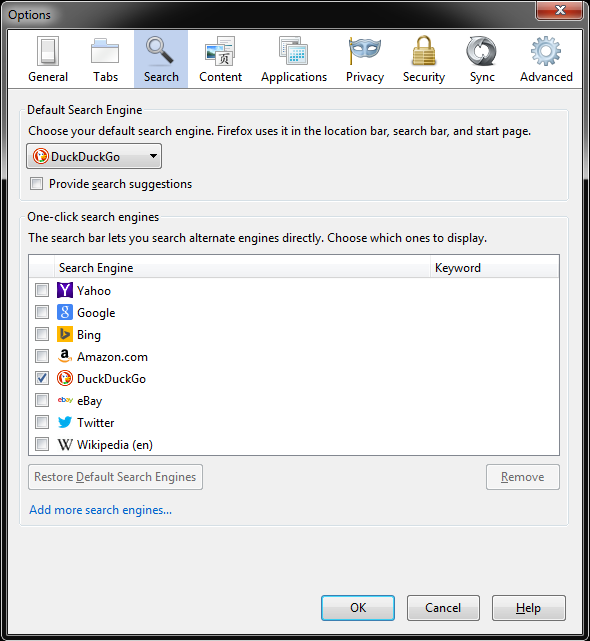
We change the default search in order to avoid leakage of search queries and addresses we address
In the security settings, we require you to warn when a site tries to install an add-on, block sites suspected of attacks (in some cases, you need to disable this option to visit resources related to exploits, etc.). We also disable saving passwords.
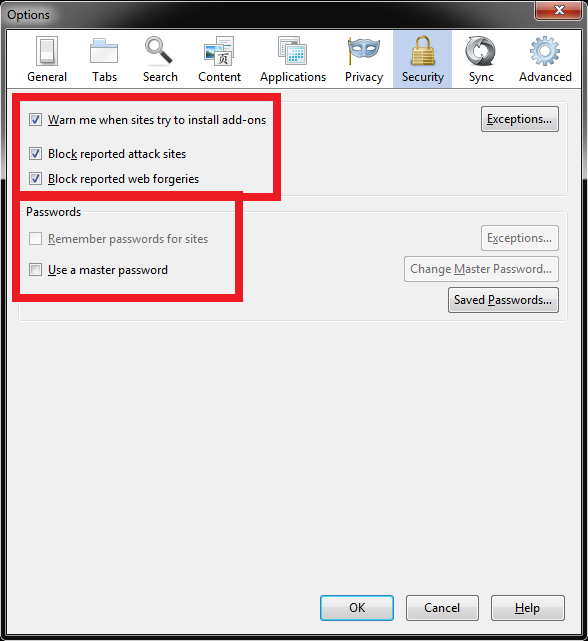
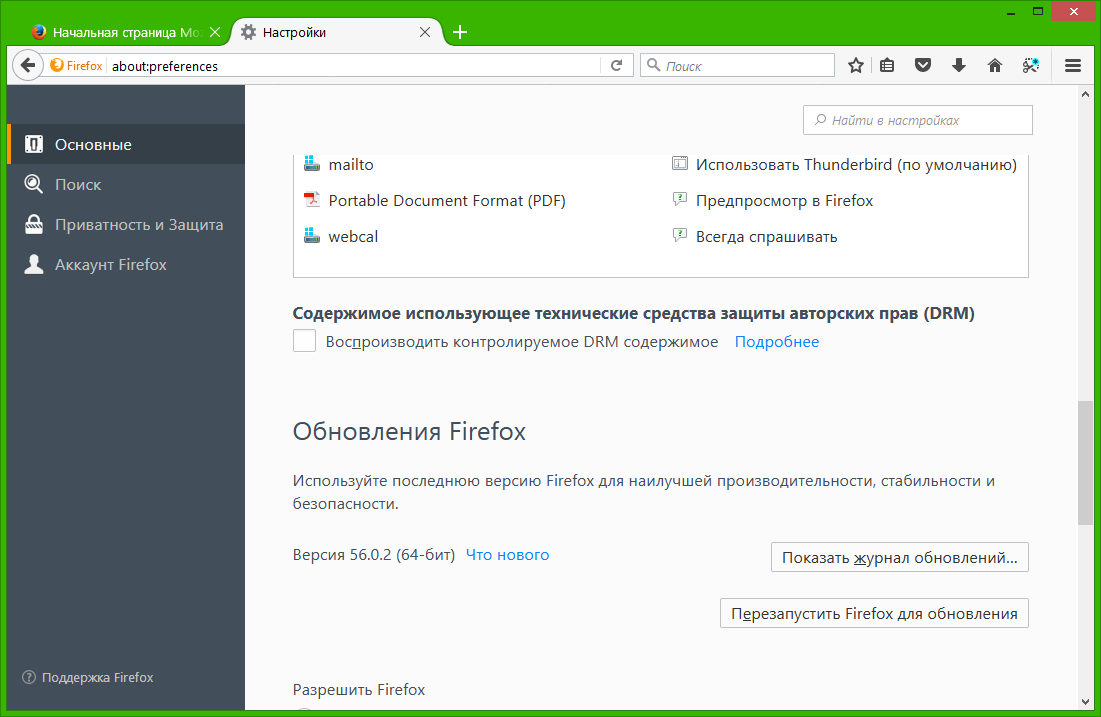
DRM content playback has been disabled
Tracking is disabled,
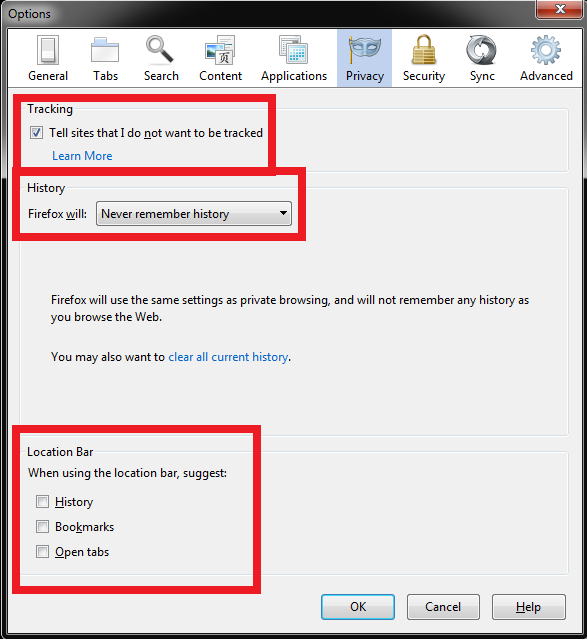
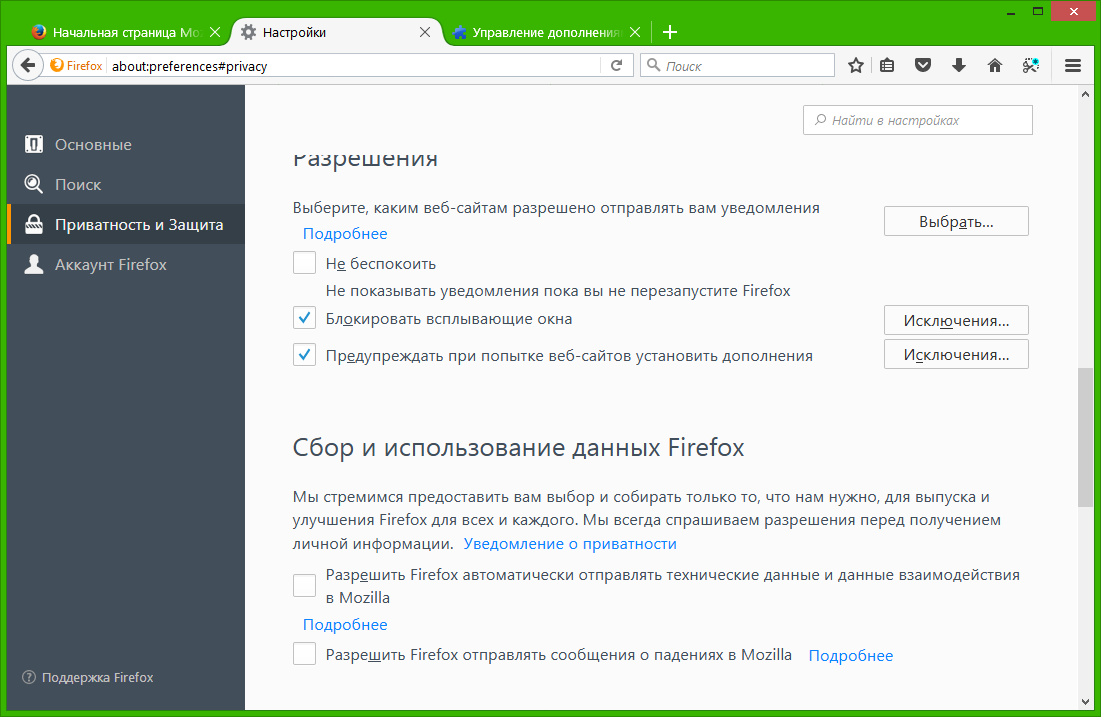
Pop-ups are blocked
Used plugins:

AdBlock Plus - for blocking advertisements and other banners.
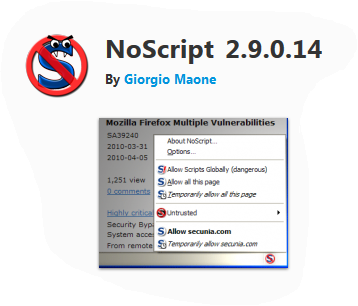
NoScript - to disable JavaScript and Flash by default. Execution of scripts is allowed temporarily or permanently for a specific site.
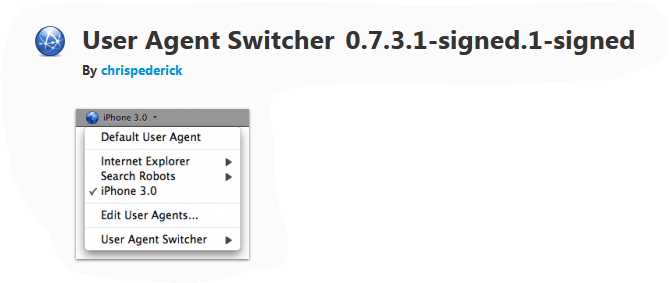
UserAgent Switcher - to use an arbitrary User-Agent.
Now let's configure Windows Firewall to prevent traffic leaks if the VPN tunnel is broken or bypassed. As an example, I'm considering connecting via OpenVPN, but you can use your preferred client by choosing it when creating an application rule instead of openvpn.exe (hereinafter in the text).
Let's start by disabling unnecessary services and services.
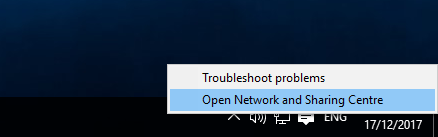
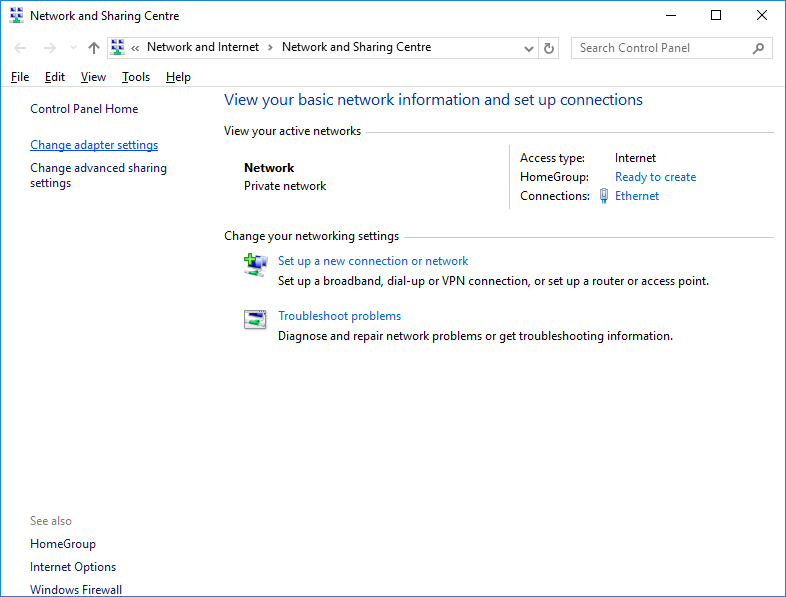
Let's open the adapter settings.
Choosing our main internet connection
Disable everything except the TCPv4 protocol (and TCPv6 if your ISP supports this protocol and you use its capabilities, otherwise, be sure to disable it)
Click "OK" and return to the settings for network connections. We select "Windows Firewall".
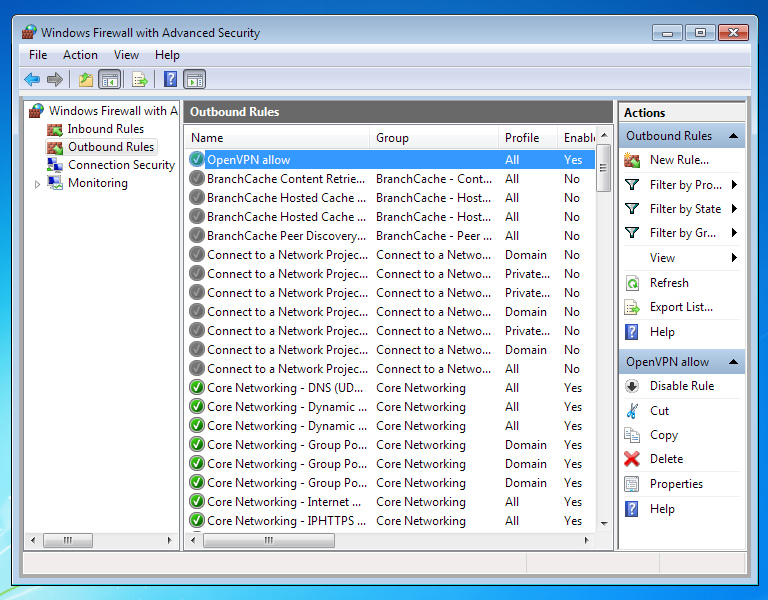
Open "Advanced settings"
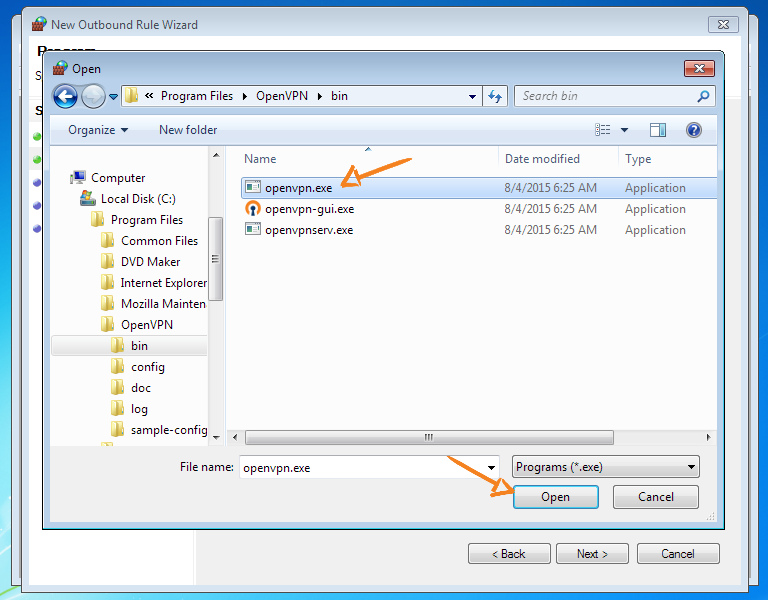
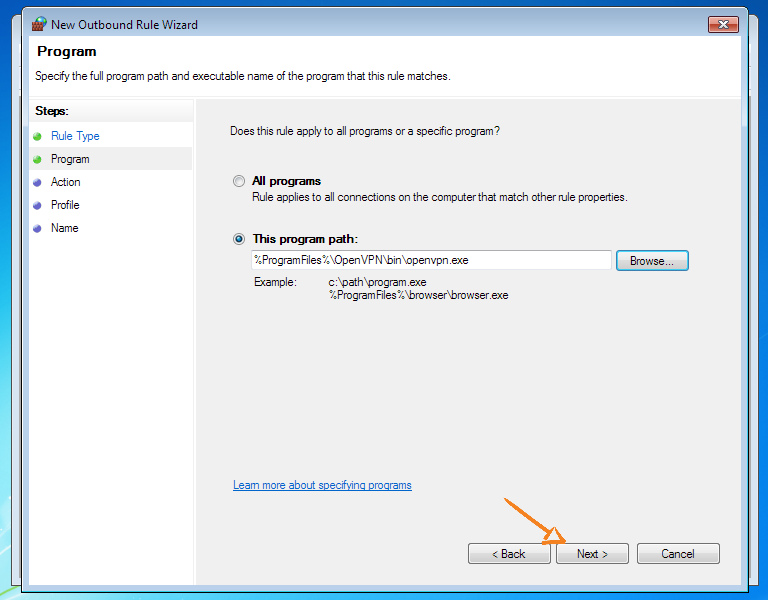
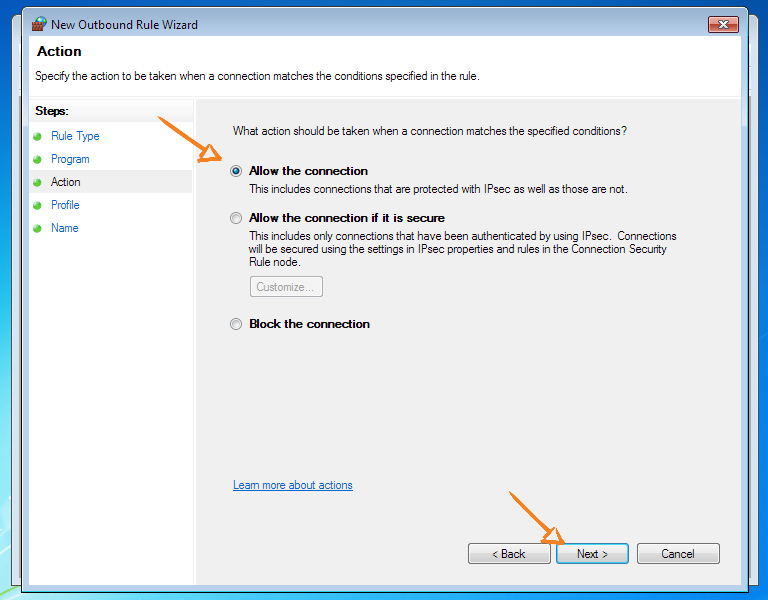
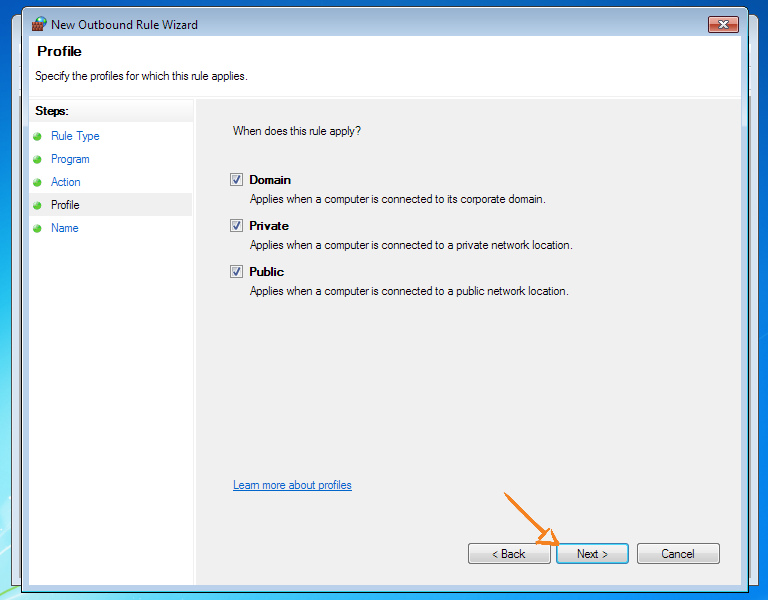
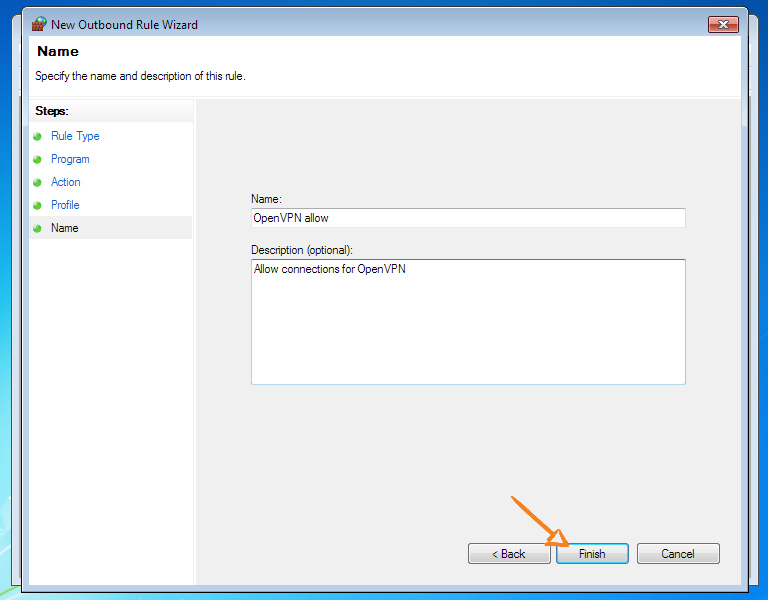
We create a new rule for outgoing connections. We only allow OpenVPN.
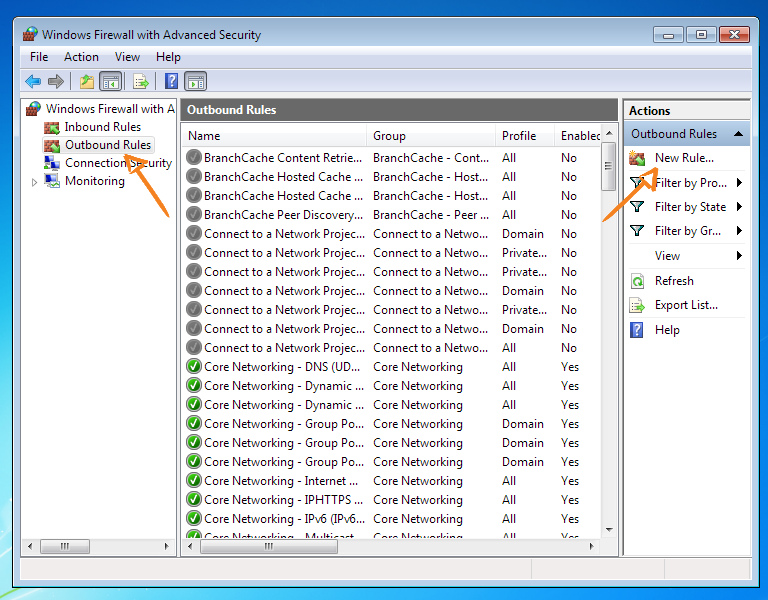
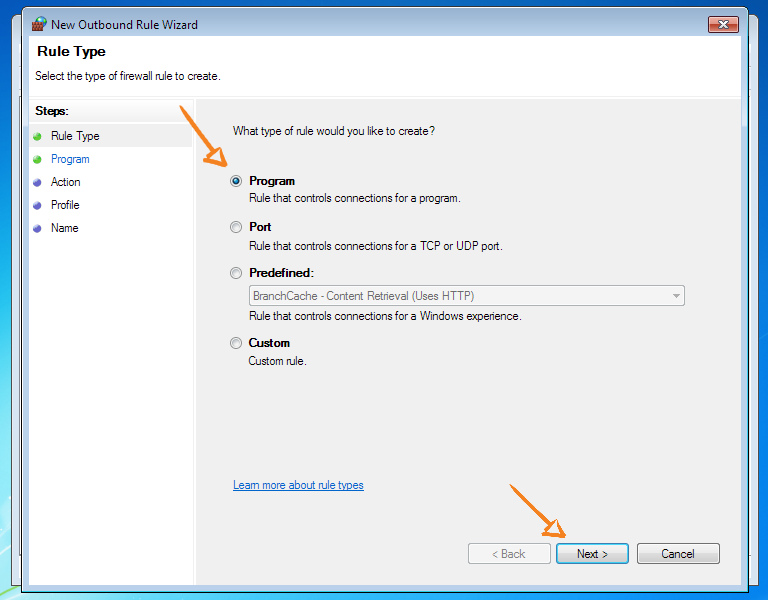
If you are using another client, then it is at this step that you should select it instead of openvpn.exe
Now we will block all other connections to prevent leaks in the event of a VPN tunnel disconnection or errors in the route configuration.
Block all traffic directions (inbound and outbound) for all profiles except Public.

Make sure your primary internet connection has a Home or Work profile
To check that everything is configured correctly, turn off the VPN and try to PING a known DNS server

If the ping fails, everything is configured correctly, otherwise, repeat all the steps from the very beginning.
For even greater security, you can deny all outgoing DNS traffic, but keep in mind that in this case the VPN will only work with servers over IP, and domain names will not be available.
Above was presented the basic configuration of a secure VPN connection. If you want to experiment, you can change the rules, but only in the direction of tightening the security policy (that is, blocking additional traffic directions, etc.), but in no case allowing those already blocked. The network operability after additional changes should be checked separately for a specific system and tasks to be solved.
Also, for additional security, you can use the function of blocking traffic bypassing the VPN, using a regular crypto client based on openvpn. Personally, I find it more convenient to work with it than tossing configs into the ovenvpn every time.
The setup is very simple. Download from the site, install, run.
We agree with the updates, click next. Next, go to the tray and select settings
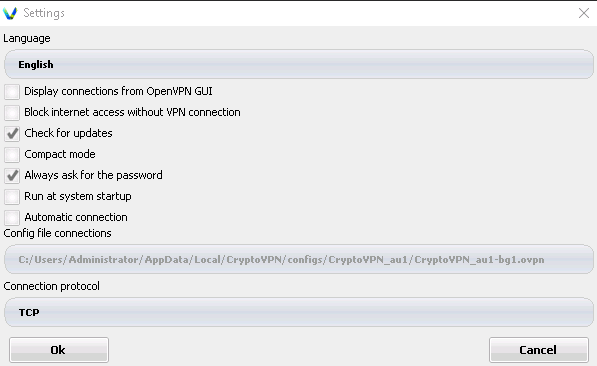
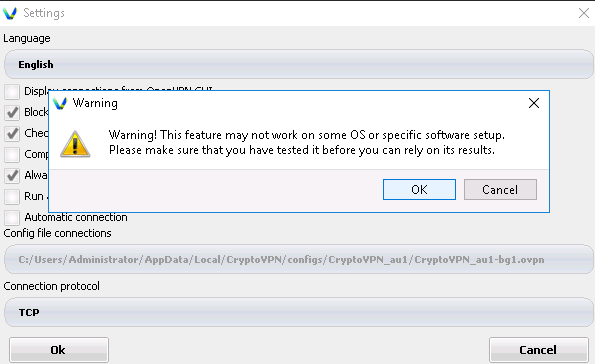
Check the box Block internet access without VPN connection. Click ok.
Also check the Run on system startup checkbox
Then again ok on the main settings tab.
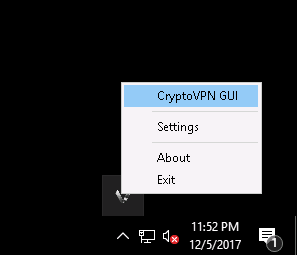
Next, select the client in the tray again and click CryptoVPN GUI
This window will open. We choose a country or a bunch of countries. Click connect

Enter authorization data and click connect.

If such a message pops up (usually at the first start)
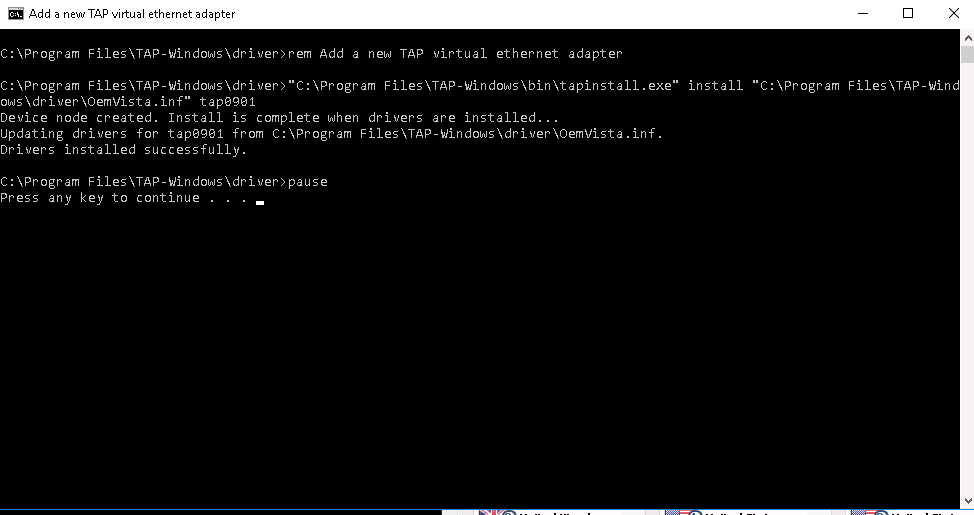
We do it as in the screenshot. Start-All Programs - windows tap - Add a new TAP-Windows virtual ethernet adapter.
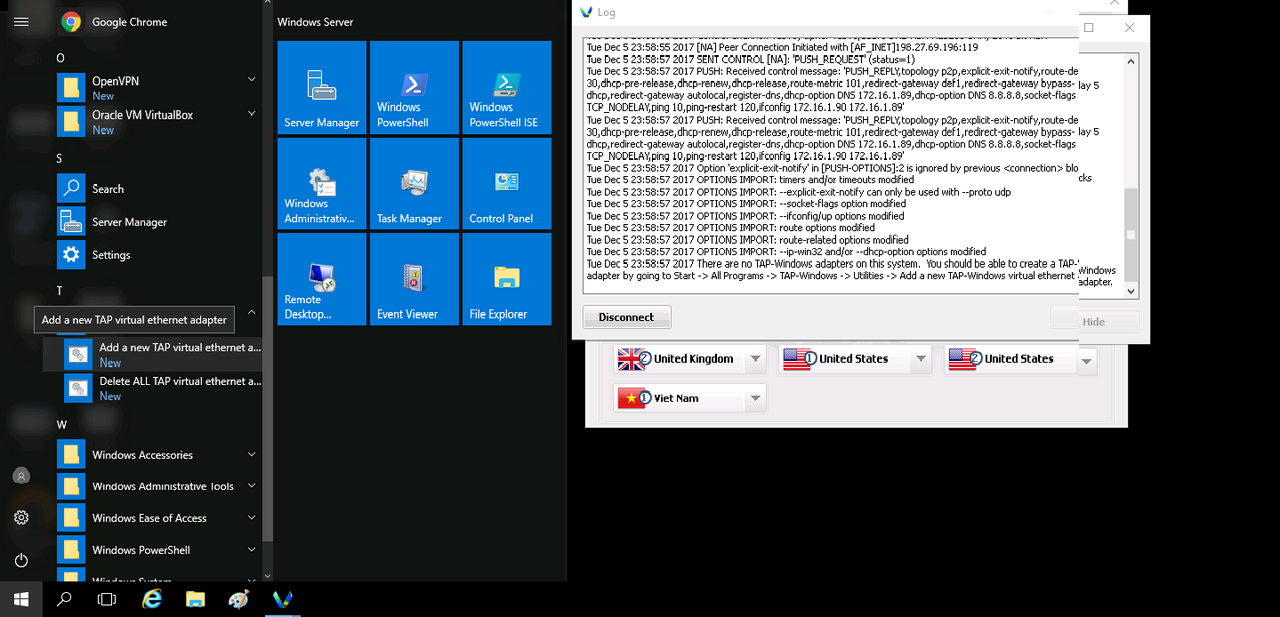
Such a window will pop up. We are waiting for the message "Press any key to continue" to appear, press any button and reconnect to the VPN.
Of course, you cannot completely trust the blocking of traffic through the software, tk. there may be different situations when it can work out incorrectly. Therefore, it is advisable to use it only in conjunction with a full-fledged firewall. If you do not like windows firewall, you can use any third party, for example Comodo.
A good manual on how to do this can be found here:
http://cryptovpn.blogspot.com/2013/02/windows-2.html
Everything works now. You and your traffic are reliably protected.
In the next part of the article, I will analyze the moments of setting up the system.
Sorry that screenshots from different versions of windows, wrote this article on different laptops!
P.S. They ask what kind of vpn - I answer: https://my.cryptovpn.com
In today's article:
1) Creation of a cryptocontainer
2) Installing vitrualbox + windows 7 eng on an encrypted container
3) Protection against data leaks and traffic
4) Software required for work.
Let's get started!
1) Setting up and creating a cryptocontainer
Download veracrypt from the official site.
https://veracrypt.codeplex.com/releases/view/631440
Creating a VeraCrypt volume
Step 1 - creating the volume
Launch VeraCrypt and click Create Volume.
Step 2.- Choose the volume type
In the window of the volume creation wizard, you should select what type of volume you want to create. VeraCrypt can place an encrypted volume in a file, in a disk partition, or on an entire disk. In this case, we choose the second item, since we need to encrypt a non-system partition / disk.
Select the second item and click Next
Step 3 - regular or hidden volume
At this step, you need to choose what type of volume to create, standard or hidden. Hidden volumes are discussed in the "VeraCrypt Advanced Features" article - not yet published.
Select VeraCrypt Regular Volume and click Next
Step 4 - Placing the Volume
You must select a disk or partition that will be used as an encrypted container for storing data.
To continue, click Select Device, a dialog for selecting a partition or disk will open in which you need to select a disk or partition for encryption.
In this case, we have selected the only partition (\ Device \ Harddisk2 \ Partition1), which takes up all the free space on Removable Disk 2
Please note that if you select an existing partition on the disk and it contains files, at the sixth step you will have the opportunity to choose to delete this data or encrypt along with the partition.
If you want to encrypt the entire device, and not a separate disk partition, you need to delete the existing partitions on the disk, for example, using the Windows Disk Management tool, and all data on the device will be lost.
After you have selected a disk or partition, click OK
Step 5 - Placing the Volume
On the Volume Creation Wizard, click Next
Step 6 - volume creation mode
If you want to encrypt the selected partition along with all the data it contains, select the Encrypt partition in place item (works only for partitions with the NTFS file system).
We encrypt a partition on a USB flash drive with the FAT file system, the encryption option with all available data will not work in our case. Therefore, we choose to create and format the encrypted volume (ATTENTION! This option will destroy all data on the selected partition)
Remember to click the Next button
Step 6 - Encryption Settings
Choosing encryption and hashing algorithms, if you are not sure which to choose, leave the default AES and SHA-512 as the strongest option
Step 7 - Volume Size
The volume size corresponds to the size of the selected partition, in our case it is 3.77 GB. Remember to click the Next button
Step 8 - Volume Password
This is the most important step, here you need to create a strong password that will be used to access the encrypted data. We recommend that you carefully read the recommendations of the developers in the Create Volume Wizard window on how to choose a good password.
In addition to the password or separately, you can use a key file - create or select an existing one. It is not necessary to use a key file, but using it will further increase the security of your data. At the same time, it is important to take care of a backup copy of the file, since if it is lost or damaged, you will not be able to access the data in the container.
After you select a strong password and / or key file, click the Next button
Step 9 - Formatting the Volume
To store files larger than 4 Gigabytes in an encrypted partition, select the NTFS file system , for small partitions (as in our case) it is better to use FAT or exFAT.
Move the mouse pointer randomly within the volume creation wizard window, at least until the indicator turns green, the longer you move the mouse, the better. This allows you to significantly strengthen the cryptographic strength of the encryption key. Then click Format .
Answer affirmatively in the dialogue, all data will be destroyed if such appears, and you agree with this.
Formatting will start, depending on the size of the partition and the speed of your computer, it may take some time.
After the partition is formatted, carefully read the warning about using the old drive letter, always follow these recommendations.
Click OK You will see the following message.
Step 9 - The volume is created
We have just successfully encrypted the Device \ Harddisk2 \ Partition1 partition on the USB stick.
Click Exit, the wizard should close
Next, the newly created volume must be mounted, after which it can be used for its intended purpose - for safe storage of data.
Mount VeraCrypt volume
Step 10 - Selecting a Drive Letter and Device
In the main window of the program, select the desired drive letter (in our case, it is K ) and click the Select Device button .
Step 11 - Selecting an Encrypted Partition
In the dialog that opens, select the encrypted partition that you used in the previous steps (in our case, it is Device \ Harddisk2 \ Partition1 ), after which you will return to the main program window.
Step 12 - Mount the encrypted partition
Click the Mount button, after which a dialog for entering a password and / or selecting a key file will appear.
Step 13 - entering password and / or key file
Enter the password and / or key file that you specified in step 8 and click OK
Step 14 - the last step
Successfully installed for Have for We the encrypted partition as with the with the a local drive the the the K.
Drive K is fully encrypted (including filenames, partition table, free space). You can work with this disk in the same way as with any other disk in the system, copy, save, move files. As soon as you place a file on this disk, it is immediately encrypted on the fly
After you place the files on the encrypted disk, it is important to permanently delete the originals using any program to permanently erase the files.
Please note that VeraCrypt never saves decrypted data to disk - when you work with an encrypted container, it is always encrypted, and files are decrypted on the fly and stored in RAM. This ensures that in the event of a sudden power outage or reboot, all files in the container remain encrypted. If you need to access them again, you will need to repeat steps 10 through 13.
If you need to restart the operating system, remove the USB flash drive or remove the K drive to stop accessing the container, do the following.
In the main window of the program, select the appropriate drive letter and click Dismount
P.S. I hope the information was useful and you have securely encrypted your data, but do not forget to take care of the security of your connection and use a VPN. More on that later.
2) Installing virtualbox + windows 7 eng on a cryptocontainer.
Step one
Downloading VirtualBox from the official site
https://www.virtualbox.org/wiki/Downloads
We install it on the connected cryptocontainer. For convenience, you can create a Program files folder there.
We launch. Click new. Enter the name and click next
We choose windows 7 64 bit and the optimal video memory size. I recommend setting 2-4GB. Then click create
We set the size of the virtual hard disk based on the size of the created cryptocontainer. Click create
We see this picture. Click start
Click on the icon and select the iso image of our Windows
Click start and install it as a normal Windows.
This completes the virtualbox setup. I do not recommend installing guest extensions. If the Internet does not work on the virtual machine, then in the settings in the network tab, change the NAT to Bridged adapter
3) Configuring vpn from traffic leaks.
Personally, I use one vpn provider known in narrow circles, I will not advertise, who needs to figure out how to find them.
We will configure it through openvpn and through the service client. I like the client more, because there is a function to block all connections that do not go through vpn.
OpenVPN setup
Download the client from the official website.
https://openvpn.net/index.php/download/community-downloads.html
We set. Don't launch it yet.
Downloading configs from the vpn provider. In my case it looks like this
Launch Openvpn. In the tray, click Import file
We select the config. I have it for example double vpn Canada-Australia
If everything is ok, then we see such a message.
Go to the tray, right-click on openvpn and click connect
We fill in the authorization data. And click OK
If the connection was successful, we see something like this
We go to whoer and see that it does not define us as a proxy or anonymizer.
It's time to disable webtrc, configure the mozilla and configure the firewall.
Go to the address bar, enter about: config
We are looking for and setting the following parameters:
browser.display.use_document_fonts; 0 - to hide additional fonts used in the system;
browser.privatebrowsing.autostart; true - private browsing is enabled by default;
browser.formfill.enable; false - disable autocomplete
browser.cache.offline.enable; false - block offline caching
browser.cache.disk.enable; false - disable caching to disk
browser.cache.disk_cache_ssl; false - do not cache certificates
privacy.resistFingerprinting; true - enable built-in anti-fingerprinting mechanisms of the browser
canvas.focusring.enabled; false
canvas.path.enabled; false
canvas.filters.enabled; false
canvas.customfocusring.enabled; false
canvas.capturestream.enabled; false - to disable Canvas HTML;
font.name.monospace.x-western; Times New Roman - font options have been corrected so that the browser cannot be identified by the specific fonts used.
dom.event.clipboardevents.enabled; false - disable transmission of keyboard events.
security.ssl3.rsa_des_ede3_sha; false - prohibit weak encryption algorithms
security.ssl.require_safe_negotiation; true - requires secure data transfer
security.tls.version.min; 3 - prohibit the use of old versions of TLS
geo.enabled; false
network.cookie.lifetimePolicy; 2 - clear cookies every time the browser is turned off.
media.peerconnection.enabled; false - disable the hated WebRTC support. A technology created for Peer-2-Peer to transfer data in a browser (streaming video, voice, etc.), which entails disclosing the parameters of a local network (internal IP, DNS).
Completely disable telemetry by entering telemetry in the search and set all parameters that take the value true / false to false.
Further in the settings
We change the default search in order to avoid leakage of search queries and addresses we address
In the security settings, we require you to warn when a site tries to install an add-on, block sites suspected of attacks (in some cases, you need to disable this option to visit resources related to exploits, etc.). We also disable saving passwords.
DRM content playback has been disabled
Tracking is disabled,
Pop-ups are blocked
Used plugins:
AdBlock Plus - for blocking advertisements and other banners.
NoScript - to disable JavaScript and Flash by default. Execution of scripts is allowed temporarily or permanently for a specific site.
UserAgent Switcher - to use an arbitrary User-Agent.
Now let's configure Windows Firewall to prevent traffic leaks if the VPN tunnel is broken or bypassed. As an example, I'm considering connecting via OpenVPN, but you can use your preferred client by choosing it when creating an application rule instead of openvpn.exe (hereinafter in the text).
Let's start by disabling unnecessary services and services.
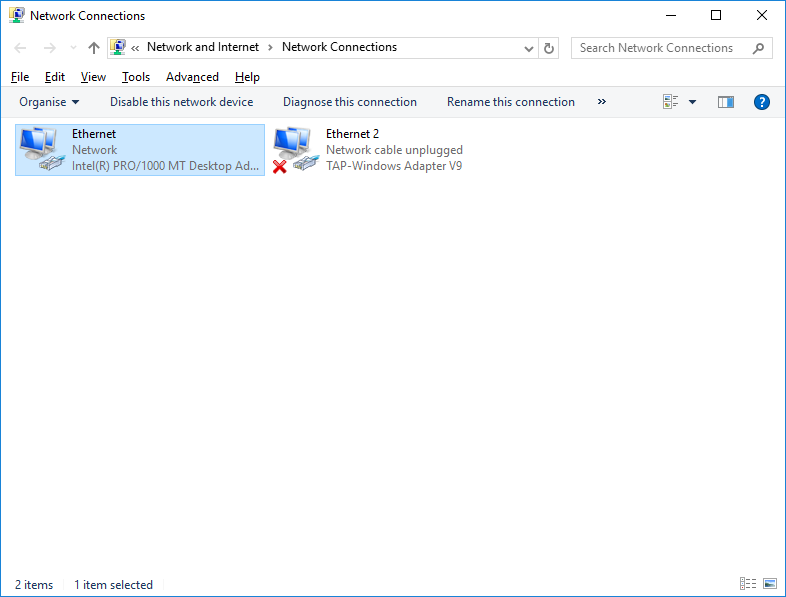
Let's open the adapter settings.
Choosing our main internet connection
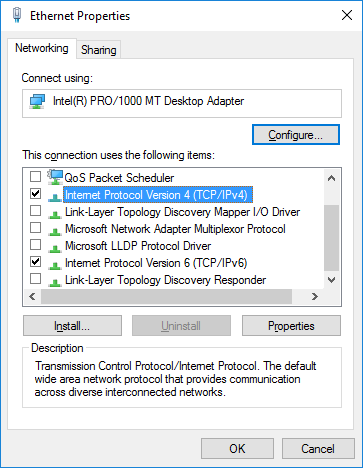
Disable everything except the TCPv4 protocol (and TCPv6 if your ISP supports this protocol and you use its capabilities, otherwise, be sure to disable it)
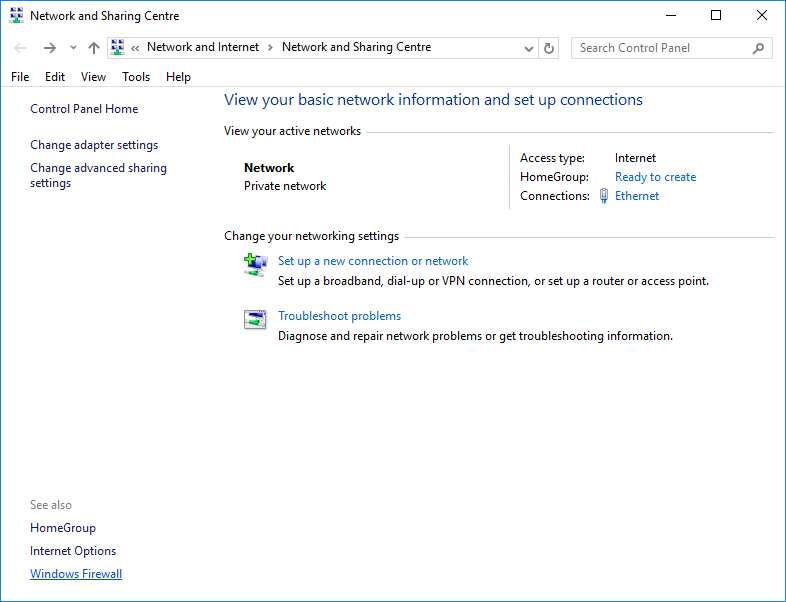
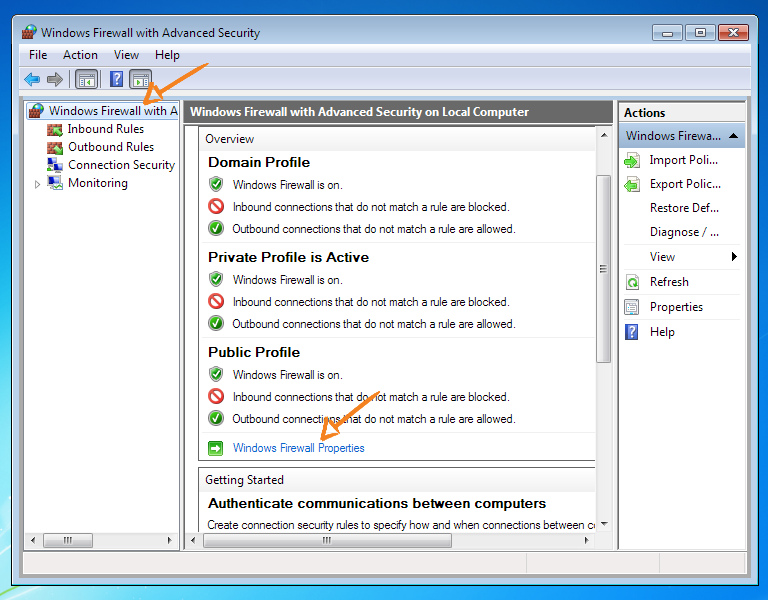
Click "OK" and return to the settings for network connections. We select "Windows Firewall".
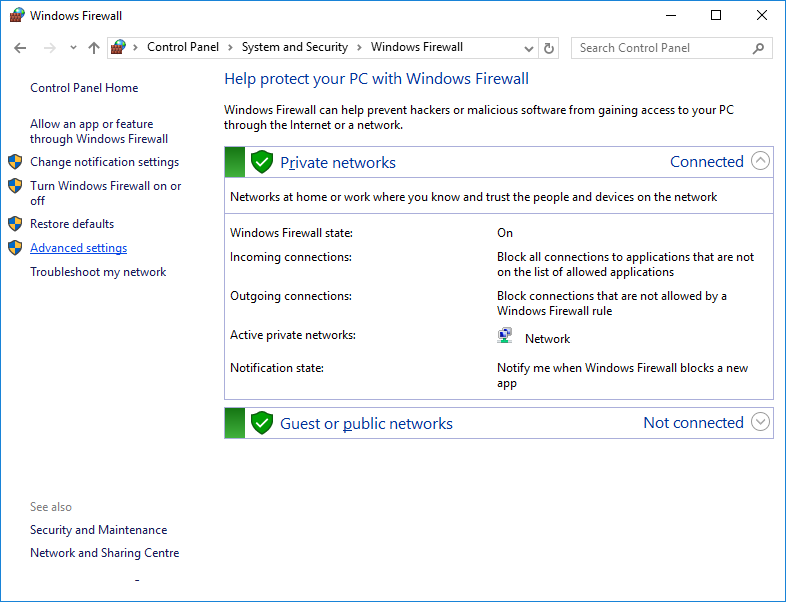
Open "Advanced settings"
We create a new rule for outgoing connections. We only allow OpenVPN.
If you are using another client, then it is at this step that you should select it instead of openvpn.exe
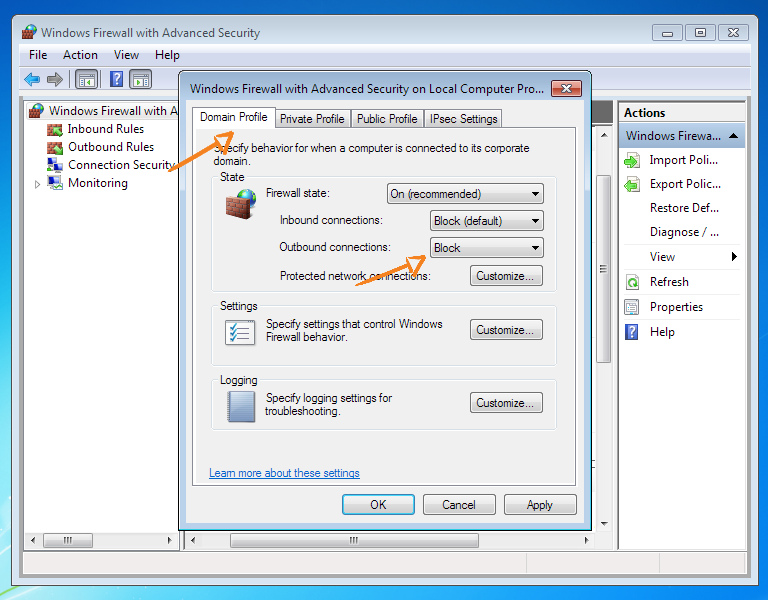
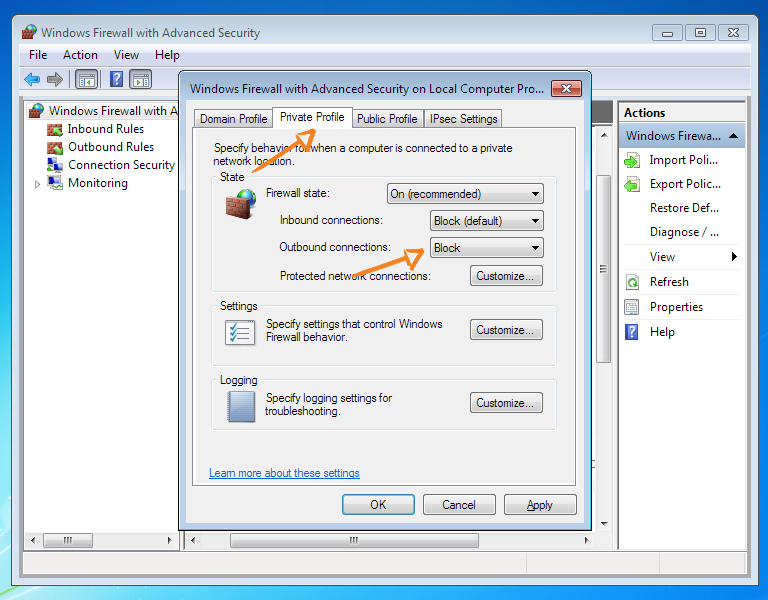
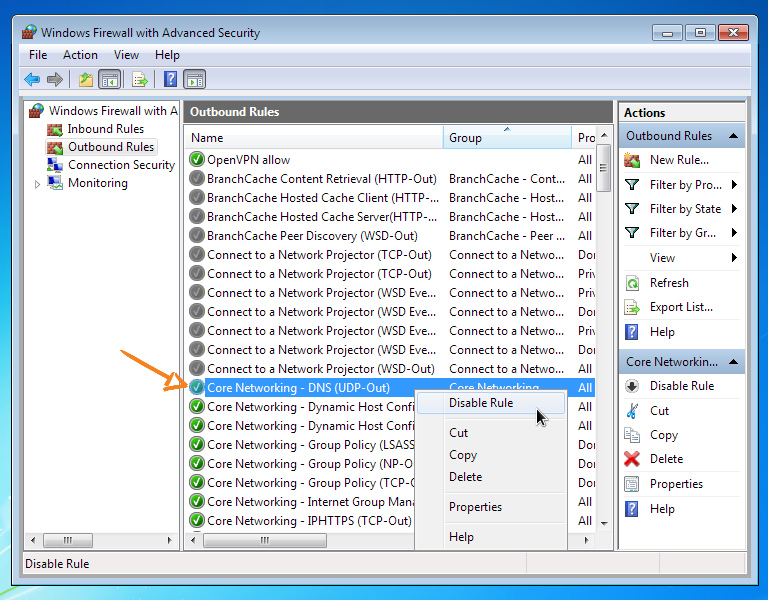
Now we will block all other connections to prevent leaks in the event of a VPN tunnel disconnection or errors in the route configuration.
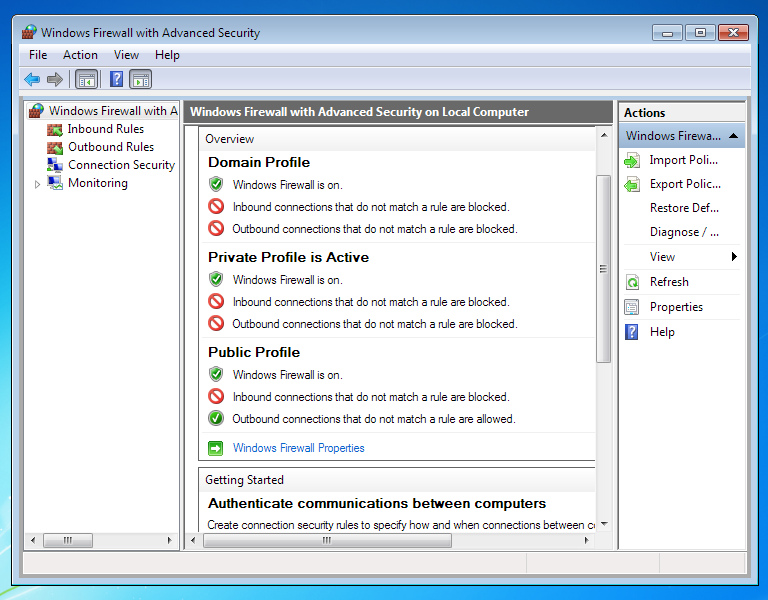
Block all traffic directions (inbound and outbound) for all profiles except Public.
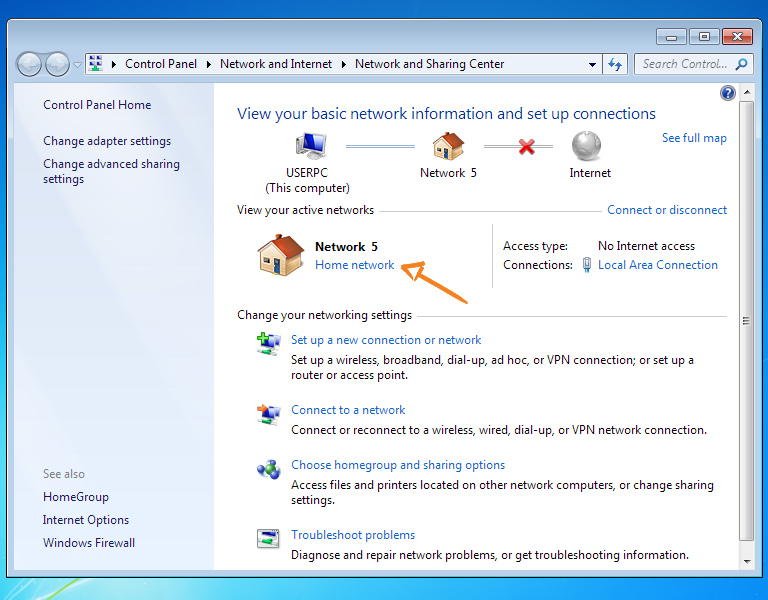
Make sure your primary internet connection has a Home or Work profile
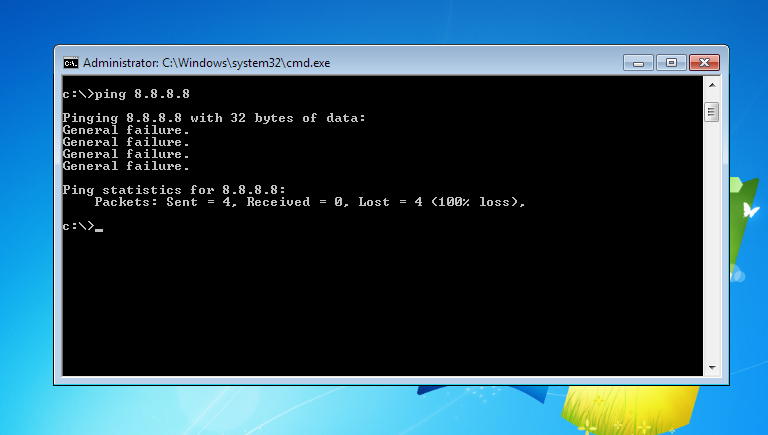
To check that everything is configured correctly, turn off the VPN and try to PING a known DNS server
If the ping fails, everything is configured correctly, otherwise, repeat all the steps from the very beginning.
For even greater security, you can deny all outgoing DNS traffic, but keep in mind that in this case the VPN will only work with servers over IP, and domain names will not be available.
Above was presented the basic configuration of a secure VPN connection. If you want to experiment, you can change the rules, but only in the direction of tightening the security policy (that is, blocking additional traffic directions, etc.), but in no case allowing those already blocked. The network operability after additional changes should be checked separately for a specific system and tasks to be solved.
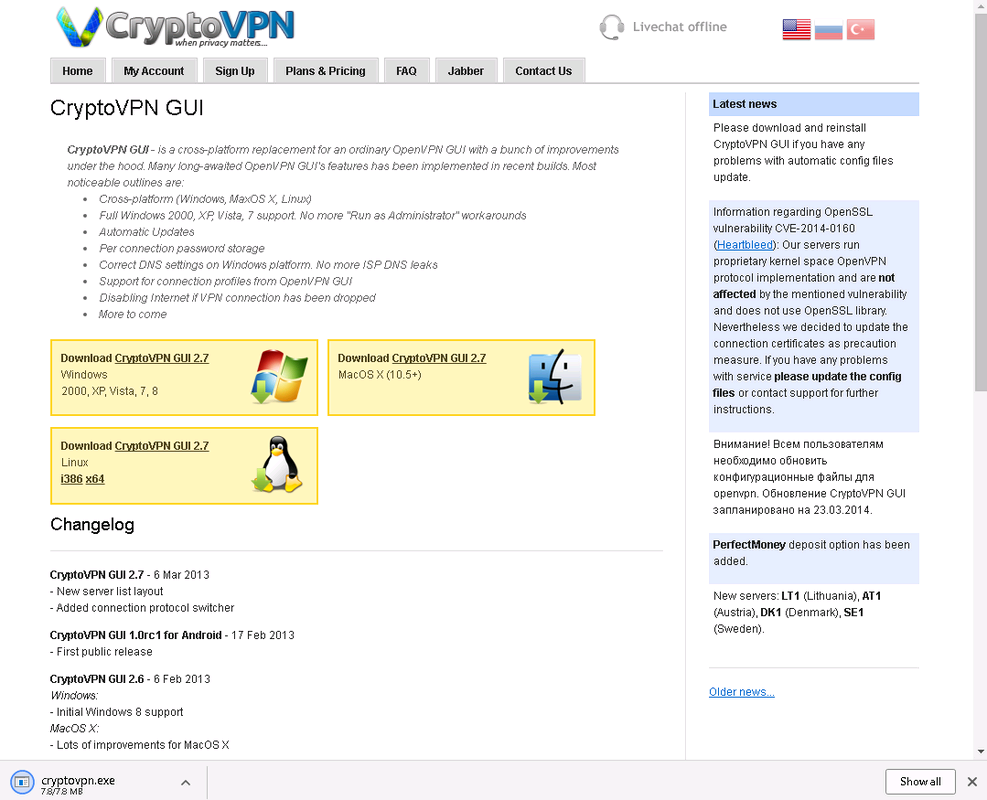
Also, for additional security, you can use the function of blocking traffic bypassing the VPN, using a regular crypto client based on openvpn. Personally, I find it more convenient to work with it than tossing configs into the ovenvpn every time.
The setup is very simple. Download from the site, install, run.
We agree with the updates, click next. Next, go to the tray and select settings
Check the box Block internet access without VPN connection. Click ok.
Also check the Run on system startup checkbox
Then again ok on the main settings tab.
Next, select the client in the tray again and click CryptoVPN GUI
This window will open. We choose a country or a bunch of countries. Click connect
Enter authorization data and click connect.
If such a message pops up (usually at the first start)
We do it as in the screenshot. Start-All Programs - windows tap - Add a new TAP-Windows virtual ethernet adapter.
Such a window will pop up. We are waiting for the message "Press any key to continue" to appear, press any button and reconnect to the VPN.
Of course, you cannot completely trust the blocking of traffic through the software, tk. there may be different situations when it can work out incorrectly. Therefore, it is advisable to use it only in conjunction with a full-fledged firewall. If you do not like windows firewall, you can use any third party, for example Comodo.
A good manual on how to do this can be found here:
http://cryptovpn.blogspot.com/2013/02/windows-2.html
Everything works now. You and your traffic are reliably protected.
In the next part of the article, I will analyze the moments of setting up the system.
Sorry that screenshots from different versions of windows, wrote this article on different laptops!
P.S. They ask what kind of vpn - I answer: https://my.cryptovpn.com
Last edited by a moderator: