Brother
Professional
- Messages
- 2,590
- Reaction score
- 518
- Points
- 83
In everyday life, the default gateway is specified in the network settings of your computer. Most often, the gateway device is called a "router" or "router" - all requests for IP addresses that are not part of your local network go through it. A proxy server (from the English "authorized" or "trusted") also acts as an intermediary between you and the target network resource, but it is not a default gateway, that is, to use it in the application, you must explicitly specify the appropriate parameters. The simplest example is access to the I2P or Tor network. All the internal logic of these networks is provided by a separate application that provides the user with a proxy interface to connect. By specifying the required proxy in the web browser settings, we can visit sites with the domain names ".i2p" and ".onion", which an ordinary router does not even know about. Also, proxy services are gaining popularity for bypassing locks: you have registered some proxy from a liberal country in the browser settings and open any sites without knowing the spiritually insane insanity.
Modern proxy servers have comprehensive functionality for controlling and monitoring traffic - a good solution for offices and government agencies in which you need to fence employees from unwanted resources, as well as provide Internet access with additional authorization and different bandwidth for different users.
Regardless of your proxy use case, using the default gateway is more convenient in most cases. If only because some applications do not know how to work through a proxy.

The essence of Tun2Socks work is to create a virtual network adapter, which the operating system will perceive as a normal network interface. All information received on such a virtual adapter will actually be transferred inside Tun2Socks, which will provide the necessary logic for further information transfer to the proxy server.
Information about using the utility at startup with the parameter --help:
Everything may seem clear at first glance only to a seasoned administrator, or to someone who really did not understand anything. On practical acquaintance with Tun2Socks, the question arises: if a virtual network adapter is created in the system, then how will it become the default gateway and whether it is necessary to manually set an address for it. Documentation comes to the rescue.
It makes no sense to duplicate here the official description of the project and all the documentation, so let's move on to the essence - to the practical configuration of the gateway with an explanation of each step.
After downloading, unzip the archive to any convenient location.
Tun2Socks creates a virtual network adapter, but the driver for this (Wintun) needs to be downloaded separately. Here is a direct download link for Wintun 0.11 version. I recommend this particular version, because Tun2Socks v2.3.1 refused to work with newer versions in my case. If desired, the latest driver release can be found on the official page. You only need one file from the entire archive wintun.dll, which must be taken from the correct directory, depending on your operating system. A case of the A A A with with with with In architecture amd64, the path to the required library is as with the with the with the with the FOLLOWS: wintun/bin/amd64/wintun.dll. Place a suitable file wintun.dll in the directory where the Tun2Socks executable is located.
Tun2Socks is launched with passed values via the command line (the commands below must be executed with administrator rights). The command for a simple launch is as follows:
You can assign an IP address to the interface and specify a subnet mask through the standard Windows graphical interface, but we will use the benefits of the command line:
In the example, the virtual interface is assigned an address 127.254.254.1, but in fact it can be any private address from the subnet, which, firstly, is not used by other network adapters of your operating system, and secondly, it is not used in the local network of your enterprise or at home (otherwise local routing). In most cases, the example address will be the correct value (since the range is 127.0.0.1/8). So, we will assume that the address is assigned to the virtual network interface.
Now we need to tell the operating system a new interface as a gateway:
Attention! If the proxy server is not on a local network with the same subnet as one of the network interfaces of your computer, ie access to the proxy server is carried out through an existing gateway, you must leave access to the proxy server as it was, otherwise the above configuration will not work - you must agree that an attempt to connect to the proxy server through the proxy server itself is absurd. In practice, this means that to connect to the proxy server, you need to add one more route:
route add 10.10.100.0 mask 255.255.255.0 10.10.5.25
The example specifies a routing rule to a subnet 10.10.100.0/24, which should not go through a common gateway (gatewaytun), but through a network interface that has access to a device with an address 10.10.5.25 (which is a gateway to the desired subnet). This rule is true, firstly, if you need to preserve access to the subnet of the local network, which is inaccessible directly and, secondly, and more importantly, if the proxy server itself is located in the given subnet, through which all our traffic will go in the future.
For home use, when there are no local subnets and all that is required is connecting to a proxy server through an ISP, the above command is replaced by this one:
In the example, the address 1.1.1.1 is the address of the DNS server.
The result is the following set of commands:
For most users, manually executing all commands can be inconvenient. Such people can experiment with automated scripts (batch files). For example, enter all the necessary commands in some one start.bat and add it to startup. I'm not strong in body shirts and Windows access rights. As a parting word, I will only note that all commands must be executed with administrator rights. Maybe someone will share a nice script in the comments.
Linux binaries are on the release page, among others. For example, for Debian amd64, the tun2socks-linux-amd64.zip. There is one file inside the archive. After extracting, assign the executable flag ( chmod +x tun2socks-linux-amd64) to it and put it in a convenient place, for example /usr/sbin/. Additional drivers are not required to create a WireGuard tunnel in Linux - modern distributions support the technology at the kernel level.
All of the commands below must be run with superuser rights.
The run command looks like this:
DNS settings in * nix systems are usually global, so there is no need to specify them explicitly for each interface. However, whoever needs it knows not only about /etc/resolv.conf, but also about the possibility of explicitly specifying the DNS server in the config of network connections. We will not dwell on this.
Automation is the second name of any admin. For Debian, I will write a systemd service that will start Tun2Socks and bring up the interface gatewaytun, and in the configuration of this network interface I will indicate the commands that must be executed when it is turned on. If necessary, you can adapt this approach for other operating systems, taking into account their specifics.
Service file, which will lie in /etc/systemd/system/tun2socks.service:
Note the path to Tun2Socks and the proxy server address in the line ExecStart. Change these parameters to suit you. After the ampersand, there is a pause of three seconds, followed by the activation of the new network interface. A pause is set in case of high system load to give time to create the interface before trying to turn it on.
We indicate in the /etc/network/interfaces parameters of the interface and additional instructions for execution after its inclusion. Lines are appended to the end of the file:
Now that everything is ready, you can start and disable the gateway with two simple commands:
If Tun2Socks is needed on a permanent basis, the created service can be added to startup:
To be honest, I did not understand automation on Windows for a long time. It didn't start out of the box and - let it rest. I do not like Windows, sorry. And how to love it, if to execute a command from a bat-file with administrator rights, you need to create a shortcut to this batch file and put a tick in it "Run with administrator rights". Label and check mark, Karl! Moreover, the command for adding a route did not want to work it out anyway.
Modern proxy servers have comprehensive functionality for controlling and monitoring traffic - a good solution for offices and government agencies in which you need to fence employees from unwanted resources, as well as provide Internet access with additional authorization and different bandwidth for different users.
Regardless of your proxy use case, using the default gateway is more convenient in most cases. If only because some applications do not know how to work through a proxy.
Tun2Socks
Tun2Socks is a free cross-platform project (GPL-3.0) written in Golang. The core of the development team is made up of the Chinese. The application does not have a graphical shell and is configured with simple parameters at startup. The name Tun2Socks (Tunnel to SOCKS) is interpreted as "tunnel through a SOCKS proxy". Why SOCKS when there is an HTTP proxy? The answer is simple: Tun2Socks can also work through an HTTP proxy, but the HTTP protocol does not support the transmission of UDP traffic. Most of the information goes through UDP, the delivery of which requires maximum speed (audio and video calls, online games, as well as DNS queries that resolve human-readable names of network resources into IP addresses). Therefore, UDP support should not be underestimated.The essence of Tun2Socks work is to create a virtual network adapter, which the operating system will perceive as a normal network interface. All information received on such a virtual adapter will actually be transferred inside Tun2Socks, which will provide the necessary logic for further information transfer to the proxy server.
Information about using the utility at startup with the parameter --help:
Code:
Usage of tun2socks:
  -device string
     Use this device [driver://]name
  -fwmark int
     Set firewall MARK (Linux only)
  -interface string
     Use network INTERFACE (Linux/MacOS only)
  -loglevel string
     Log level [debug|info|warn|error|silent] (default "info")
  -mtu int
     Set device maximum transmission unit (MTU)
  -proxy string
     Use this proxy [protocol://]host[:port]
  -stats string
     HTTP statistic server listen address
  -token string
     HTTP statistic server auth token
  -udp-timeout int
     Set timeout for each UDP session
  -version
     Show version information and quit
Everything may seem clear at first glance only to a seasoned administrator, or to someone who really did not understand anything. On practical acquaintance with Tun2Socks, the question arises: if a virtual network adapter is created in the system, then how will it become the default gateway and whether it is necessary to manually set an address for it. Documentation comes to the rescue.
It makes no sense to duplicate here the official description of the project and all the documentation, so let's move on to the essence - to the practical configuration of the gateway with an explanation of each step.
Windows
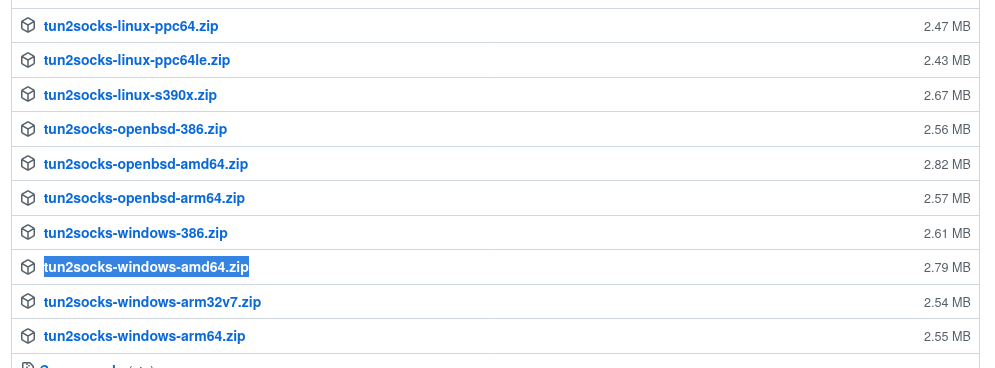
First you need to download the latest version of Tun2Socks. Binaries are distributed on the releases page in the project's official git-repository. Choose one of the packages starting with tun2socks-windows. If you have 64-bit Windows on old hardware, this will probably work for you tun2socks-windows-amd64.zip (since I have never seen ARM architecture on older Windows machines).
After downloading, unzip the archive to any convenient location.
Tun2Socks creates a virtual network adapter, but the driver for this (Wintun) needs to be downloaded separately. Here is a direct download link for Wintun 0.11 version. I recommend this particular version, because Tun2Socks v2.3.1 refused to work with newer versions in my case. If desired, the latest driver release can be found on the official page. You only need one file from the entire archive wintun.dll, which must be taken from the correct directory, depending on your operating system. A case of the A A A with with with with In architecture amd64, the path to the required library is as with the with the with the with the FOLLOWS: wintun/bin/amd64/wintun.dll. Place a suitable file wintun.dll in the directory where the Tun2Socks executable is located.
Tun2Socks is launched with passed values via the command line (the commands below must be executed with administrator rights). The command for a simple launch is as follows:
Code:
tun2socks-windows-amd64.exe -device tun: // gatewaytun -proxy socks5: //10.10.100.1: 1080- tun2socks-windows-amd64.exe is the name of the Tun2Socks executable file;
- -device tun://gatewaytun defines the name of the new virtual network interface (gatewaytun);
- -proxy socks5://10.10.100.1:1080 reports the protocol (in my case it is SOCKS5) and the address of the proxy server.
You can assign an IP address to the interface and specify a subnet mask through the standard Windows graphical interface, but we will use the benefits of the command line:
Code:
netsh interface ip set address name = "gatewaytun" static 127.254.254.1 255.255.255.255In the example, the virtual interface is assigned an address 127.254.254.1, but in fact it can be any private address from the subnet, which, firstly, is not used by other network adapters of your operating system, and secondly, it is not used in the local network of your enterprise or at home (otherwise local routing). In most cases, the example address will be the correct value (since the range is 127.0.0.1/8). So, we will assume that the address is assigned to the virtual network interface.
Now we need to tell the operating system a new interface as a gateway:
Code:
route add 0.0.0.0 mask 0.0.0.0 127.254.254.1Attention! If the proxy server is not on a local network with the same subnet as one of the network interfaces of your computer, ie access to the proxy server is carried out through an existing gateway, you must leave access to the proxy server as it was, otherwise the above configuration will not work - you must agree that an attempt to connect to the proxy server through the proxy server itself is absurd. In practice, this means that to connect to the proxy server, you need to add one more route:
route add 10.10.100.0 mask 255.255.255.0 10.10.5.25
The example specifies a routing rule to a subnet 10.10.100.0/24, which should not go through a common gateway (gatewaytun), but through a network interface that has access to a device with an address 10.10.5.25 (which is a gateway to the desired subnet). This rule is true, firstly, if you need to preserve access to the subnet of the local network, which is inaccessible directly and, secondly, and more importantly, if the proxy server itself is located in the given subnet, through which all our traffic will go in the future.
For home use, when there are no local subnets and all that is required is connecting to a proxy server through an ISP, the above command is replaced by this one:
Code:
route add 11.11.11.11 mask 255.255.255.255 10.10.5.25- 11.11.11.11 - the address of the proxy server on the Internet;
- 255.255.255.255 - mask, meaning that the rule includes only the address of the proxy server;
- 10.10.5.25 - the address of the gateway in the local network, which is provided to you by your Internet provider.
Code:
netsh interface ip set dns "gatewaytun" static 1.1.1.1In the example, the address 1.1.1.1 is the address of the DNS server.
The result is the following set of commands:
Code:
tun2socks-windows-amd64.exe -device tun: // gatewaytun -proxy PROXY_PROXY: // PROXY_SERVER_ADDRESS: PORT
netsh interface ip set address name = "gatewaytun" static 127.254.254.1 255.255.255.255
route add 0.0.0.0 mask 0.0.0.0 127.254.254.1

# Optional. For the local network of the enterprise.
route add LOCAL_NET_SEGMENT mask SEGMENT_MASK OF GATEWAY_ADDRESS_TO_SEGMENT

# Optional. When using a proxy server on the Internet.
route add PROXY_SERVER_ADDRESS mask 255.255.255.255 PROVIDER_GATEWAY_ADDRESS

# Optional. DNS server, if the proxy server can handle UDP.
netsh interface ip set dns "gatewaytun" static DNS_SERVER_ADDRESS
For most users, manually executing all commands can be inconvenient. Such people can experiment with automated scripts (batch files). For example, enter all the necessary commands in some one start.bat and add it to startup. I'm not strong in body shirts and Windows access rights. As a parting word, I will only note that all commands must be executed with administrator rights. Maybe someone will share a nice script in the comments.
Linux
GNU / Linux (and other * nix-systems) users are mostly more competent in command line and system settings, so there will be less explanations in places (especially since the essence of what is happening has already been described in detail a little higher) ... Practical instructions are given using the example of Debian.Linux binaries are on the release page, among others. For example, for Debian amd64, the tun2socks-linux-amd64.zip. There is one file inside the archive. After extracting, assign the executable flag ( chmod +x tun2socks-linux-amd64) to it and put it in a convenient place, for example /usr/sbin/. Additional drivers are not required to create a WireGuard tunnel in Linux - modern distributions support the technology at the kernel level.
All of the commands below must be run with superuser rights.
The run command looks like this:
Code:
/ usr / sbin / tun2socks-linux-amd64 -device tun: // gatewaytun -proxy socks5: //10.10.100.1: 1080- -device tun://gatewaytun defines the name of the new virtual network interface (gatewaytun);
- -proxy socks5://10.10.100.1:1080 reports the protocol (in my case it is SOCKS5) and the address of the proxy server.
Code:
# Assign an address to the new interface
ip addr add 127.254.254.1/32 dev gatewaytun

# Turn on the interface
ip link set gatewaytun up

# Remove the old default gateway (if any)
ip route del default

# Add a default route via the new interface
ip route add default dev gatewaytun

# Optional. Add a route to the proxy server on the local network
ip route add NETWORK_ADDRESS / PREFIX dev INTERFACE_NAME IN_LOCAL_NETWORK

# Optional. Route to a proxy server on the Internet (most likely for home)
ip route add PROXY_ADDRESS / 32 dev INTERFACE_NAME_IN_PROXY_NETWORK
DNS settings in * nix systems are usually global, so there is no need to specify them explicitly for each interface. However, whoever needs it knows not only about /etc/resolv.conf, but also about the possibility of explicitly specifying the DNS server in the config of network connections. We will not dwell on this.
Automation is the second name of any admin. For Debian, I will write a systemd service that will start Tun2Socks and bring up the interface gatewaytun, and in the configuration of this network interface I will indicate the commands that must be executed when it is turned on. If necessary, you can adapt this approach for other operating systems, taking into account their specifics.
Service file, which will lie in /etc/systemd/system/tun2socks.service:
Code:
[Unit]
Description=Tun2Socks gateway
After=network.target

[Service]
User=root
Type=idle
ExecStart=/usr/sbin/tun2socks-linux-amd64 -device tun://gatewaytun -proxy socks5://10.10.100.1:1080 & sleep 3; ip link set gatewaytun up
Restart=on-failure

[Install]
WantedBy=multi-user.target
Note the path to Tun2Socks and the proxy server address in the line ExecStart. Change these parameters to suit you. After the ampersand, there is a pause of three seconds, followed by the activation of the new network interface. A pause is set in case of high system load to give time to create the interface before trying to turn it on.
We indicate in the /etc/network/interfaces parameters of the interface and additional instructions for execution after its inclusion. Lines are appended to the end of the file:
Code:
allow-hotplug gatewaytun
iface gatewaytun inet static
address 127.254.254.0
netmask 255.255.255.255
post-up ip route del default
post-up ip route add default dev gatewaytun

# Optional. Add a route to the proxy server on the local network
# post-up ip route add NETWORK_ADDRESS / PREFIX dev_INTERFACE_NAME IN_LOCAL_NETWORK

# Optional. Route to a proxy server on the Internet (most likely for home)
# post-up ip route add PROXY_ADDRESS / 32 dev INTERFACE_NAME_IN_PROXY_NETWORK

# post-up <other rules executed when the interface is turned on (if necessary)>
Now that everything is ready, you can start and disable the gateway with two simple commands:
Code:
systemctl start tun2socks # START
systemctl stop tun2socks # STOP
If Tun2Socks is needed on a permanent basis, the created service can be added to startup:
Code:
systemctl enable tun2socksAfterword
The motive for the article was the lack of adequate search results for queries like "gateway through a proxy", "how to send all traffic through a proxy" and the like. I think the material will be useful to the widest audience.To be honest, I did not understand automation on Windows for a long time. It didn't start out of the box and - let it rest. I do not like Windows, sorry. And how to love it, if to execute a command from a bat-file with administrator rights, you need to create a shortcut to this batch file and put a tick in it "Run with administrator rights". Label and check mark, Karl! Moreover, the command for adding a route did not want to work it out anyway.