Carder
Professional
- Messages
- 2,620
- Reaction score
- 2,043
- Points
- 113
In addition to updating your system and installing new drivers, you can improve the Windows 10 experience by using various settings. They will help to optimize the OS, making it more user-friendly.
Want to keep your PC performing well while blocking unwanted programs from running in the background? In this article, we'll talk with you about which Windows 10 settings should be changed to optimize your operating system and make it more efficient.
Windows 10 uses the service "Optimizing the delivery of updates for Windows 10," to send updates to PC users. It is a peer-to-peer delivery system where updates that have already been downloaded to your computer can be sent immediately to another PC to save bandwidth. The service was designed in principle to help Microsoft conserve Internet bandwidth. However, if you do not want your system to freeze or slow down running programs while doing important work, you can disable this function:
Even when we had 8GB of RAM on our computer, we missed that as our SSD's swap file was too small. Because of this, you always had to manually adjust the paging file size after reinstalling Windows.
If you are running low on RAM on your PC or laptop (8GB or less), we recommend increasing the paging file size. This will help to properly reorganize and allocate RAM, which will ensure the smooth operation of your device.
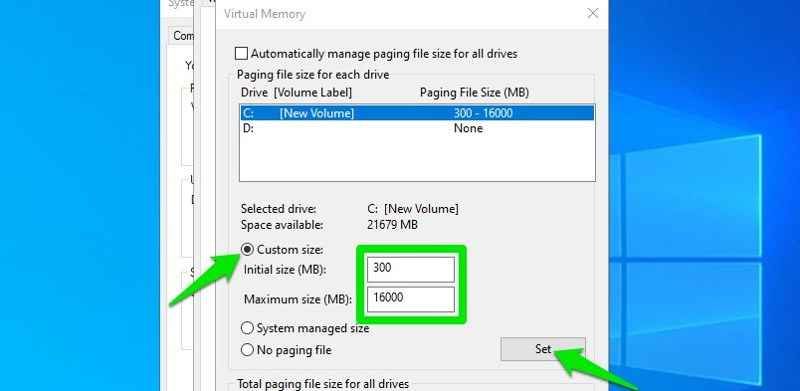
Note: The paging file will occupy the amount of memory you choose on the computer. Make sure you have enough storage space.
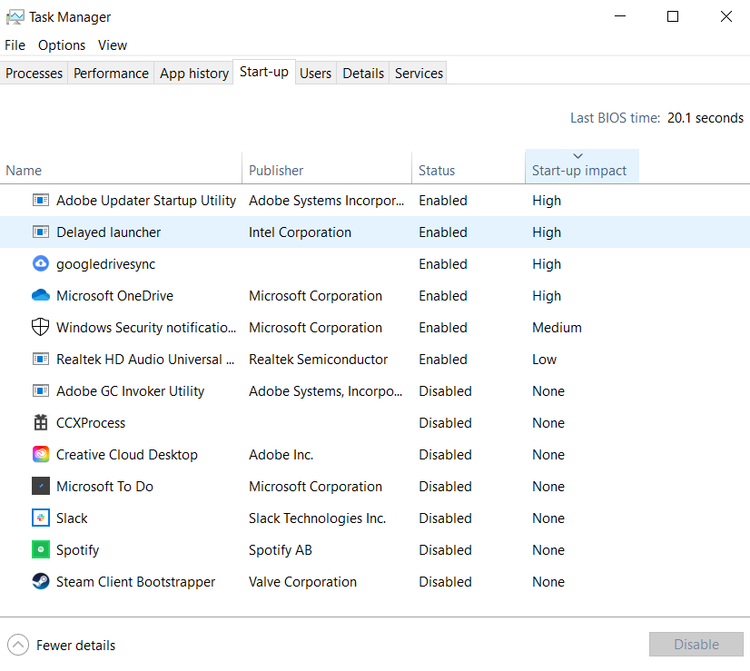
You should disable any unnecessary applications and services that start at login to ensure that your computer's resources are not wasted.
You will see a list of all applications that open immediately after Windows starts. You will need to find those applications that you do not use immediately after logging in, and disable their autoload. To disable the startup of a specific application, right-click on it and click on the "Disable" button.
Make sure you haven't disabled any applications related to Windows itself or maintenance of installed hardware, such as a video card. On the contrary, these programs help the system to run faster and less often to fail or errors.
To do this, press the Windows Key + R keyboard shortcut. This will open the "Run" window, in it - enter "msconfig" to go to the system parameters.
Now go to the Services tab and check the box next to Don't show Microsoft services. This will hide all system services. Just uncheck the box next to the service you want to disable and click the Apply button to accept the changes.
Keeping control of all Windows services and programs that violate your privacy, or uninstalling apps you don't want to use, is no easy task. Most of them are very difficult to disable - for that you need to change the system registry settings. However, don't worry, we know software that is great for controlling all of your Windows privacy settings.
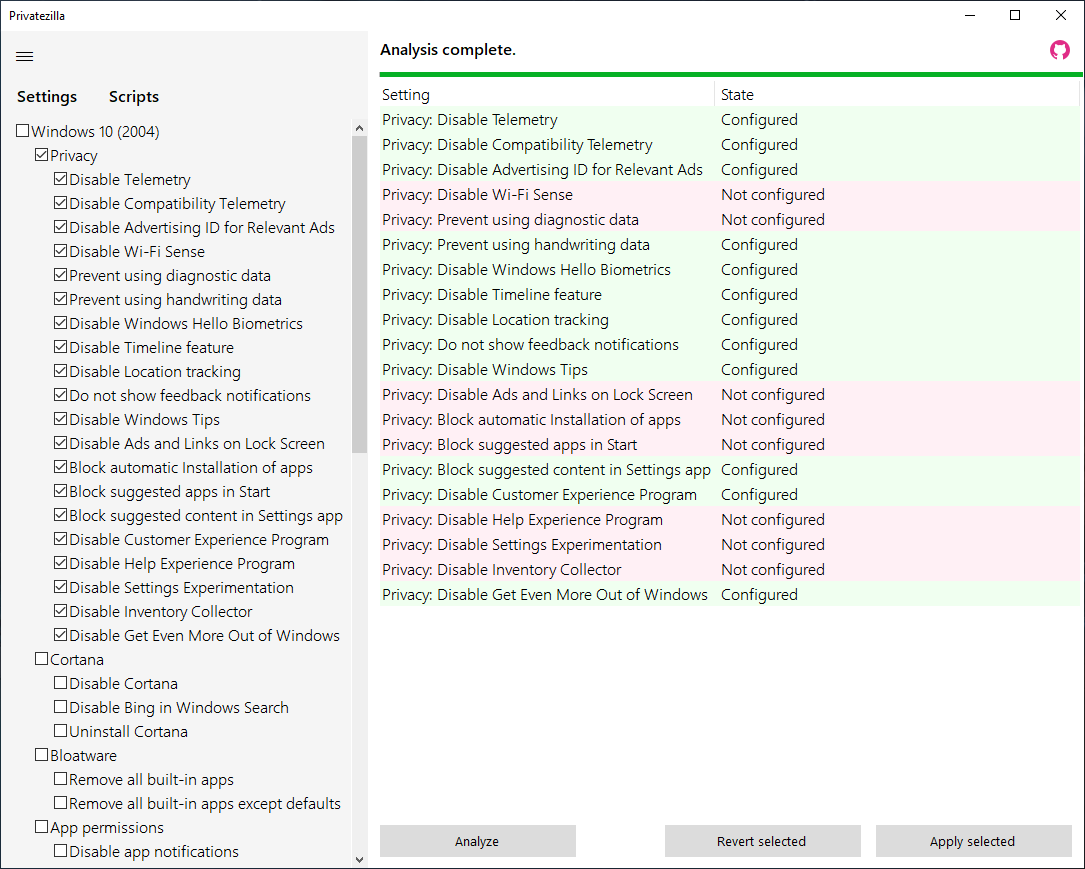
W10Privacy is a completely free app for managing all Windows 10 apps and services in one place. It ensures that only data that you authorize to share is shared. Moreover, the program has a bunch of settings that will help improve the speed of Windows. Install the application and run it as administrator by right-clicking on its shortcut and choosing Run as administrator.
The application has several sections with corresponding settings and color coding. You can hover your mouse cursor over any parameter to open its full description and understand how it affects the performance of your system as a whole.
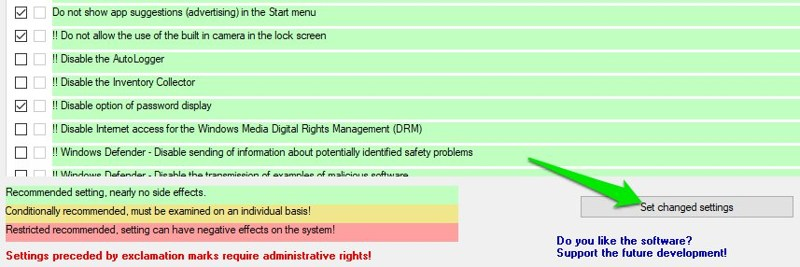
Check the box for the options you want to change, and then click on the " Set new settings " button in the lower right corner to apply them. The W10Privacy app will be restarted for the changes to take effect. You can always uncheck the box next to a certain parameter to cancel its effect.
If you don't like doing things by hand, you can try Avira System Speedup to optimize your Windows for maximum system performance.
Conclusion
By using the tips above, you can dramatically improve the performance of your Windows 10. Be careful and only change the settings you are sure of. Optimizing your system will help improve your user experience and make it easier for you to tackle difficult work and school assignments.
Want to keep your PC performing well while blocking unwanted programs from running in the background? In this article, we'll talk with you about which Windows 10 settings should be changed to optimize your operating system and make it more efficient.
Disable Delivery Optimization
We don't like Windows 10 because the system constantly uses the Internet connection either to communicate with Microsoft servers or to download and install updates. This directly affects the performance of your PC, which is very noticeable if you are playing an online game or using a photo editing program. It is not possible to completely disable communication as this process is necessary to keep the system up to date. However, you can prevent Windows 10 from using your internet connection to update other PCs you don't know.Windows 10 uses the service "Optimizing the delivery of updates for Windows 10," to send updates to PC users. It is a peer-to-peer delivery system where updates that have already been downloaded to your computer can be sent immediately to another PC to save bandwidth. The service was designed in principle to help Microsoft conserve Internet bandwidth. However, if you do not want your system to freeze or slow down running programs while doing important work, you can disable this function:
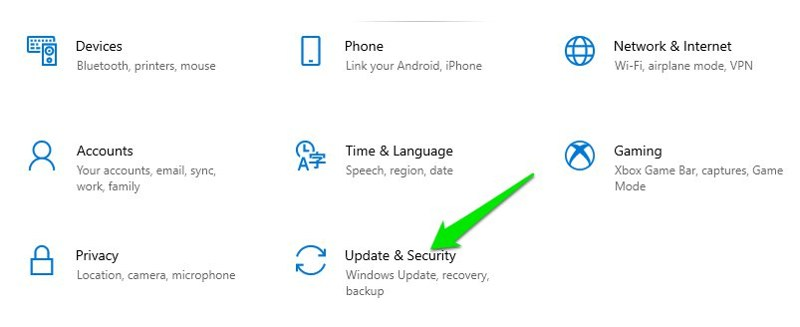
- Open Windows 10 Settings by right-clicking on the Start Menu. In the window that appears, go to the "Update and Security" section.
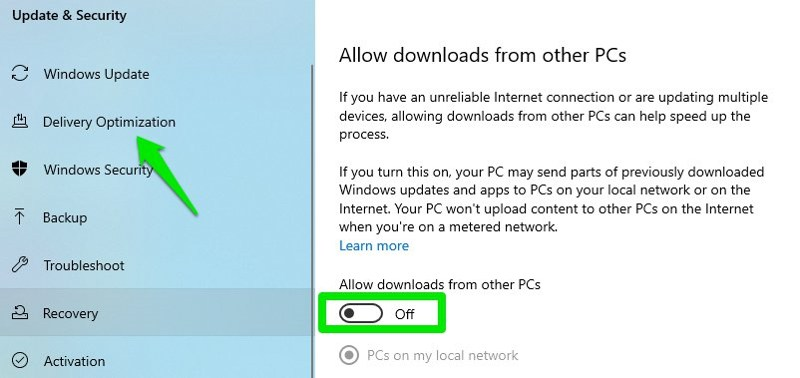
- Now click on the "Delivery Optimization" subsection on the left and disable the service by unchecking the "Allow downloads from other computers" option.
Changing the settings in the "Power supply" section
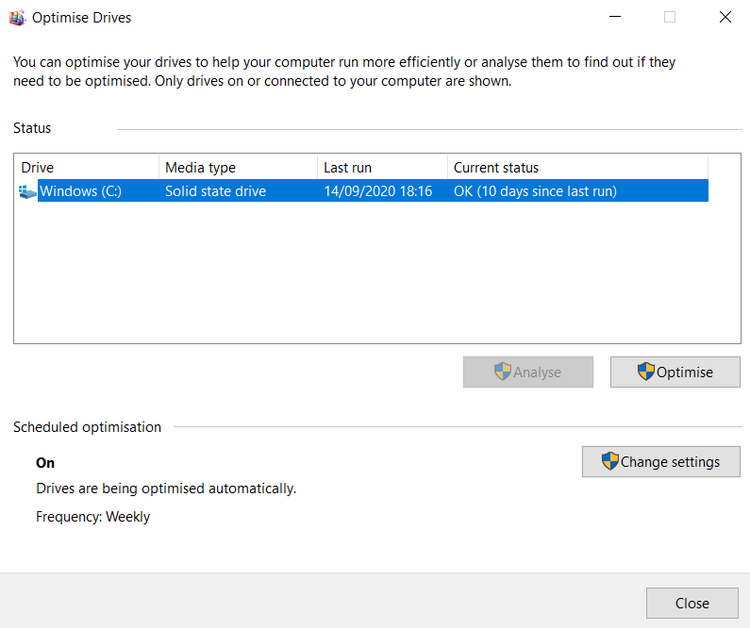
The correct Windows power mode is essential for your system to run quickly, especially if you are using a laptop. However, we recommend that each user configure their preferred power plan to ensure that their computer is optimized for their needs. Windows 10 may already have tweaked power plans to improve your system's performance or save energy. It is worth noting that the default settings are usually far from the ideal you want, so they should be changed.Configuring Windows paging file options
The paging file is the space on your computer's disk for storing passive processes in the form of a cache to free up additional RAM. This file allows your computer to process processes that require more memory than you have. While Windows 10 does a fine job of setting the paging file by default, you should adapt its size based on your needs.Even when we had 8GB of RAM on our computer, we missed that as our SSD's swap file was too small. Because of this, you always had to manually adjust the paging file size after reinstalling Windows.
If you are running low on RAM on your PC or laptop (8GB or less), we recommend increasing the paging file size. This will help to properly reorganize and allocate RAM, which will ensure the smooth operation of your device.
- Press the Windows + Pause keys on your keyboard to open System Options.
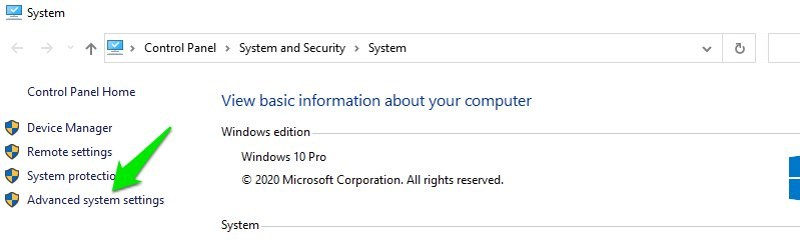
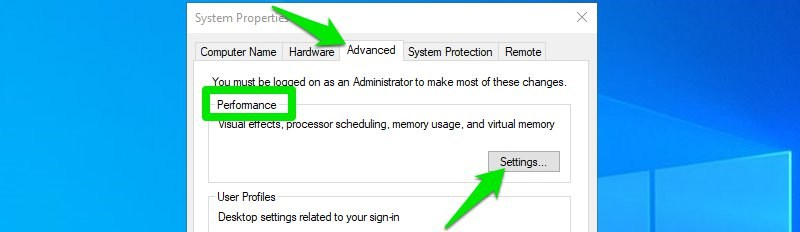
- Then go to the "Advanced system settings" section on the left side of the computer screen.
- In the System Properties window, click on the Settings button in the Performance section.
- Now go to the "Advanced" tab and click on the "Change" button in the "Virtual Memory" section.
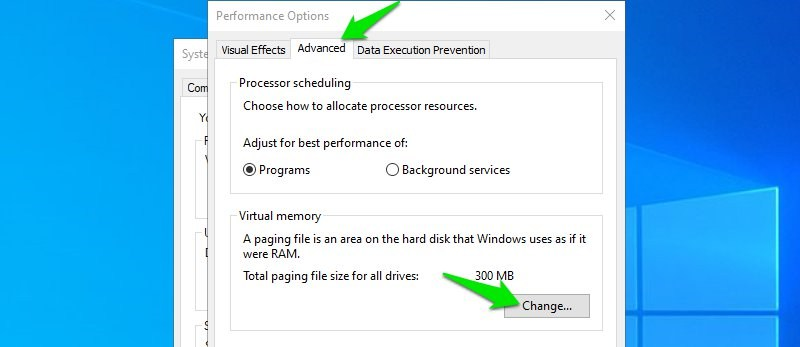
- Here select the "Paging File Size" option and specify the minimum and maximum values you want.
Note: The paging file will occupy the amount of memory you choose on the computer. Make sure you have enough storage space.
Disable launch of certain applications and services during login to Widnows
Many applications appear on your screen right after Windows starts up, even if you don't need them when you start your system. This slows down the OS loading speed and also unnecessarily uses the limited resources of your computer. This problem is often faced by users whose Windows has already been installed on the purchased PC. It is usually teeming with manufacturer-imposed software.You should disable any unnecessary applications and services that start at login to ensure that your computer's resources are not wasted.
Disabling the launch of certain applications
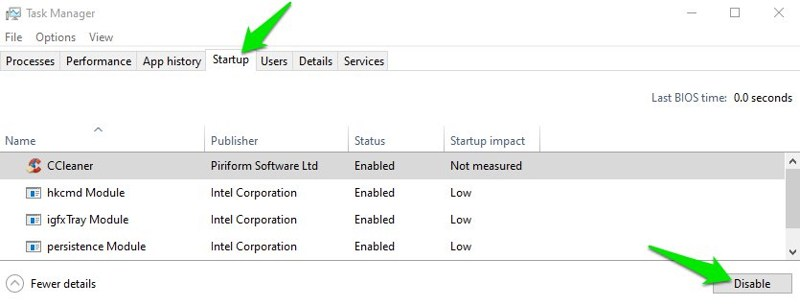
To disable the launch of certain applications, press the key combination "Ctrl + Shift + Esc". This will open the "Task Manager", in this window you should go to the "Startup" tab.You will see a list of all applications that open immediately after Windows starts. You will need to find those applications that you do not use immediately after logging in, and disable their autoload. To disable the startup of a specific application, right-click on it and click on the "Disable" button.
Make sure you haven't disabled any applications related to Windows itself or maintenance of installed hardware, such as a video card. On the contrary, these programs help the system to run faster and less often to fail or errors.
Disable starting certain services
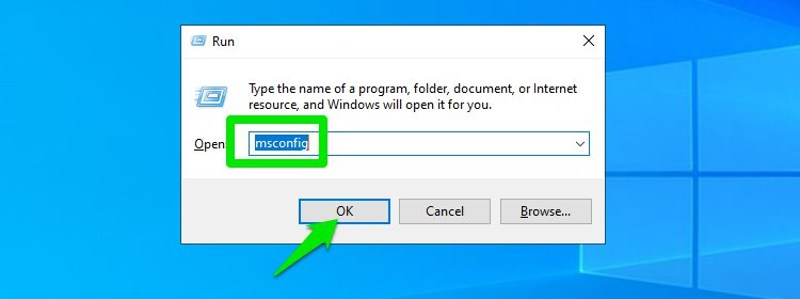
There are also services that run in the background that start with Windows and consume the necessary system resources. You should disable them to keep your PC running smoothly.To do this, press the Windows Key + R keyboard shortcut. This will open the "Run" window, in it - enter "msconfig" to go to the system parameters.
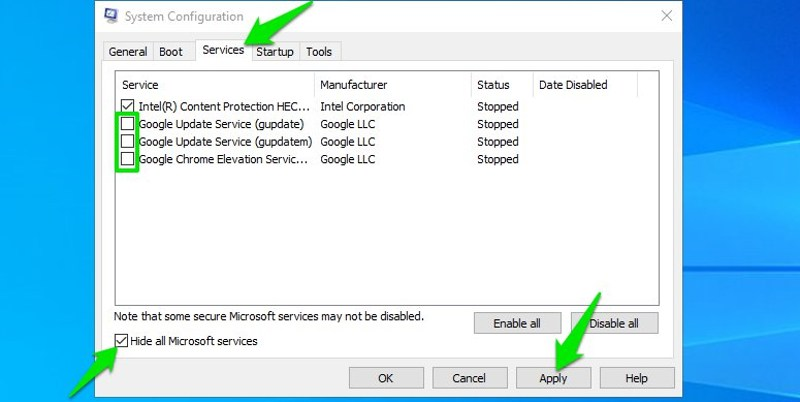
Now go to the Services tab and check the box next to Don't show Microsoft services. This will hide all system services. Just uncheck the box next to the service you want to disable and click the Apply button to accept the changes.
Manage Windows 10 privacy settings and background apps
One of the reasons Windows 7 is better than Windows 10 is because there aren't many apps and services on this system that violate user privacy. Windows 10 tries to force you to only use apps from Microsoft. This is mainly the case for the huge number of applications running in the background; they collect information about user actions and consume the computer resources you need.Keeping control of all Windows services and programs that violate your privacy, or uninstalling apps you don't want to use, is no easy task. Most of them are very difficult to disable - for that you need to change the system registry settings. However, don't worry, we know software that is great for controlling all of your Windows privacy settings.
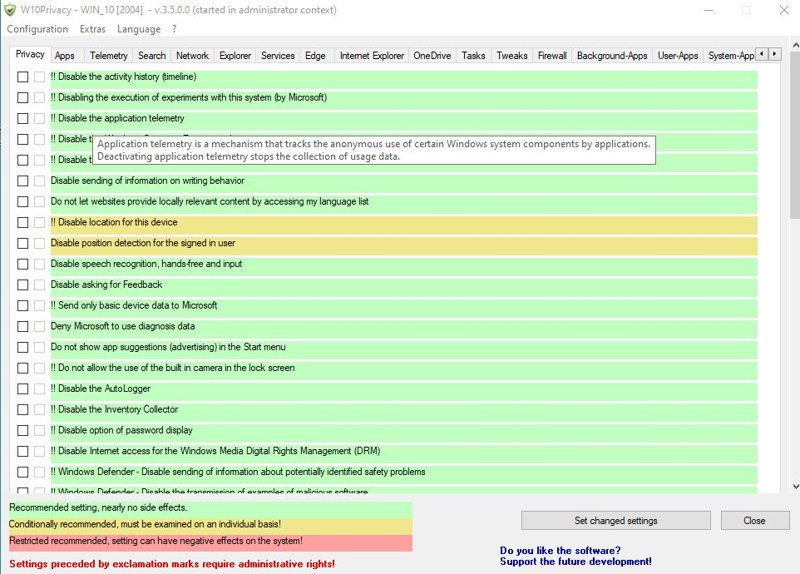
W10Privacy is a completely free app for managing all Windows 10 apps and services in one place. It ensures that only data that you authorize to share is shared. Moreover, the program has a bunch of settings that will help improve the speed of Windows. Install the application and run it as administrator by right-clicking on its shortcut and choosing Run as administrator.
The application has several sections with corresponding settings and color coding. You can hover your mouse cursor over any parameter to open its full description and understand how it affects the performance of your system as a whole.
- Confidentiality. This section contains general privacy controls, such as preventing Microsoft from collecting data about the use of their applications and diagnosing applications.
- Applications. In this section, you can control application access to your hardware or programs. For example, you can prevent applications from accessing your PC's camera or microphone.
- Telemetry. We do not recommend that you change any of the system settings in this section unless you know what they are responsible for. These are settings related to the security policies of the firewall. You can also prevent your computer from sending Windows usage data to Microsoft's servers.
- Search. Here you will find settings that will prevent Microsoft from collecting information about what you are looking for on the Internet.
- Networks. This section provides options for managing the privacy of your Wi-Fi data. For example, you can prevent Windows from sharing information about network connections with other applications.
- Explorer. This section mainly contains settings that help optimize the performance of Windows 10. However, it also includes settings related to system privacy, such as turning off ads in Explorer.
- Service. Here you can disable some Windows services that cannot be removed, such as System Search. Most of them are important for the correct operation of the system, so be extremely careful.
- Edge. In this section, you can change the settings for Microsoft's Microsoft Edge browser. Prevent him from sending data related to your internet activity.
- Internet Explorer. As with Edge, this section contains settings to control how Internet Explorer works.
- OneDrive. In this section, you can prevent OneDrive from storing your personal data and automatically log in when you boot your computer.
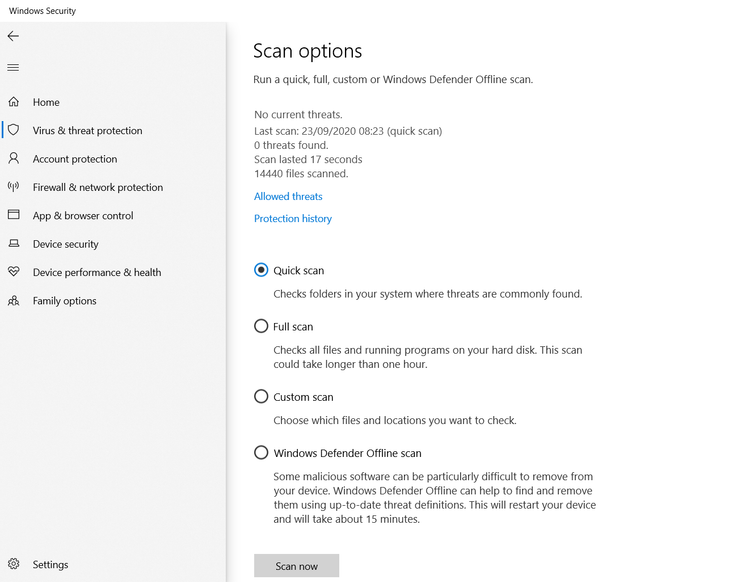
- Tasks. Windows 10 automatically launches many scheduled tasks such as Windows Defender scan and error reporting. In this section, you can change the settings to disable the execution of scheduled tasks.
- Tricks and tricks. This section contains a bunch of settings related to system performance. They will help speed up your Windows 10. For example, you can prevent the system from restarting automatically after an update, or enable automatic closing of applications that are not responding.
- Firewall. Here you can block outbound traffic of many Windows 10 services such as Parental Controls, Biometrics, Xbox.
- Applications running in the background. This section allows you to stop applications running in the background. You can start or disable certain programs based on your requirements.
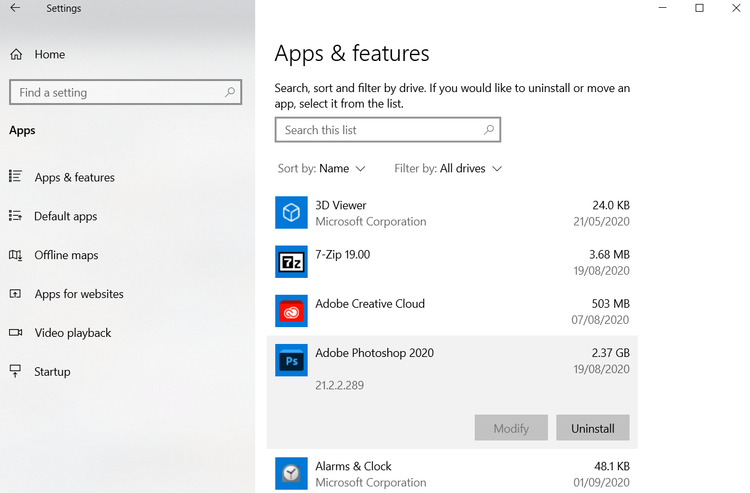
- User applications. Here you will find a list of installed applications that can be removed or reinstalled in a couple of clicks. Most of them are also removed through Windows options.
Check the box for the options you want to change, and then click on the " Set new settings " button in the lower right corner to apply them. The W10Privacy app will be restarted for the changes to take effect. You can always uncheck the box next to a certain parameter to cancel its effect.
If you don't like doing things by hand, you can try Avira System Speedup to optimize your Windows for maximum system performance.
Conclusion
By using the tips above, you can dramatically improve the performance of your Windows 10. Be careful and only change the settings you are sure of. Optimizing your system will help improve your user experience and make it easier for you to tackle difficult work and school assignments.