Nox is an android emulator that will allow us to install a shop / bank / office application and do it in. Why bother with this and why beat from the emulator? In order to reduce the fraud shop, since from mobile applications + if you are logged in via Facebook or a Google account - fraud is much weaker than from a desktop browser.
First of all, download and install NOX on the virtual VirtualBox, then go to the settings.
Click on the gear and in the "main" tab set root rights and change the device language to the language of the country with which we will work.

Then open the "advanced" tab and specify the number of cores and ram for nox to work, as well as select the type of device and screen extension.

Go to the "properties" tab and select the phone model (you can choose the default model or self-defined, where you yourself specify the necessary information), IMEI, and also enter the KX or drop number, since applications burn this information.

After that, you need to select a launcher for the device model that we chose before, this is mandatory, since the default is the NOX launcher and this is pale. After it is installed, click on the "home" button.

We select our launcher, which will be used as the main one.

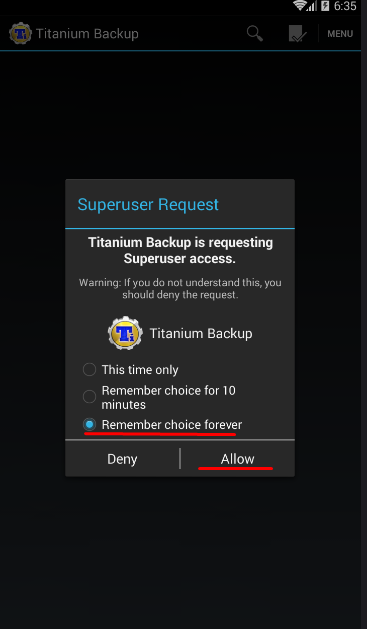
Now we need to download and install Titanium Backup. After starting, a window will pop up where we need to give root rights to this application.
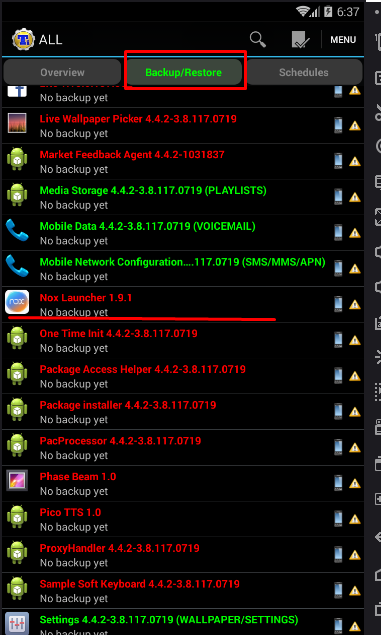
After that, we look for the NOX launcher from the list and delete it, since we do not need it.
Then we search and delete the following google services that are burning our system.
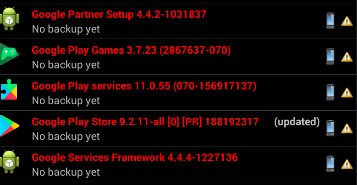
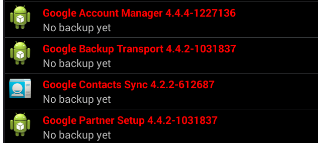
The output should look like this:
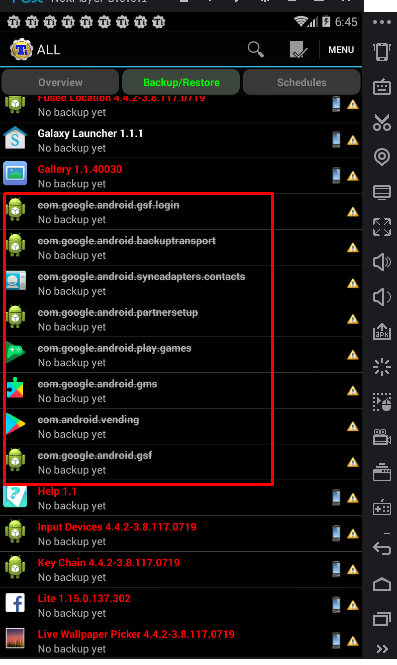
Check or you definitely demolished these services, as this is important! Also put your wallpaper on your desktop, as it burns too. Now we set up the system language, the time zone for the CH and be sure to turn off the geolocation.
How to connect to ssh tunnels on an android - you can see on forum, as well as a more detailed setting of an android device.
Now let's move on to the equally important point, to the dns substitution. You can use either google dns for the country we will work with or use public-dns.info from this site.
Open the settings - Wi-Fi and press the button on our network, in the window that appears, click on "modify network".

In the "Ip settings" field, select "Static" and in the "dns1" field, insert the ip of our dns server.

This completes the setup. Good luck to all!
First of all, download and install NOX on the virtual VirtualBox, then go to the settings.
Click on the gear and in the "main" tab set root rights and change the device language to the language of the country with which we will work.
Then open the "advanced" tab and specify the number of cores and ram for nox to work, as well as select the type of device and screen extension.
Go to the "properties" tab and select the phone model (you can choose the default model or self-defined, where you yourself specify the necessary information), IMEI, and also enter the KX or drop number, since applications burn this information.
After that, you need to select a launcher for the device model that we chose before, this is mandatory, since the default is the NOX launcher and this is pale. After it is installed, click on the "home" button.
We select our launcher, which will be used as the main one.
Now we need to download and install Titanium Backup. After starting, a window will pop up where we need to give root rights to this application.
After that, we look for the NOX launcher from the list and delete it, since we do not need it.
Then we search and delete the following google services that are burning our system.
The output should look like this:
Check or you definitely demolished these services, as this is important! Also put your wallpaper on your desktop, as it burns too. Now we set up the system language, the time zone for the CH and be sure to turn off the geolocation.
How to connect to ssh tunnels on an android - you can see on forum, as well as a more detailed setting of an android device.
Now let's move on to the equally important point, to the dns substitution. You can use either google dns for the country we will work with or use public-dns.info from this site.
Open the settings - Wi-Fi and press the button on our network, in the window that appears, click on "modify network".
In the "Ip settings" field, select "Static" and in the "dns1" field, insert the ip of our dns server.
This completes the setup. Good luck to all!