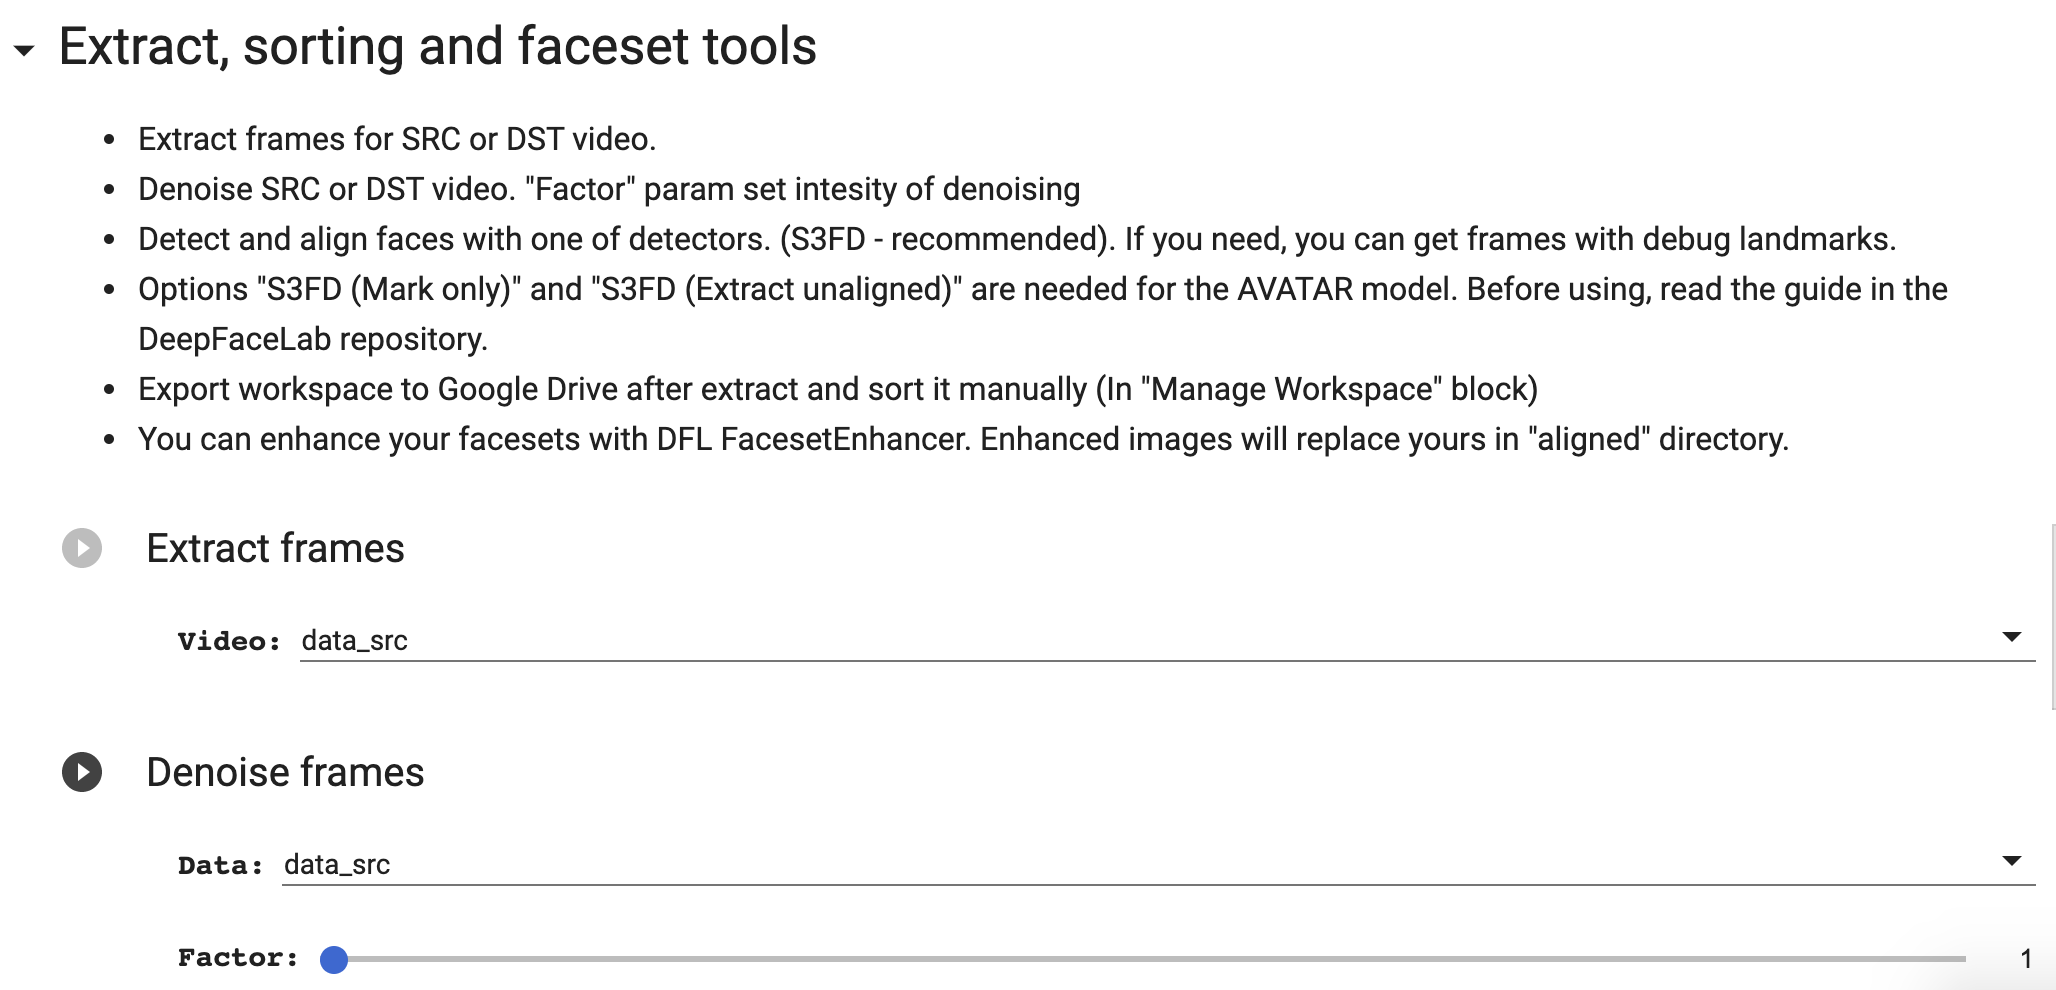
Carding
Professional
- Messages
- 2,871
- Reaction score
- 2,493
- Points
- 113
imagine that you have a full-body photo. Just a still image. Then all you need is a solo video of your favorite dancer performing a few moves. Not so hard now that TikTok is taking over the world.
Image animation uses a video sequence to control the movement of an object in the image. In this story, we'll see how image animation technology is now incredibly easy to use and how you can animate just about anything you can think of. To do this, I converted the source code of the corresponding publication into a simple script, creating a thin shell that everyone can use to create DeepFakes. With the original image and the correct driving video, anything is possible.
How does it work?
Under the hood, a neural network is used that is trained to reconstruct the video, taking into account the original frame (still image) and the hidden representation of movement in the video that is learned during training. During testing, the model takes as input a new source image and a moving video (for example, a sequence of frames) and predicts how the object in the source image moves according to the movement depicted in these frames.
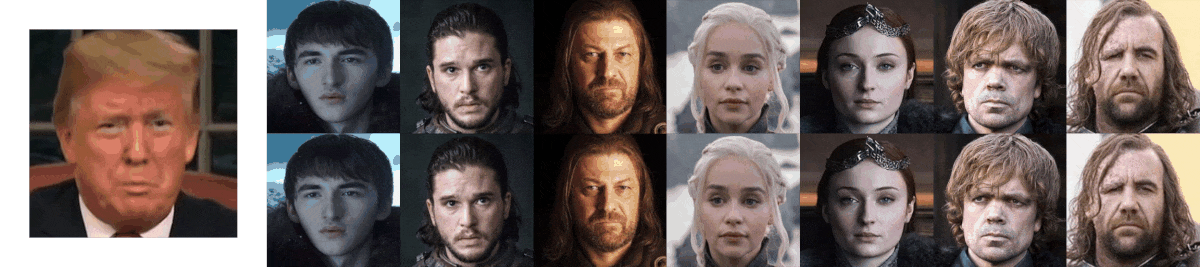
The model tracks everything that is interesting in animation: head movements, conversations, eye tracking, and even body actions. For example, let's look at the GIF below: President trump makes the cast of Game of thrones talk and move like him.
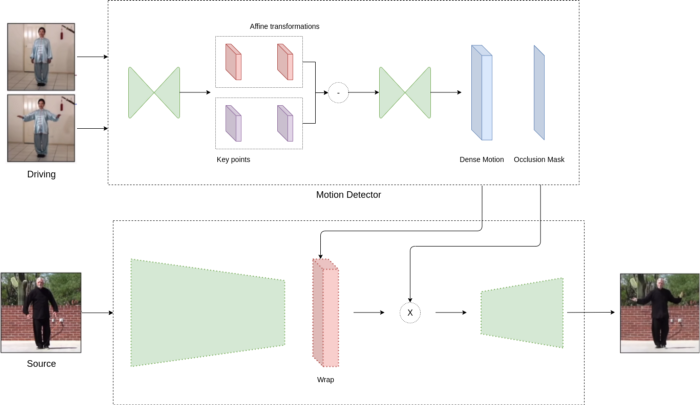
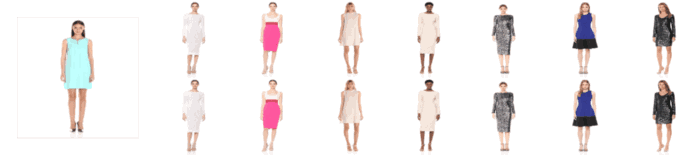
For this purpose, the framework consists of two models: a motion estimator and a video generator. Initially, the motion estimator tries to find out the hidden representation of motion in the video. This is encoded as motion-specific key point offsets (where the key points can be the position of the eyes or mouth) and local affine transformations. This combination can model a larger family of transformations instead of using only the key point offset. The model has two outputs: a dense field of motion and an occlusion mask. This mask determines which parts of the driving video can be restored by deforming the original image, and which parts should be taken out of context because they are not present in the original image (for example, on the back of the head).For example, consider the trendy GIF below. The back of each model is missing from the original image, so the model should assume this.
The video generator then takes as input the output signal of the motion detector and the original image and animates it according to the driving video; it distorts the original image in ways that resemble the driving video, and in the hospital, it distorts the closed parts. Figure 1 shows the architecture of the framework.
Sample code
The source code for this article is available on GitHub. What I did was create a simple shell script, a thin shell that uses the source code and can be easily used by everyone for quick experimentation.
To use it, you must first install the module. Run pip install deep-animator to install the library in your environment. Then we will need four items:
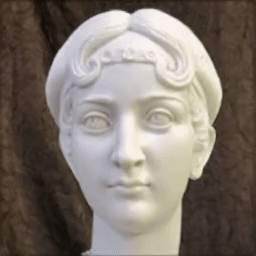
Now we are ready to create a statue that imitates Leonardo DiCaprio! To get the results, simply run the following command.
For example, if you downloaded everything from the same CD folder to this folder and run:
deep_animate 00.png 00.mp4 conf.yml deep_animator_model.pth.tar
On my processor, it takes about five minutes to get the generated video. It will be saved in the same folder, unless otherwise specified in the --dest option. Alternatively, you can use GPU acceleration with the --device CUDA option. Finally, we are ready to see the result. Pretty cool!
Conclusion
Finally, we used deep-animator, a thin wrapper, to animate the statue.
While there are some concerns about such technologies, they may have different applications, and also show how easy it is currently to create fake stories, raising awareness about them
Image animation uses a video sequence to control the movement of an object in the image. In this story, we'll see how image animation technology is now incredibly easy to use and how you can animate just about anything you can think of. To do this, I converted the source code of the corresponding publication into a simple script, creating a thin shell that everyone can use to create DeepFakes. With the original image and the correct driving video, anything is possible.
How does it work?
Under the hood, a neural network is used that is trained to reconstruct the video, taking into account the original frame (still image) and the hidden representation of movement in the video that is learned during training. During testing, the model takes as input a new source image and a moving video (for example, a sequence of frames) and predicts how the object in the source image moves according to the movement depicted in these frames.
The model tracks everything that is interesting in animation: head movements, conversations, eye tracking, and even body actions. For example, let's look at the GIF below: President trump makes the cast of Game of thrones talk and move like him.
Methodology and approach
Before creating our own sequences, let's take a closer look at this approach. First, the training data set is a large collection of videos. During training, authors extract pairs of frames from the same video and pass them to the model. The model tries to reconstruct the video by somehow learning which key points are in pairs and how to represent the movement between them.
For this purpose, the framework consists of two models: a motion estimator and a video generator. Initially, the motion estimator tries to find out the hidden representation of motion in the video. This is encoded as motion-specific key point offsets (where the key points can be the position of the eyes or mouth) and local affine transformations. This combination can model a larger family of transformations instead of using only the key point offset. The model has two outputs: a dense field of motion and an occlusion mask. This mask determines which parts of the driving video can be restored by deforming the original image, and which parts should be taken out of context because they are not present in the original image (for example, on the back of the head).For example, consider the trendy GIF below. The back of each model is missing from the original image, so the model should assume this.
The video generator then takes as input the output signal of the motion detector and the original image and animates it according to the driving video; it distorts the original image in ways that resemble the driving video, and in the hospital, it distorts the closed parts. Figure 1 shows the architecture of the framework.
Sample code
The source code for this article is available on GitHub. What I did was create a simple shell script, a thin shell that uses the source code and can be easily used by everyone for quick experimentation.
To use it, you must first install the module. Run pip install deep-animator to install the library in your environment. Then we will need four items:
- Model weight; of Course, we don't want to train the model from scratch. So we need weights to load the pre-trained model.
- YAML configuration file for our model.
- The original image; this can be, for example, a portrait.
- Video of driving; it is Better to start by downloading a video with a clearly visible face.
Code:
model_params:
 common_params:
 num_kp: 10
 num_channels: 3
 estimate_jacobian: True
 kp_detector_params:
temperature: 0.1
 block_expansion: 32
 max_features: 1024
 scale_factor: 0,25
 Num_blocks: 5
 generator_params:
 block_expansion: 64
 max_features: 512
 num_down_blocks: 2
 num_bottleneck_blocks: 6
 estimate_occlusion_map: True
 dense_motion_params:
 block_expansion : 64
 max_features: 1024
 Num_blocks: 5
 scale_factor: 0,25
 discriminator_params:
weights: [1]
 block_expansion: 32
 max_features: 512
 num_blocks: 4
Now we are ready to create a statue that imitates Leonardo DiCaprio! To get the results, simply run the following command.
Code:
deep_animate <path_ to image_source> <path_to_star_video> <path_k_aml_conf> <path_k_aml_conf><path_k_model>For example, if you downloaded everything from the same CD folder to this folder and run:
deep_animate 00.png 00.mp4 conf.yml deep_animator_model.pth.tar
On my processor, it takes about five minutes to get the generated video. It will be saved in the same folder, unless otherwise specified in the --dest option. Alternatively, you can use GPU acceleration with the --device CUDA option. Finally, we are ready to see the result. Pretty cool!
Conclusion
Finally, we used deep-animator, a thin wrapper, to animate the statue.
While there are some concerns about such technologies, they may have different applications, and also show how easy it is currently to create fake stories, raising awareness about them