How to encrypt a conversation in Jabber: step-by-step instructions
I think there is no need to explain why a person might need a reliable and secure communication channel. Yes, you can encrypt messages and send them via regular mail, but the fact that you're sending them means something. In addition, mail is not always convenient. in our age, everyone is used to using instant messengers.
The choice of private messengers is great, but there is no need to talk about the security of some of them. We immediately cut off WhatsApp, Viber, Skype and social networks. What did they do to deserve it? Probably the best response will be a tweet from Telegram Creator Pavel Durov.
Why is Telegram partially or completely banned in countries like China, Saudi Arabia or Iran, but WhatsApp is not
Here is a list of the most well-known instant messengers that are considered reliable:
- Telegram;
- Signal;
- Threema;
- Wickr.
There are also less well-known ones, but they all have one common disadvantage - linking to a phone number. Of course, you can steam up and purchase a virtual SIM card, but it's inconvenient to do this, and it would also be nice to take care of the anonymity of the payment in this case.
Let's figure out what criteria the messenger must meet in order for it to be truly anonymous. I came up with this list.
- It doesn't require entering a phone number.
- It does not require any personal data.
- You can not ignore encryption and communicate in unprotected chats.
- There must be at least some proof of privacy. At least in the form of blockages in different countries.
Since almost all newfangled instant messengers do not fit one of the points, Jabber remains The best option for secure communication - it is known that even NSA specialists use it for correspondence.
A few words about privacy
The word "privacy" usually means two things that are quite different in their essence. The first is to protect your data from government monitoring and benefit corporations from it. The second is protection from targeted wiretapping by third parties (for example, for the sake of blackmail or industrial espionage). Both of these aspects are important for us, but we need to understand that in the second case, there are no absolute guarantees. You can anticipate the technical ways of de-blocking(for example, any messenger with encryption will protect you from MitM), but there are others. An experienced specialist will try to use any piece of information you give out to search, not to mention social engineering methods.
But in order for Jabber to become truly secure, it needs to be properly configured, which is what we're going to do now. For clarity, I have divided this process into several steps.
Step 1. Download the software
First, we need to download the client itself. I'll take
Pidgin as an example - it's cross-platform and easy to set up.
We also need the OTR (Off-the-Record Messaging) plugin, which provides encryption. You can download the installer for the Windows version of Pidgin or the source code for building it in Linux
from the project's website.
When you first launch Pidgin, you will be prompted to log in with your account, but we will postpone this for now. The fact is that registration will take place from our real IP address, and it would be good for us to make sure that the IP is hidden even from the owners of the service (in case they decide to happily provide this information to anyone who asks!). To do this, you can use any type of proxy, but we will choose Tor for greater reliability.
Step 2. Forwarding traffic through Tor
If you
have Tor Browser installed, you can configure traffic forwarding directly from the registration window in the "Proxy" tab.
After launching Tor Browser and our Jabber client, you need to open the "Tools" tab and select "Settings" there, and open the "proxy" item in the settings. Check the box "Use remote DNS with SOCKS4 proxy", and select "Tor in the proxy Type" item./Privacy policy (SOCKS5)
In the "Node" item, specify 127.0.0.1 and select port 9150. This is a standard Tor port, although the 9050 variant is sometimes found.
As you might have guessed, Tor Browser should be running and listening to your port all the time while you are having a conversation. Turn it on before starting Pidgin - then it will not complain about the lack of connection to the server.
Now Pidgin traffic goes through Tor, and we can start registering. First, we need to decide on the server on which we want to create an account. Of course, you can deploy your own server, but then it will become even more difficult to maintain anonymity.
Step 3. Select the server
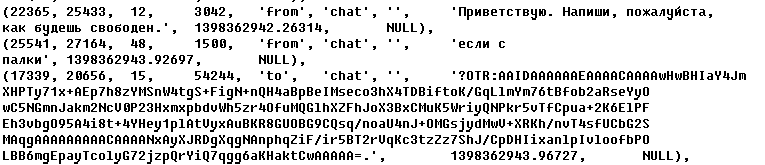
There are a huge number of servers, and the owners of many of them claim that they do not keep logs. But there is no way to verify this. You can see what the merged log will look like in the picture.
When choosing a server, first of all, you should look at what country it is located in. The EU, the US, and the country you live in are obviously bad choices. Ideally, if the server is located in a place where it is legally prohibited to collect logs. Here is a small list of servers that are trusted by many hackers, both in the CIS and abroad. But please note that some of the servers are located in the USA.
Little things matter
Let's take the choice of a nickname as an example. It would seem an elementary point, but many people are burning on it. You may not remember that you've already used it somewhere else, but Google remembers everything.
The second subtle point is that it would be good not to use nicknames with characters that have a Cyrillic counterpart. Not all servers have filters that prohibit such tricks, so at some point you may have a twin whose name letters do not differ in appearance, but have different codes.
Step 4. Register on the server
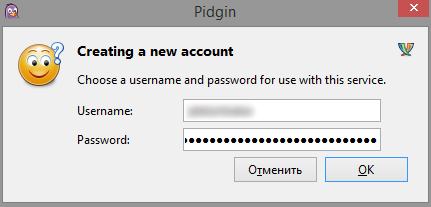
Once you have decided on your username and password, you can start registering on the server. Open the client and select the "Accounts" tab, and in it the "manage accounts" item (or just press Ctrl + A).
In the window that appears, click " Add " to open the registration and authorization window.
Here we need to do the following:
- Select the XMPP Protocol from the drop-down list.
- Enter the desired user name.
- Enter the domain of the server where you are going to create an account.
- You can skip the resource, since it doesn't affect registration (in fact, it's just an indication of which device this server login is linked to.the list of your interlocutors will tell you from which resource you logged in).
- Enter the desired password.
- Put (or not put) a check mark for remembering the password (I recommend not putting it and not storing the password anywhere but in your head — because if someone gets access to your computer, the password will already be entered).
- Be sure to check the box "Create a new account on the server" (unless, of course, you have already registered before).
After entering all the data, a separate window may appear for user registration. You'll have to enter everything again and click OK.
Step 5. Enable OTR
The account is ready, and you can start configuring encryption. I recommend one of two options: PGP or OTR. Here I will take OTR as an example - it provides a high level of security and is easily configured. However, when using it, messages in logs are not encrypted - so for full reliability, it is better to disable them. But on the server, the picture comes out about the following.
Since we have already downloaded and installed the plugin, you can activate it from the client. Open Pidgin, click "Tools" and select "Modules".
Activate the off-the-Record (OTR) plugin.
Next, we need to configure this module. To do this, at the very bottom of the list of modules, click "Configure module".
In the module settings window, the first step is to generate a key for your account. Select the account for which you want to create the key, and click "Create". The key generation window appears.
Keys are created quickly, but sometimes there is a slight hang at this step. Don't be alarmed! Pidgin isn't frozen, it's just a little busy. When the work is finished, click Ok and you will see your" fingerprint " of forty characters (five groups of eight characters).
Now tick the following items:
- "Use secure conversations»;
- "Automatically start a secure conversation»;
- "Require conversation protection»;
- "Do not log OTR conversations."
Logging is entirely voluntary. If it is useful, then turn it on, if not, then remember that it can be read by anyone who manages to gain access to your computer — remotely or completely directly.
Well, the last tick is
Show Otr button in toolbar. It simply adds a chat protection and authentication button to the interface.
Step 6. Authenticate the other person and protect the chat
In fact, you already have a secure communication channel. To add an interlocutor, click "Interlocutors" and select "Add interlocutor".
Choosing the person you're talking to.
And click "Add".
Now the other person will receive a request, and when they confirm it, you can start the chat. The security status can be viewed directly in the chat window. If encryption is not enabled, it will say "Not protected". By clicking on it, you will see a menu.
If you start a secure conversation, the message changes to "Not identified". this means that the chat is secure, but you need to authenticate the other person to be sure that they are exactly who they say they are.
There are three ways to authenticate a conversation partner.
- Question and answer. You ask the other person a question, and they must give the correct answer.
- Shared secret.
- Manual key reconciliation. This is an option in case the key needs to be passed not through Jabber, but in some other way.
After the interlocutor is authenticated, the green "protected" message will finally appear on the button.
Step 7. Configuring the mobile client
Jabber clients with encryption support are also available on mobile devices. For example, ChatSecure
for iOS and
Android. Just in case, I warn you that the Android app is not listed on the official website and requires a lot of privileges for the messenger, so use it at your own risk.
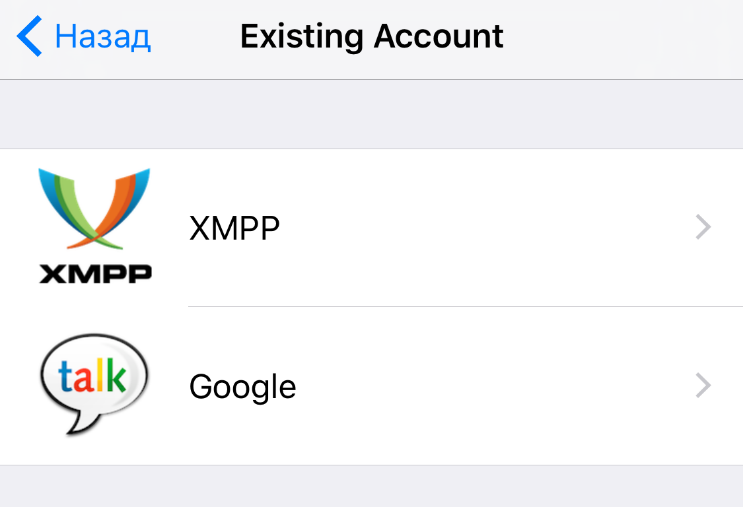
Registering in the app is similar to registering on a computer. If you already have an account, then instead of creating a new account, select Existing Account on the main page.
Next, choose XMPP.
And enter your details.
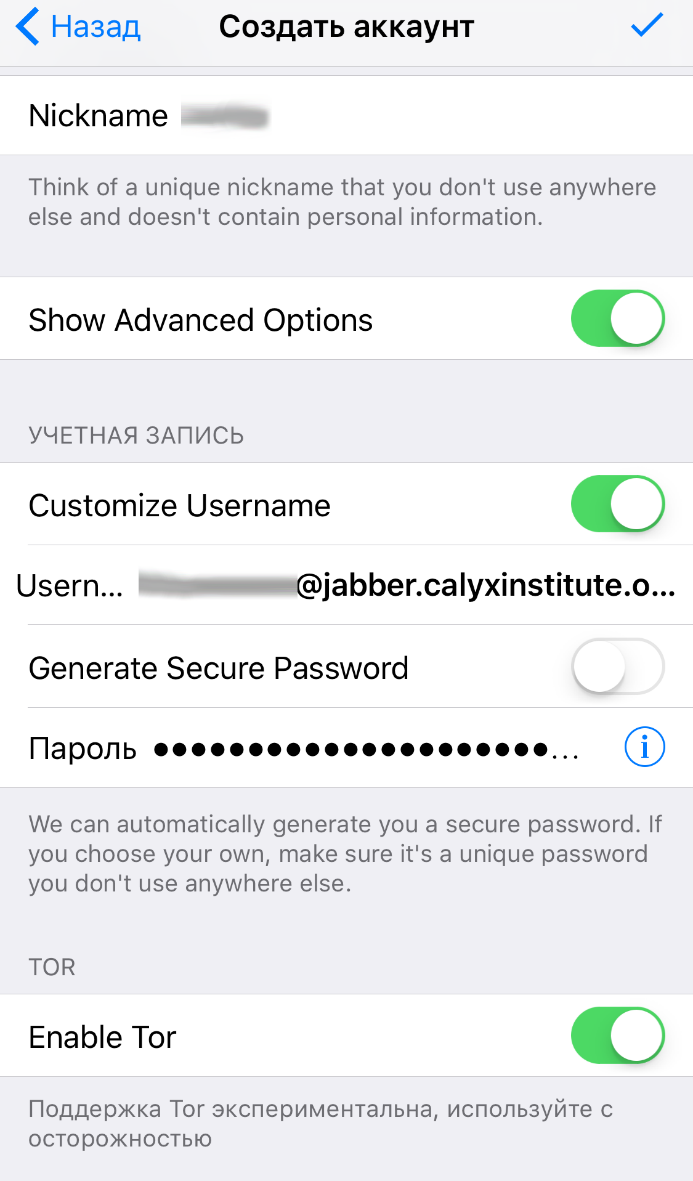
If you want to create a new account, then click "Create a new account" and fill in all the data. A big plus of ChatSecure is that it can send traffic through Tor without any additional tricks.
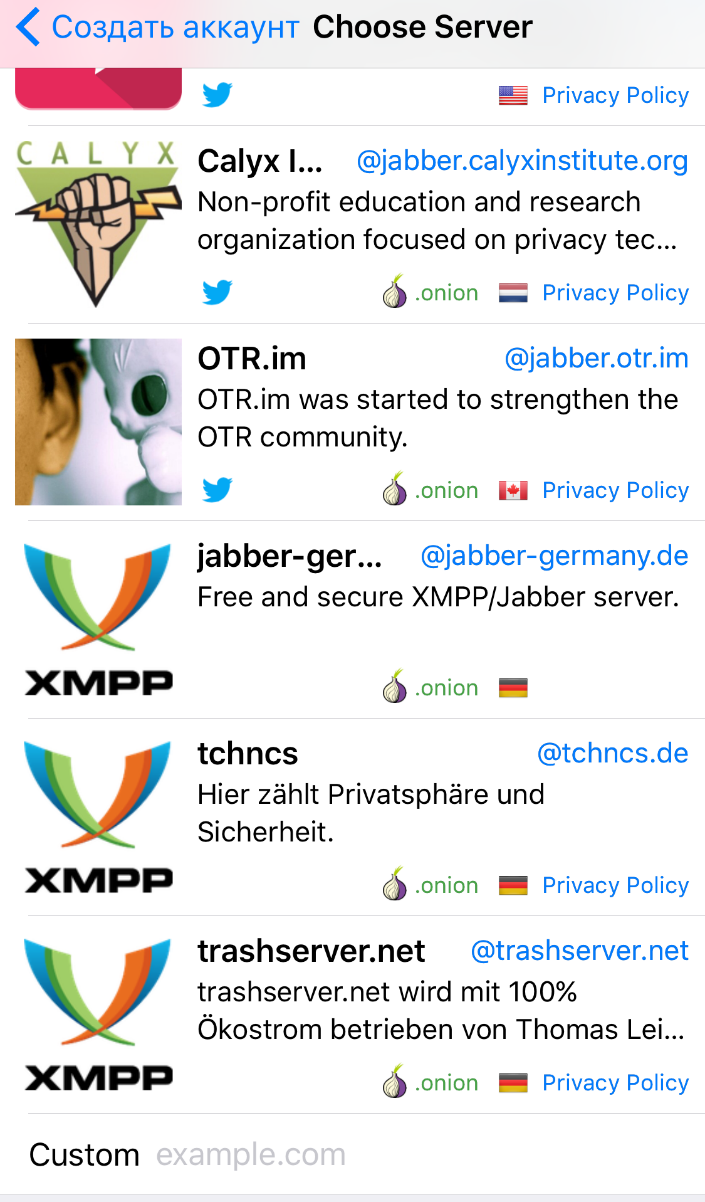
ChatSecure also has a list of private servers - choose which one you like, or if you have already chosen it before, enter the address in the Custom field at the very bottom.
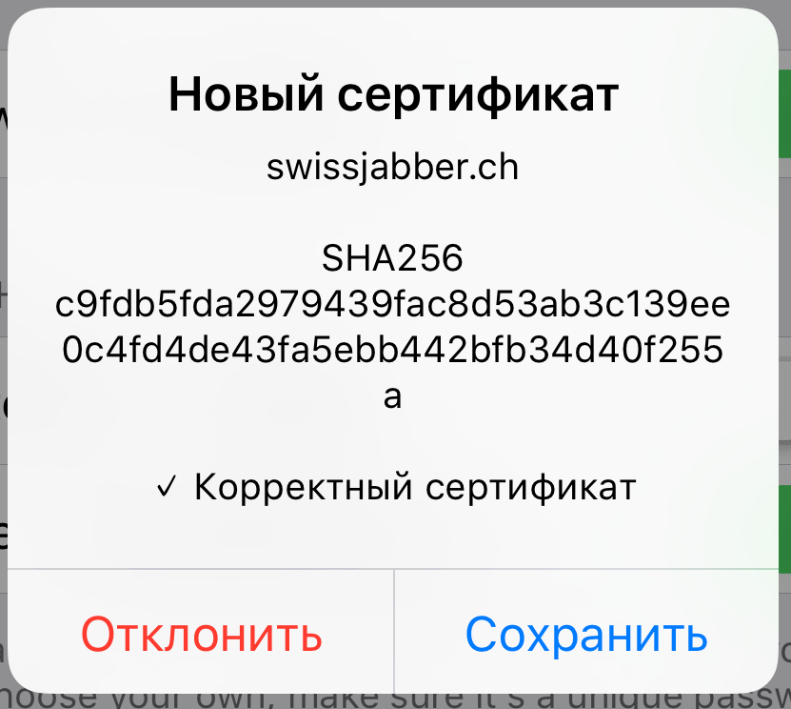
At the end, you will be prompted to save the certificate. Save it and wait for registration to finish.
Now just click on the new message icon and click "Add contact"in the menu that appears.
Enter the contact's address.
And authenticate it using one of the methods we've already listed.
U’r awesome and private
Congratulations, now you know how to set up a communication channel that will be well protected from tracking and interception! However, to achieve the highest level of privacy, you will have to go further - still bother and deploy your own server, as well as replace OTR with PGP. But more on that some other time.
xakep.ru[/B]