Managing a virtual router is a pleasure:
- Everything is clear and simple and you don't need to go into the brains of some box to change the IP address or register the IP address of a new ssh/socks/vpn/tor there, since network switching is done by clicking in another window of the virtual machine.
- Gateway content can be not only at your preferred IP address, but also separated. for example, tor sites in the Onion zone can be opened in regular browsers, since these requests will go to the Tor proxy.
- For WEBRTC requests, the virtual router will return the IP address of your SSH/Socks5 server.
- You can slow down the connection by timeout to bypass two-way Ping on some sites.
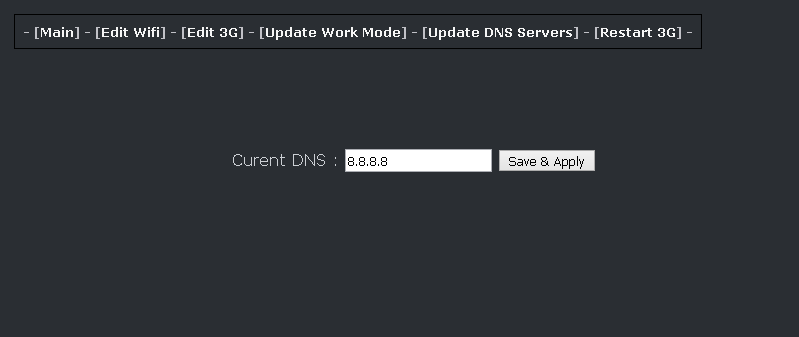
- DNS requests are sent exclusively via TCP channels via TOR/Socks - using The acrylic DNS Proxy utility.
- You can use WI-FI and it will be safe because the radio transmitter itself will be in the same Virtual router-in an isolated machine.
- With such a router, you can connect local connections that create various utilities. Example: (Back-Connect Proxy)
- Any anonymous router requires some capacity. You're your own boss here. You allocate as much memory as you need for this purpose.
Why did I use this as a comparison ? As a rule, any router is sharpened for broadcasting the Internet that is served to it...
And if it is flashed with firmware and the process of encrypting / decrypting traffic takes place inside this device and there are third-party utilities, then the internal processor of this router may not be enough. As a result, there may be brakes in the joints, breaks, and so on.
This article will make your Laptop under the operating system (Mac-OS, Windows, Linux) quite anonymous and mobile at the same time, and nothing superfluous will stick out of it, since the device itself looks like a USB plug in your laptop.
The idea itself has been flying for a long time, and it is implemented in this article. This article kills the whole point of buying a" certain " box that will distribute anonymous Internet.
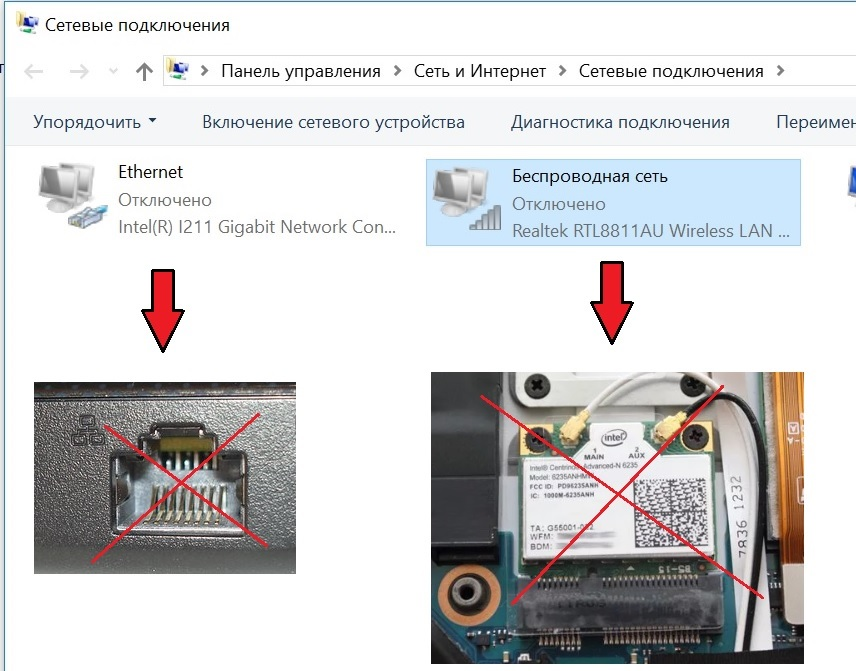
Next, turn off the Ethernet adapter in your laptop (for fanatics: Ethernet input, you can at least seal it with a sealant, you won't need it)
Next, in your laptop, turn off your built-in Wi-FI card (for fanatics: Unscrew it with a screwdriver from the laptop case - throw it out)
Further actions: In the VM of your OS, install OS win 10 (disable UAC, update, and so on and so forth. Also, don't forget to go to the power supply and configure it so that it doesn't fall asleep. It is advisable to allocate 4 GB of RAM for the virtual OS)
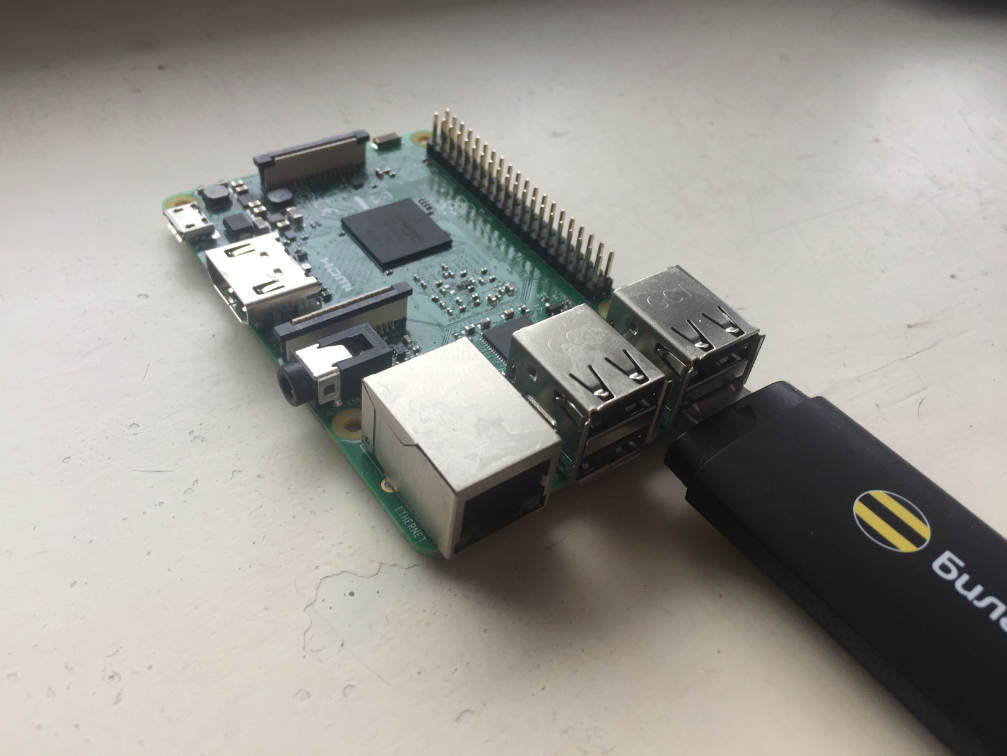
Next, we insert a USB Wi-FI adapter into your laptop and push it to the virtual machine (any USB device can be forwarded to the virtual machine)
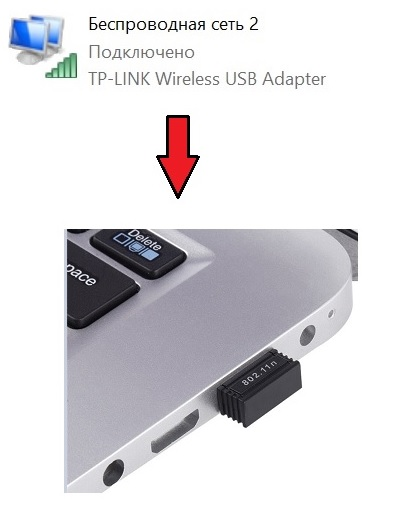
As a result, we get the following picture: a Laptop with your OS, in this OS there is a virtual machine under WIN 10 with the Internet connected via WI-FI (in General, what kind of Internet will come to your virtual machine choose for yourself.
This is your choice... optimally, however, for myself, I see a mini USB WI-FI stub)
We'll get back to configuring it on the host, but for now, we'll have all the settings on the VM.
The program will prompt us to install a Virtual TAP Adapter V9 for Private Tunnel-we agree.
Next, go to network settings and uncheck all the boxes from the two adapters (the name of Virtualbox is slightly different from the adapter this screen is from VMware, but the meaning is identical)
Next, we combine these two adapters into a network bridge and also remove all possible ticks from protocols and filters. (on the MAC bridge, the check mark will not be removed. this is normal)
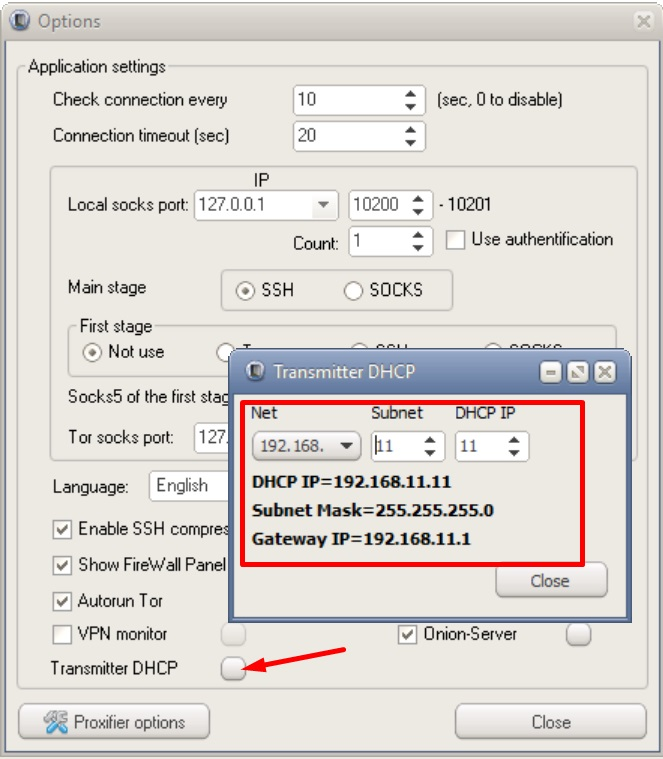
Now go to the settings of the Double SSH Tunnel Manager and look at this data. If necessary, we change it to the desired ones (this data must be transferred to the host machine in the adapter from Virtualbox or from VMware)
Turn off the virtual machine.
Back to the host machine.
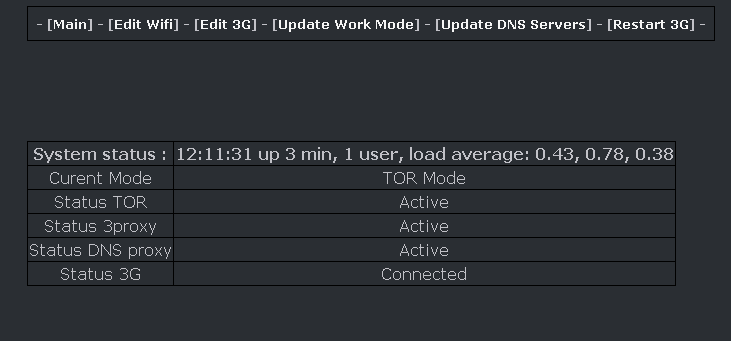
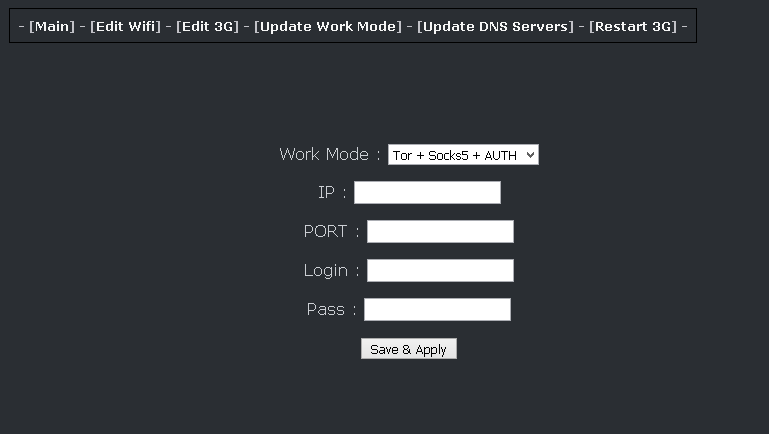
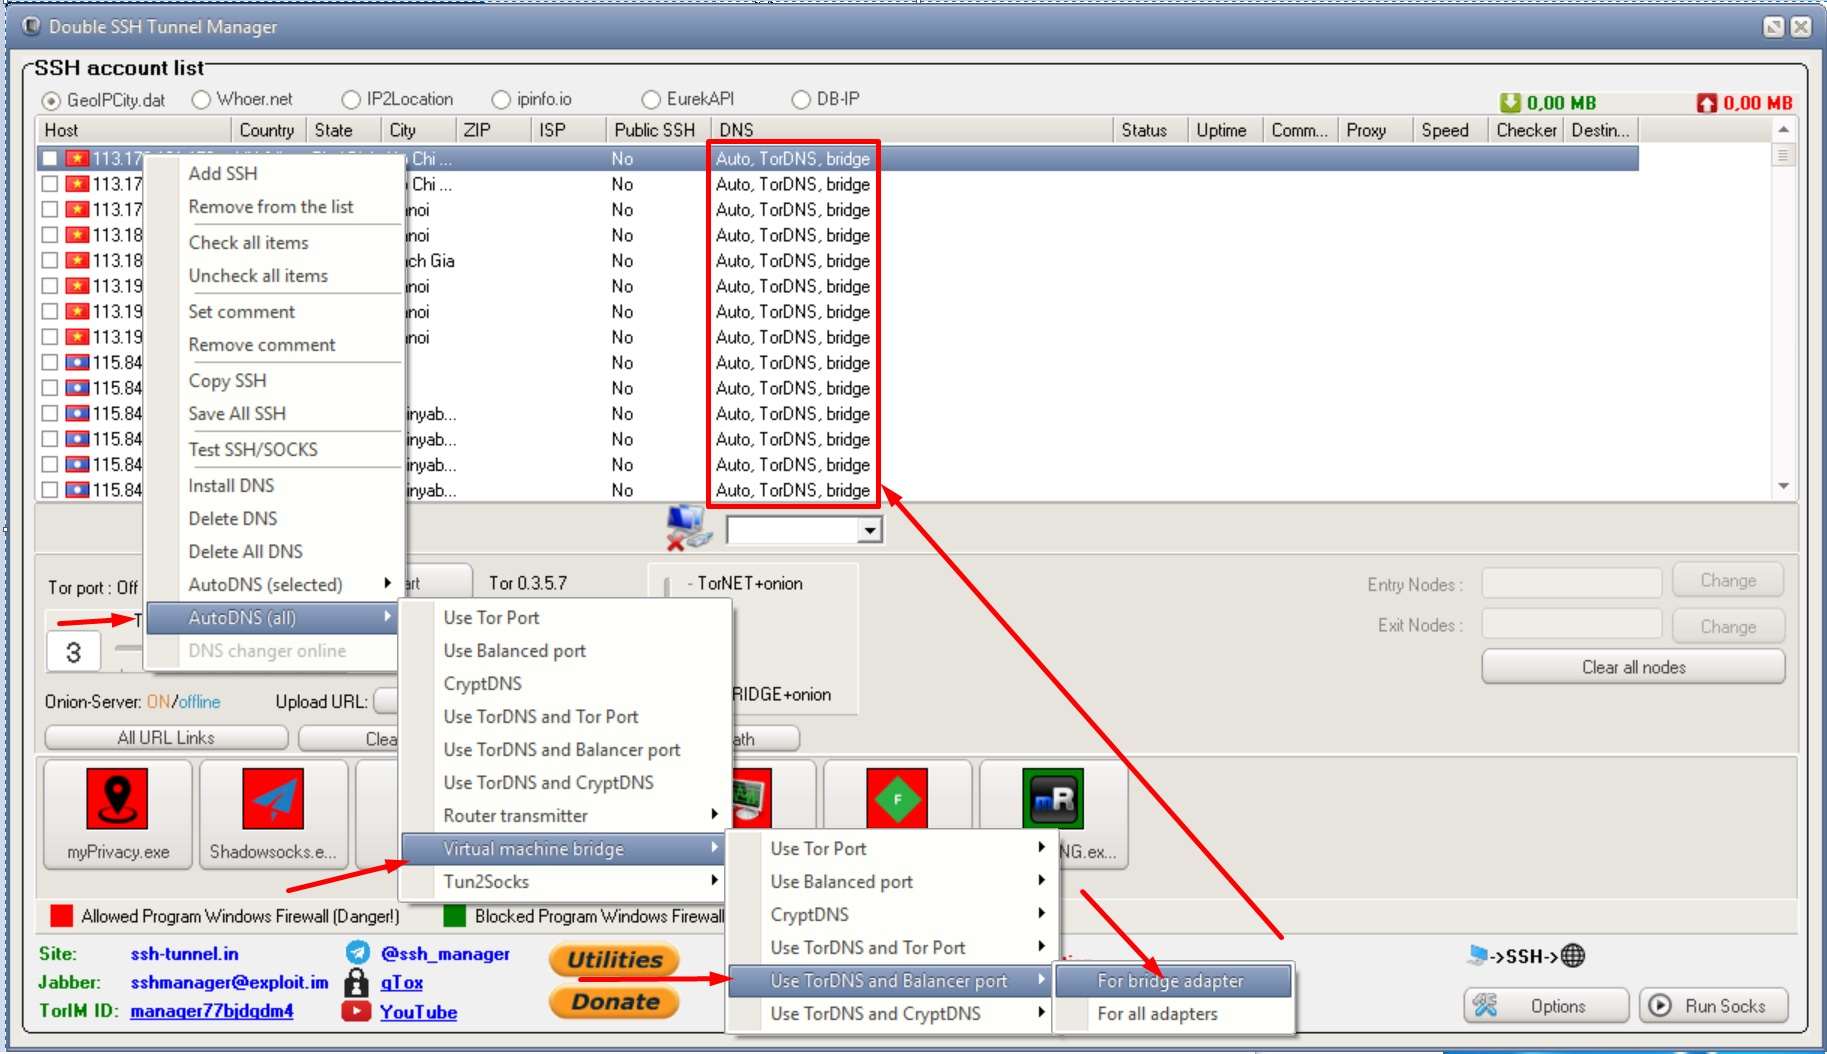
Next, we start our VM... Do not forget to connect the Internet to it via USB. Run Double SSH Tunnel Manager and set the settings opposite your SSH/Socks settings as shown in the figure below. Connecting and checking the Internet on the HOST !!!
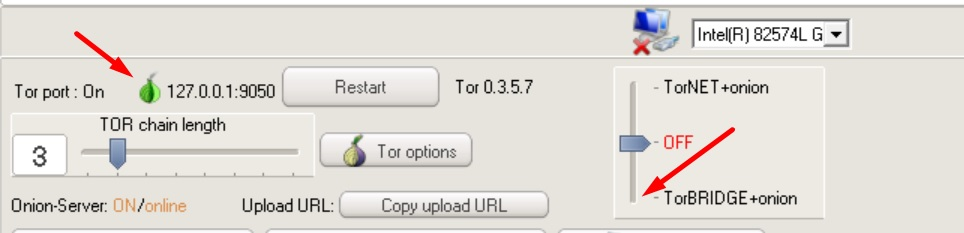
To fully broadcast the TOR network, point the slider down to TorBRIDGE + onion, but first make sure that you are connected to the Tor network (green onion)
Video
- Everything is clear and simple and you don't need to go into the brains of some box to change the IP address or register the IP address of a new ssh/socks/vpn/tor there, since network switching is done by clicking in another window of the virtual machine.
- Gateway content can be not only at your preferred IP address, but also separated. for example, tor sites in the Onion zone can be opened in regular browsers, since these requests will go to the Tor proxy.
- For WEBRTC requests, the virtual router will return the IP address of your SSH/Socks5 server.
- You can slow down the connection by timeout to bypass two-way Ping on some sites.
- DNS requests are sent exclusively via TCP channels via TOR/Socks - using The acrylic DNS Proxy utility.
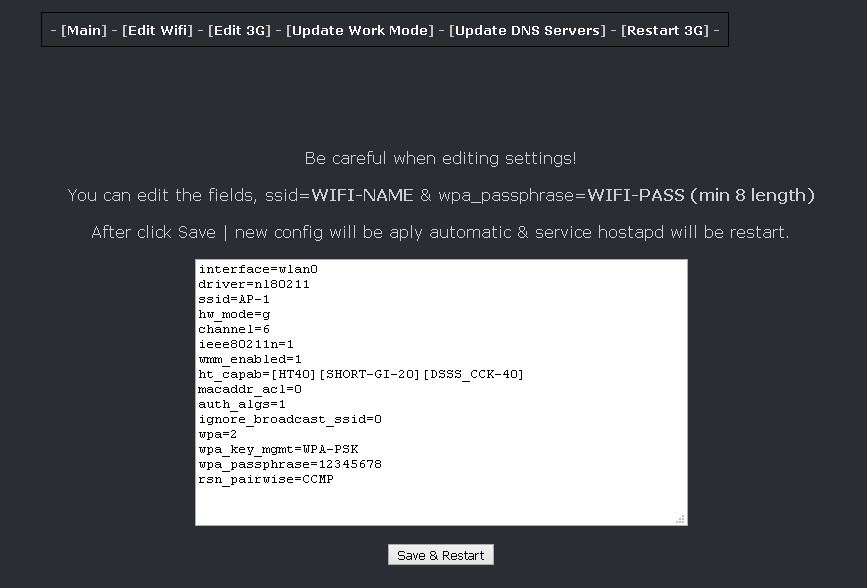
- You can use WI-FI and it will be safe because the radio transmitter itself will be in the same Virtual router-in an isolated machine.
- With such a router, you can connect local connections that create various utilities. Example: (Back-Connect Proxy)
- Any anonymous router requires some capacity. You're your own boss here. You allocate as much memory as you need for this purpose.
Why did I use this as a comparison ? As a rule, any router is sharpened for broadcasting the Internet that is served to it...
And if it is flashed with firmware and the process of encrypting / decrypting traffic takes place inside this device and there are third-party utilities, then the internal processor of this router may not be enough. As a result, there may be brakes in the joints, breaks, and so on.
This article will make your Laptop under the operating system (Mac-OS, Windows, Linux) quite anonymous and mobile at the same time, and nothing superfluous will stick out of it, since the device itself looks like a USB plug in your laptop.
The idea itself has been flying for a long time, and it is implemented in this article. This article kills the whole point of buying a" certain " box that will distribute anonymous Internet.
Go...
You have a laptop running your operating system. You install Virtualbox or VMware on your laptop as you like.Next, turn off the Ethernet adapter in your laptop (for fanatics: Ethernet input, you can at least seal it with a sealant, you won't need it)
Next, in your laptop, turn off your built-in Wi-FI card (for fanatics: Unscrew it with a screwdriver from the laptop case - throw it out)
Further actions: In the VM of your OS, install OS win 10 (disable UAC, update, and so on and so forth. Also, don't forget to go to the power supply and configure it so that it doesn't fall asleep. It is advisable to allocate 4 GB of RAM for the virtual OS)
Next, we insert a USB Wi-FI adapter into your laptop and push it to the virtual machine (any USB device can be forwarded to the virtual machine)
As a result, we get the following picture: a Laptop with your OS, in this OS there is a virtual machine under WIN 10 with the Internet connected via WI-FI (in General, what kind of Internet will come to your virtual machine choose for yourself.
This is your choice... optimally, however, for myself, I see a mini USB WI-FI stub)
We'll get back to configuring it on the host, but for now, we'll have all the settings on the VM.
Download and run Double SSH Tunnel Manager.
Where exactly to download Double SSH Tunnel Manager is up to You. There are enough links in Google.The program will prompt us to install a Virtual TAP Adapter V9 for Private Tunnel-we agree.
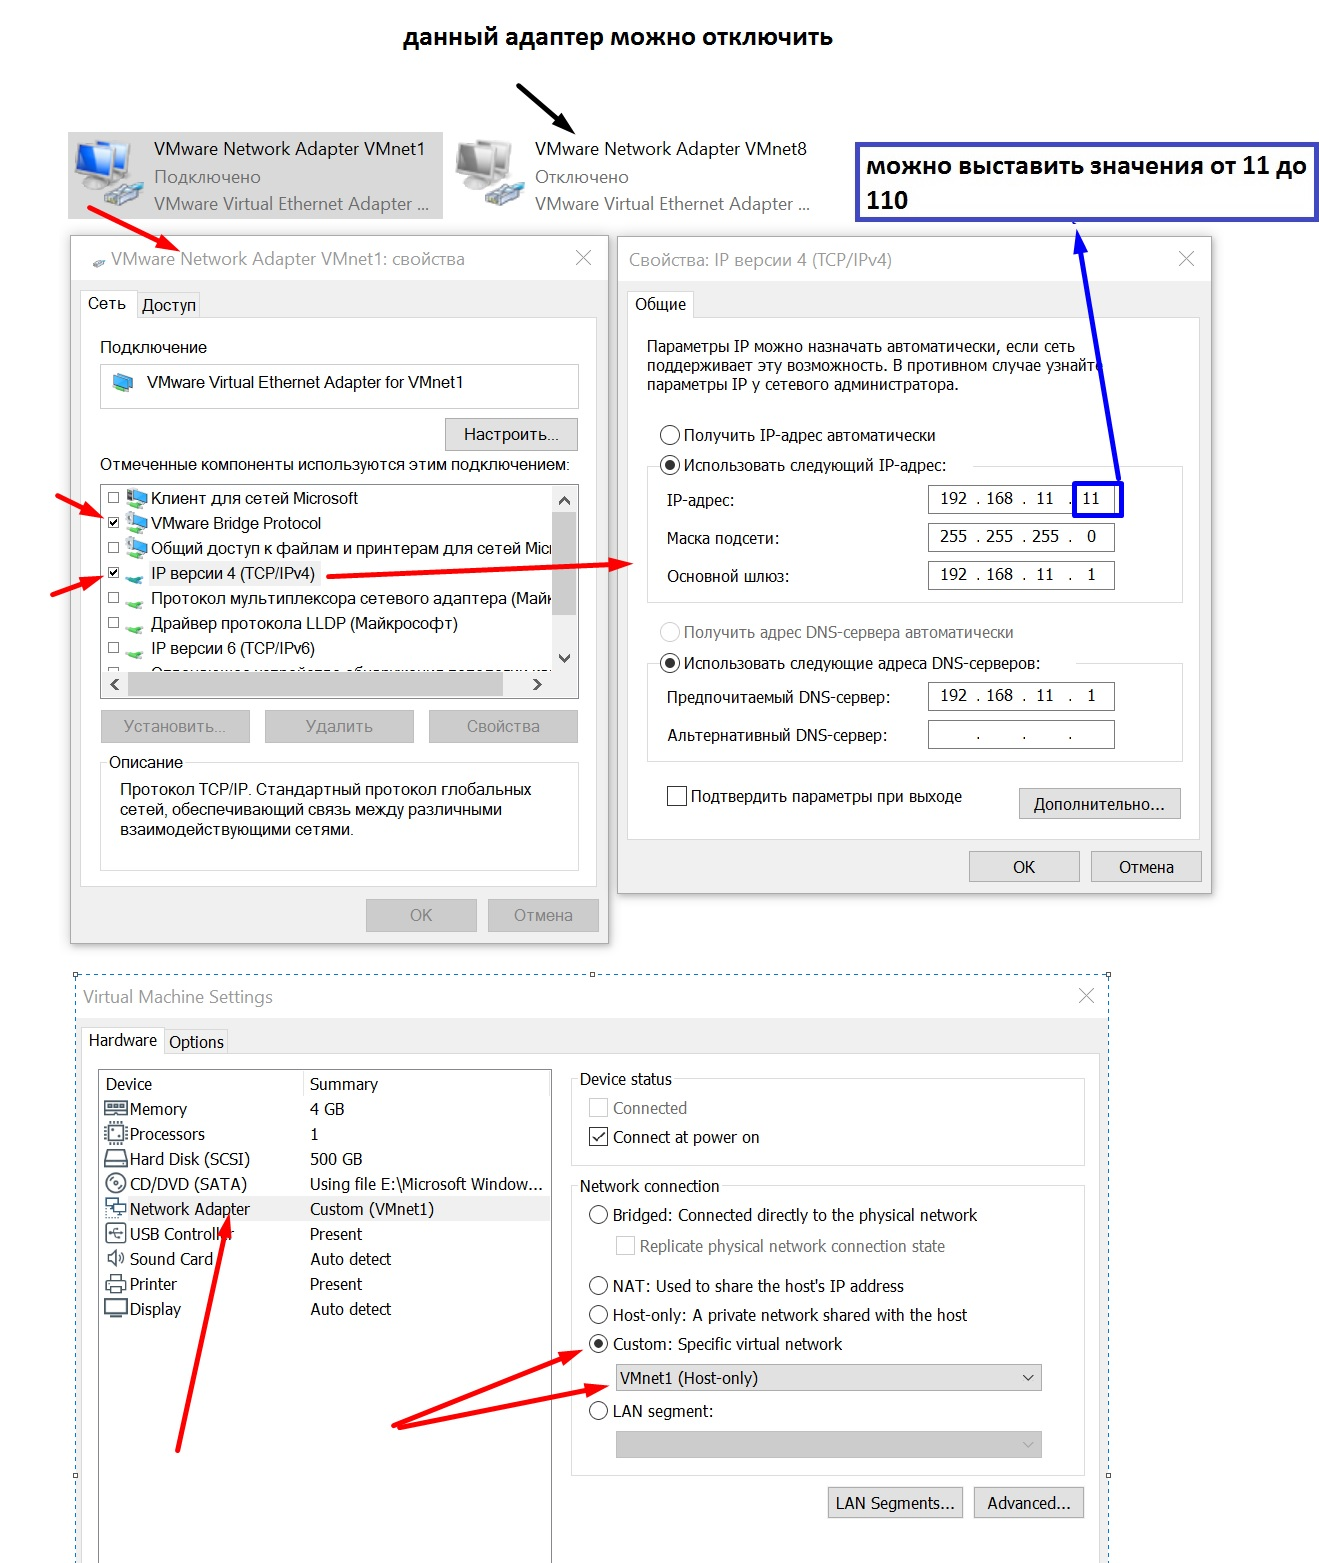
Next, go to network settings and uncheck all the boxes from the two adapters (the name of Virtualbox is slightly different from the adapter this screen is from VMware, but the meaning is identical)
Next, we combine these two adapters into a network bridge and also remove all possible ticks from protocols and filters. (on the MAC bridge, the check mark will not be removed. this is normal)
Now go to the settings of the Double SSH Tunnel Manager and look at this data. If necessary, we change it to the desired ones (this data must be transferred to the host machine in the adapter from Virtualbox or from VMware)
Turn off the virtual machine.
Back to the host machine.
Settings for Virtualbox.
We leave only two checkboxes, change the settings (TCP/IP4) to those that we saw in the Double SSH Tunnel Manager in the DHCP section, in the settings of the VM itself, change the default NAT network to VirtualBox Host-only Ethernet AdapterSettings for Vmware.
We leave only two checkboxes, change the settings (TCP/IP4) to those that we saw in the Double SSH Tunnel Manager in the DHCP section, and in the settings of the VM itself, change the default NAT network to VMnet1 (Host-only). Disable the VMware Network Adapter VMnet8
Next, we start our VM... Do not forget to connect the Internet to it via USB. Run Double SSH Tunnel Manager and set the settings opposite your SSH/Socks settings as shown in the figure below. Connecting and checking the Internet on the HOST !!!
To fully broadcast the TOR network, point the slider down to TorBRIDGE + onion, but first make sure that you are connected to the Tor network (green onion)
Video